
How to connect to the Bunkyo Video Wall
Simple Wireless Connection (AirPlay / Screen Mirroring)
This method does NOT let you use the 9 screens individually.
Turn on the Display using the “Video Wall” remote.
Also, turn on the audio speaker if audio is required using the “Audio Speaker” remote.
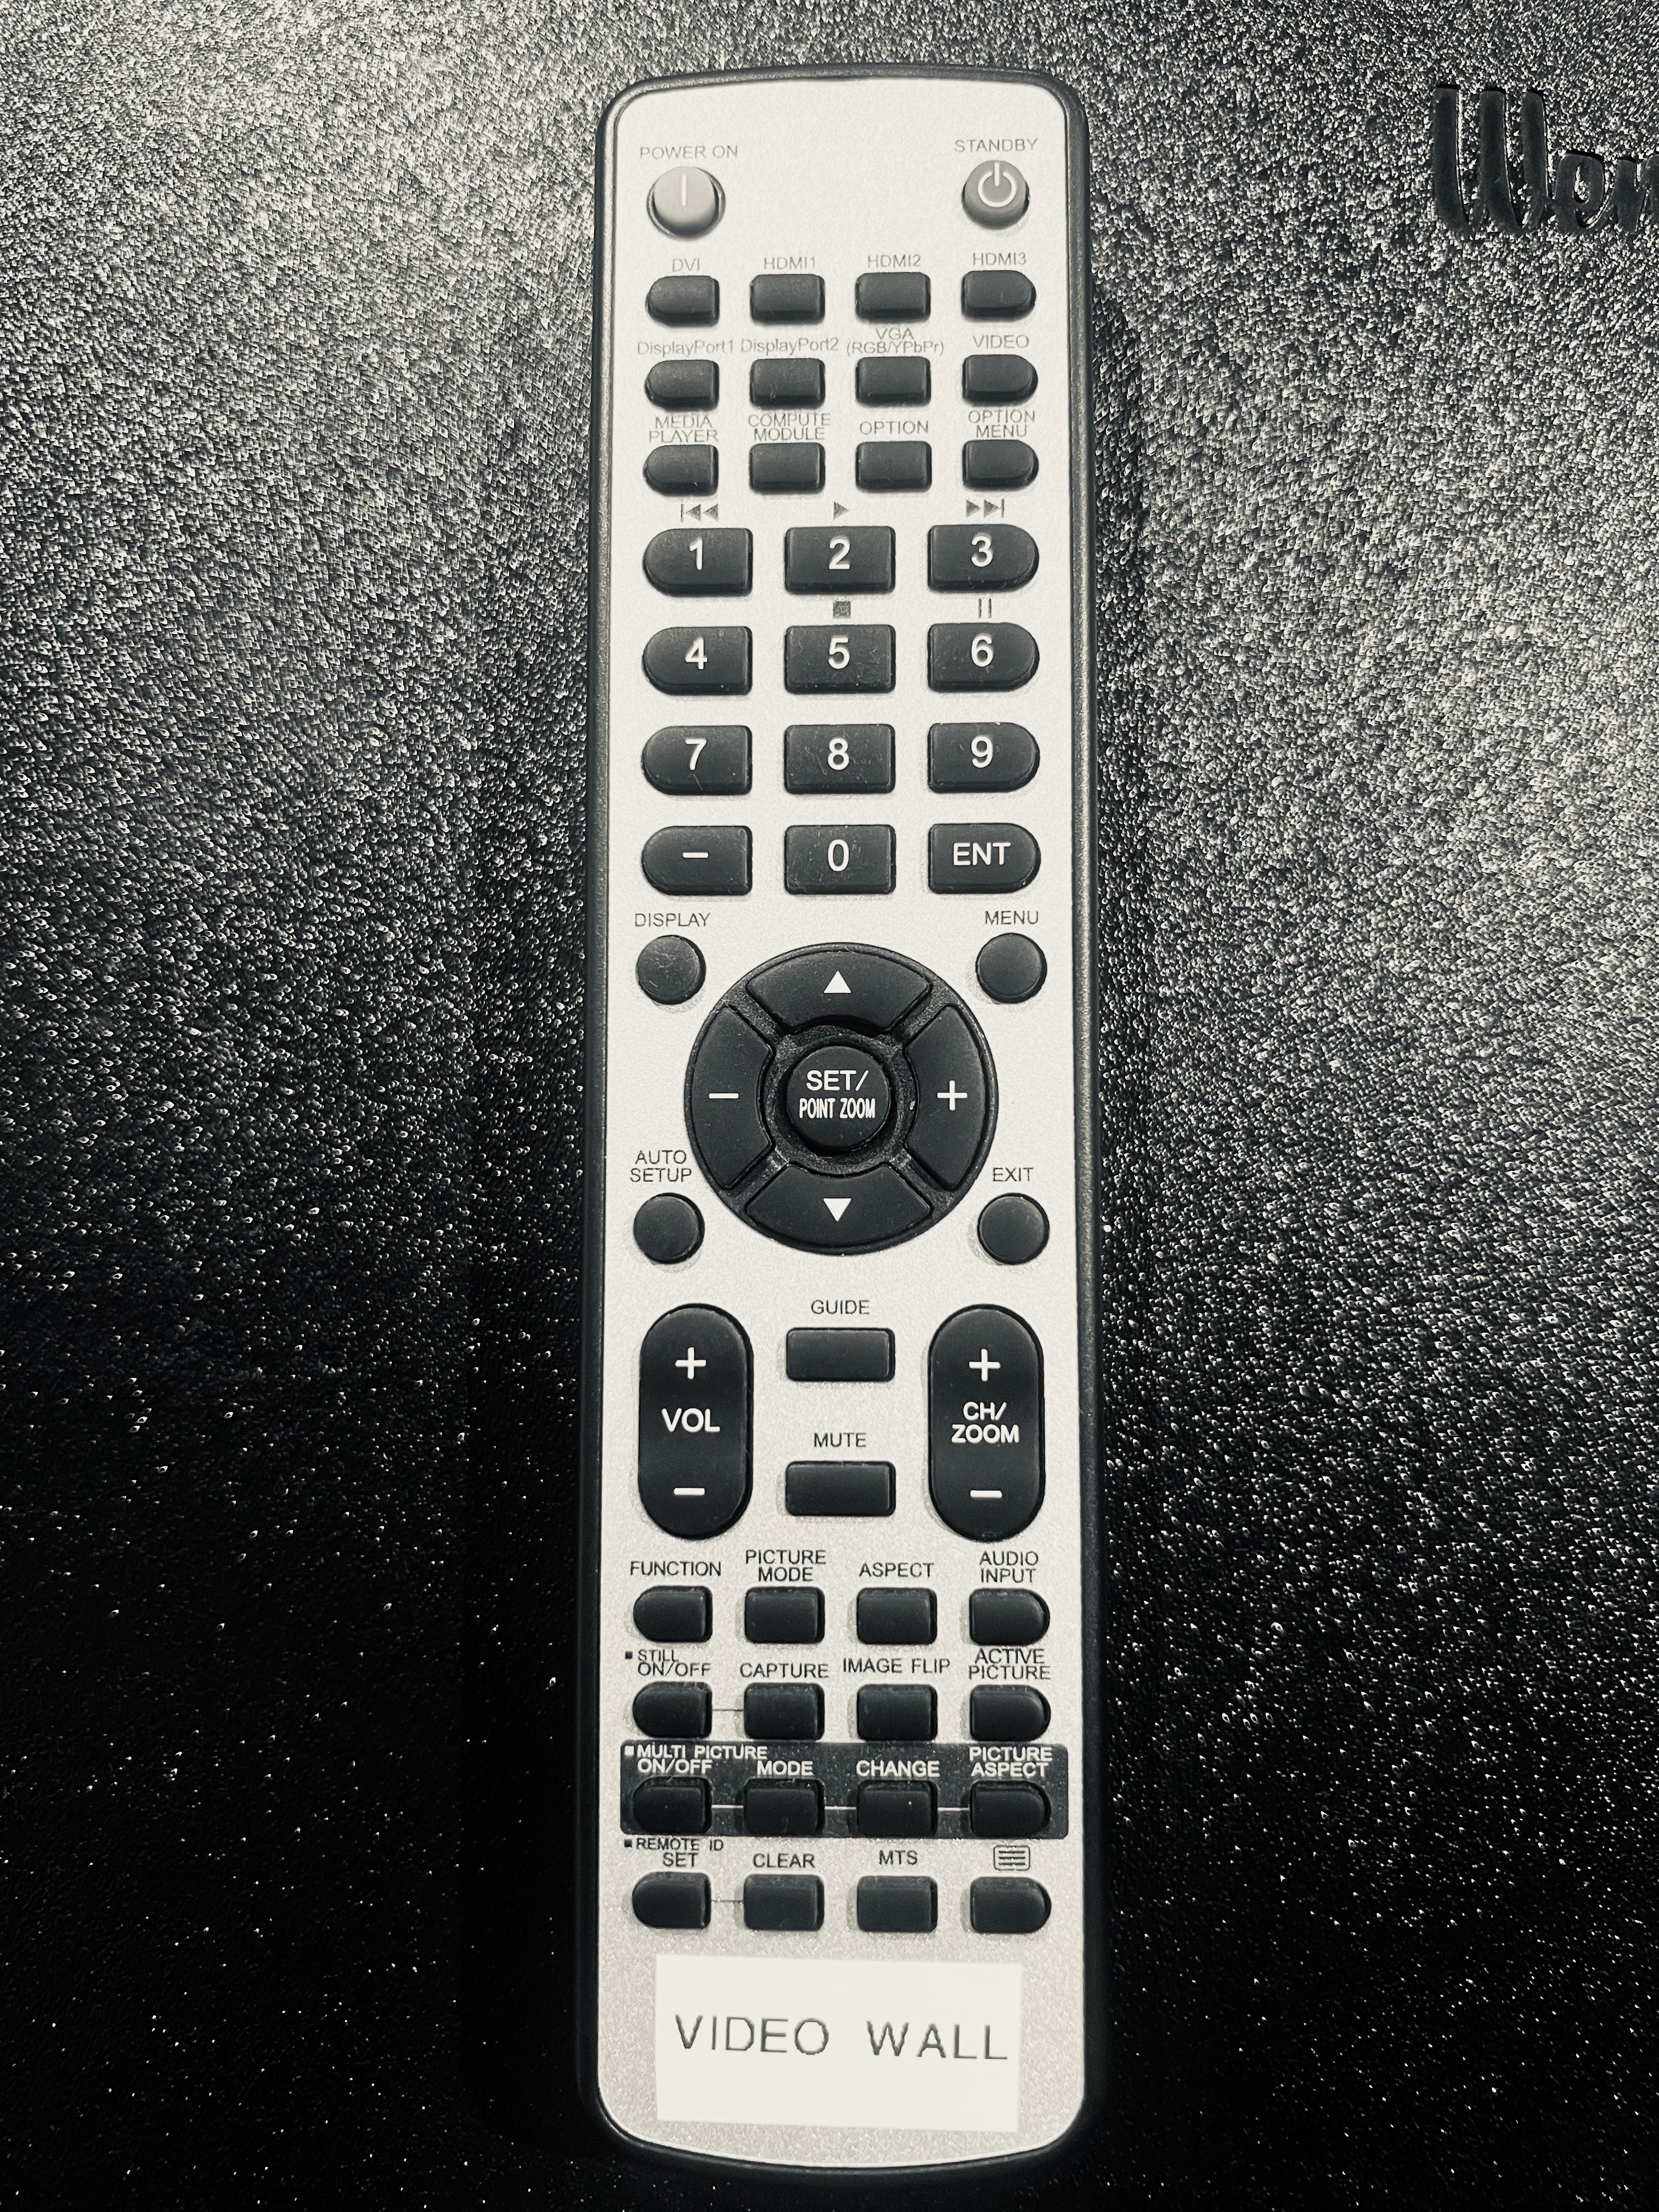
Video Wall Remote
Make sure that the video switcher attached to the back right side (closest to the windows) is switched to “APPLE TV” by pressing the middle “select” button if needed.
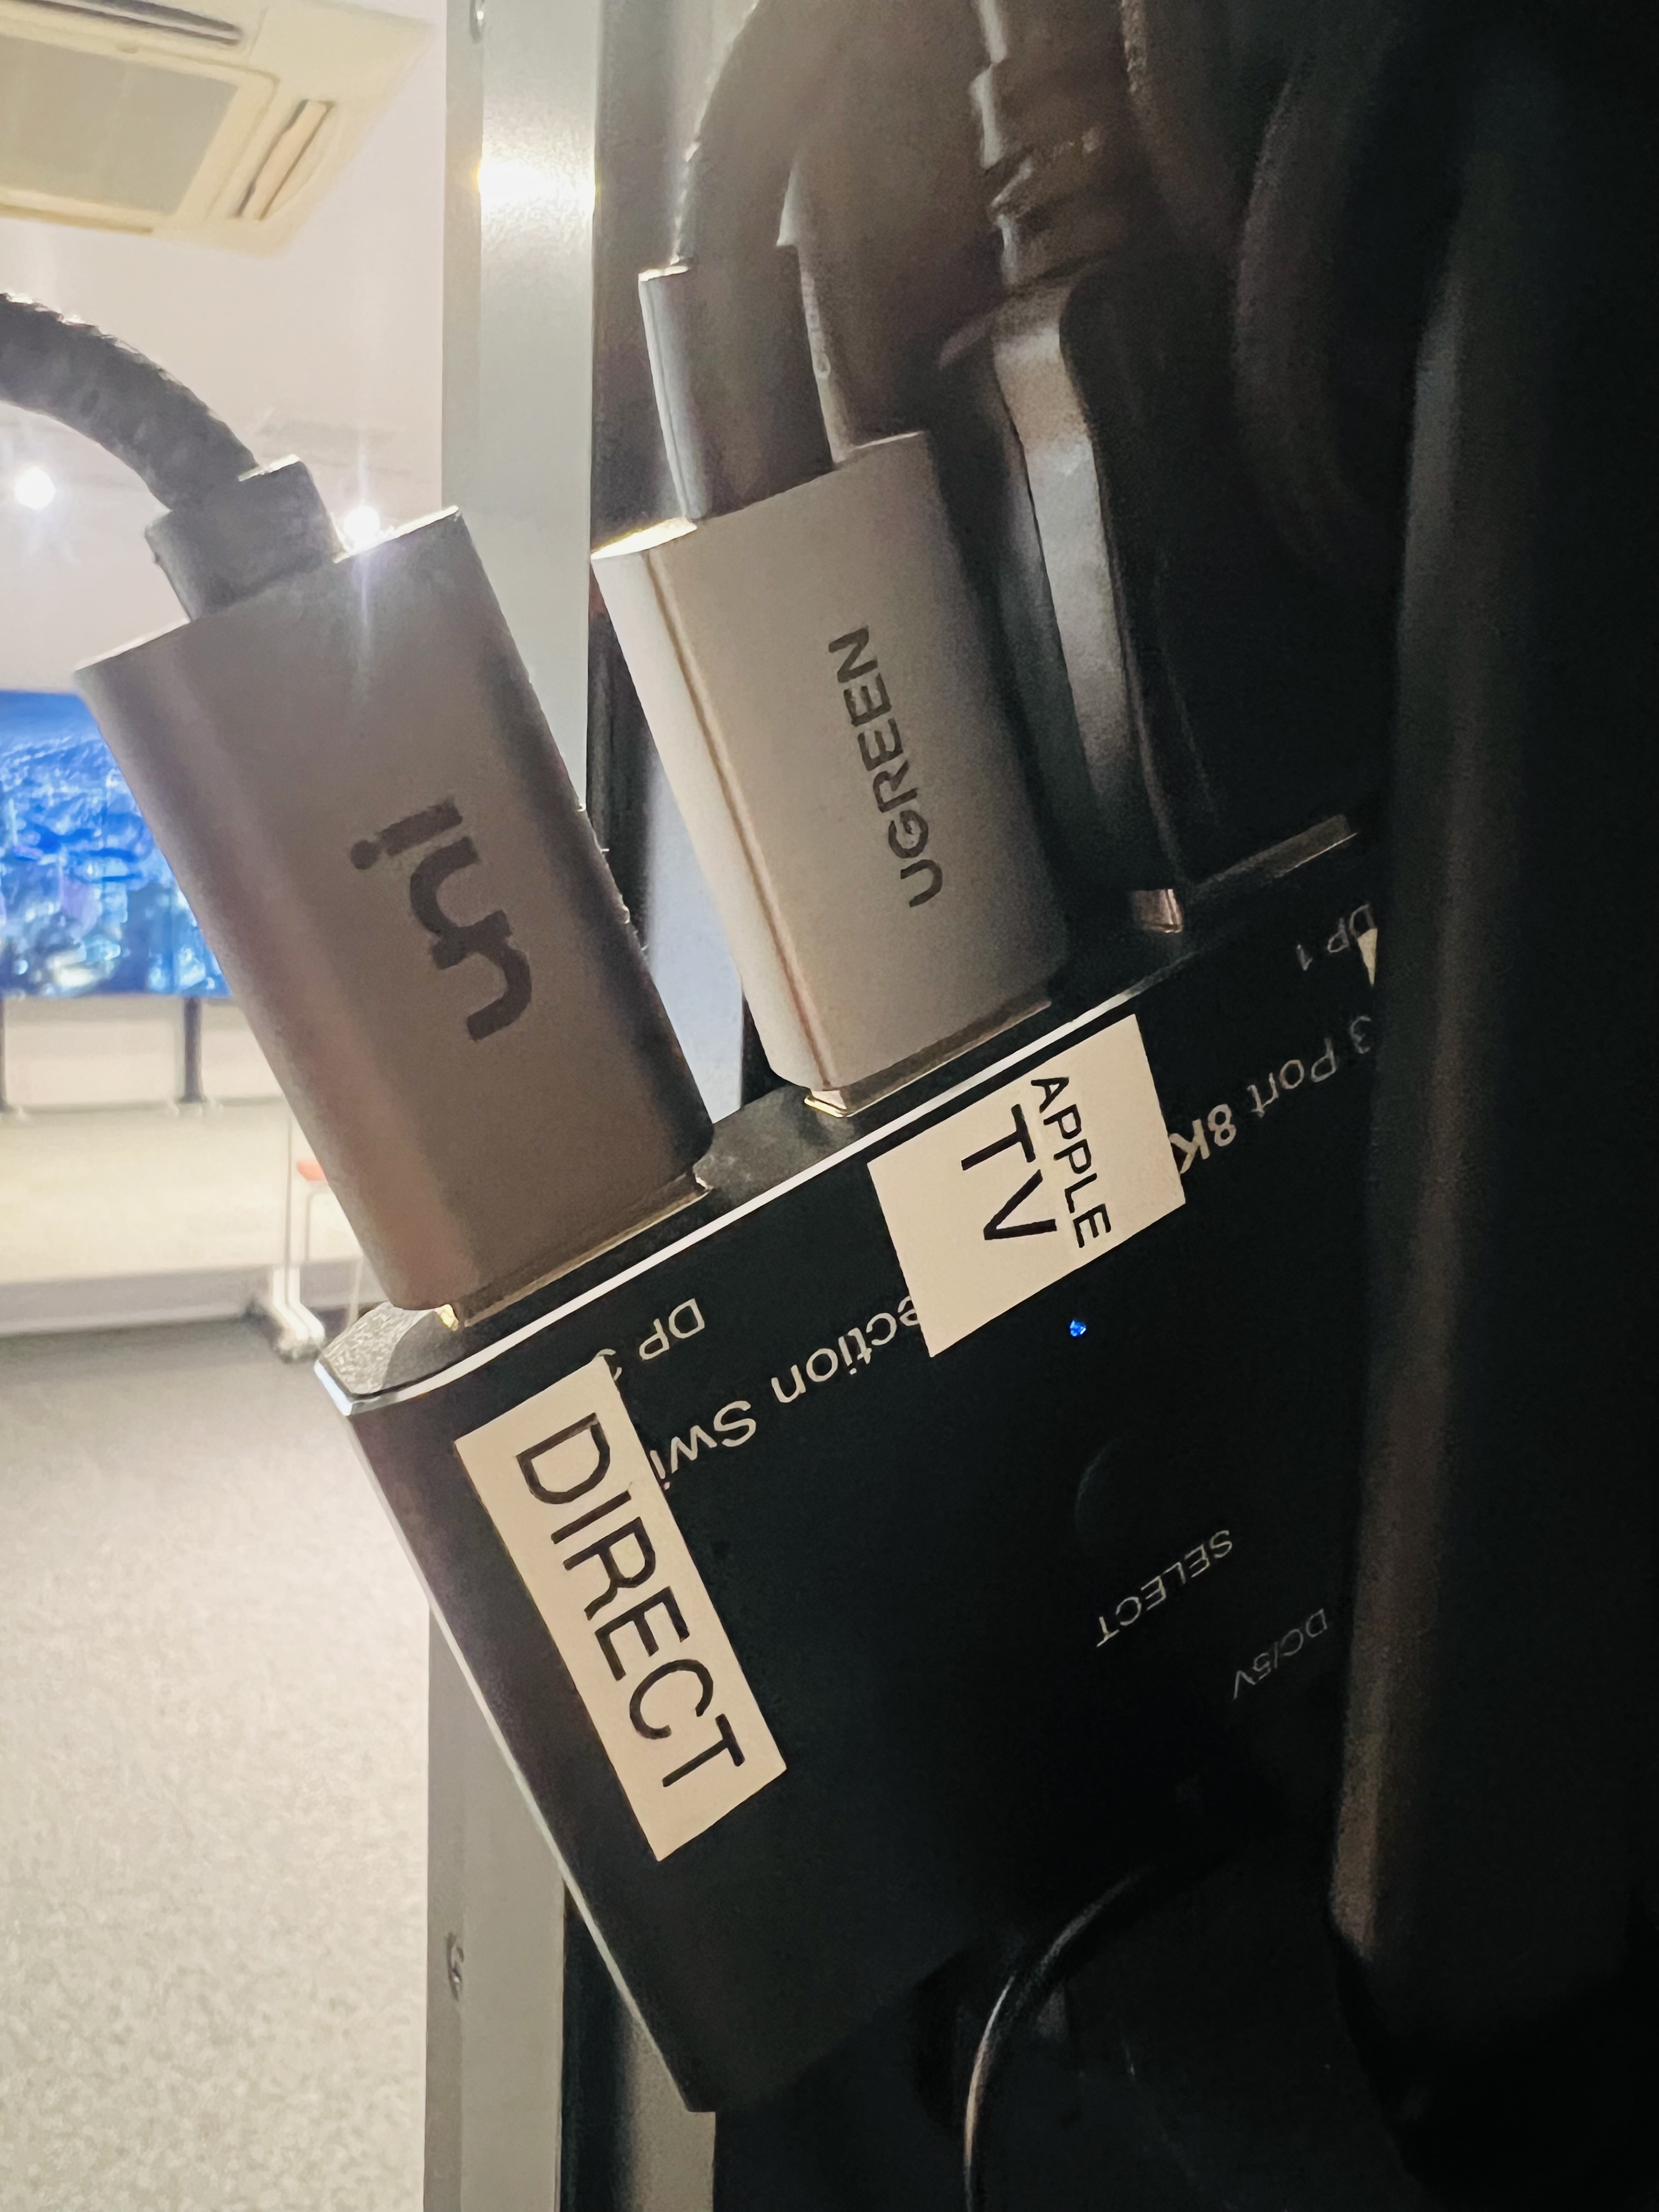
Apple TV on the back right of the Video Wall
Connect to the exhibition room display like normal through AirPlay using the device called “Video Wall”. This does not require a network connection. When AirPlaying / Screen Mirroring from one Apple Device to the Video Wall, it will connect directly to the device to display the video
Simple Wired Connection (Cable)
This method does NOT let you use the 9 screens individually.
Turn on the Display using the “Video Wall” remote.
Also, turn on the audio speaker if audio is required using the “Audio Speaker” remote.Make sure that the video switcher attached to the back right side (closes to windows) is switched to “DIRECT” by pressing the middle “select” button if needed.
Connect your device to the display using one of the USB-C type cables.
Please note the DisplayPort cable does NOT work with MacBooks using an M1 or higher chip. Please use AirPlay to stream using the AirPlay method listed above.
Advanced Connection (Mosaic)
Video Wall - Access using http://bit.ly/avideowall or http://10.4.111.253/ on the Teacher/Student Network. If you are an office (staff) member, then please use the Student Network. The teacher will not work for staff due to different network permissions.
Using the video wall, you can create a mosaic of media as shown below.
In order to use the Video Wall at Bunkyo, follow the steps provided below.
Connection Methods
Connecting to the video wall has three methods. Airplay or through the special interface. You will need your MacBook for both methods.
Turning on the Wall
Use exhibition remote to turn on (top left green button) the video wall (9 displays)
Ensure the input is on Display Port 1
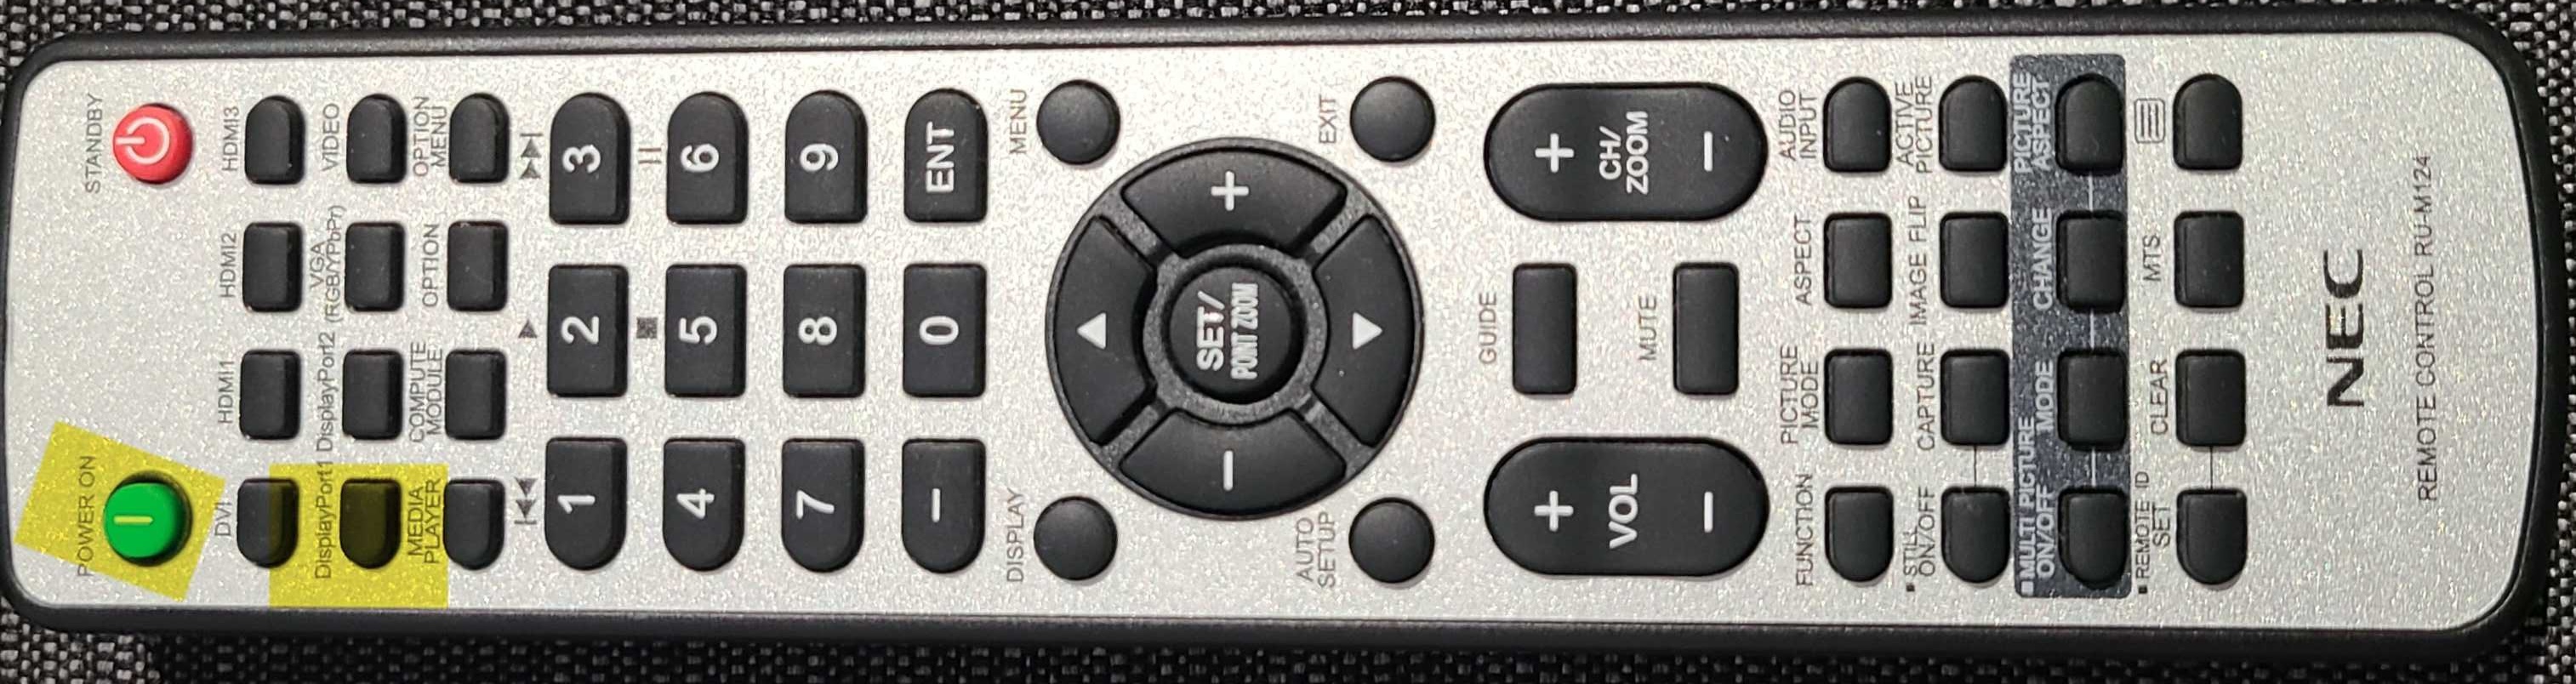
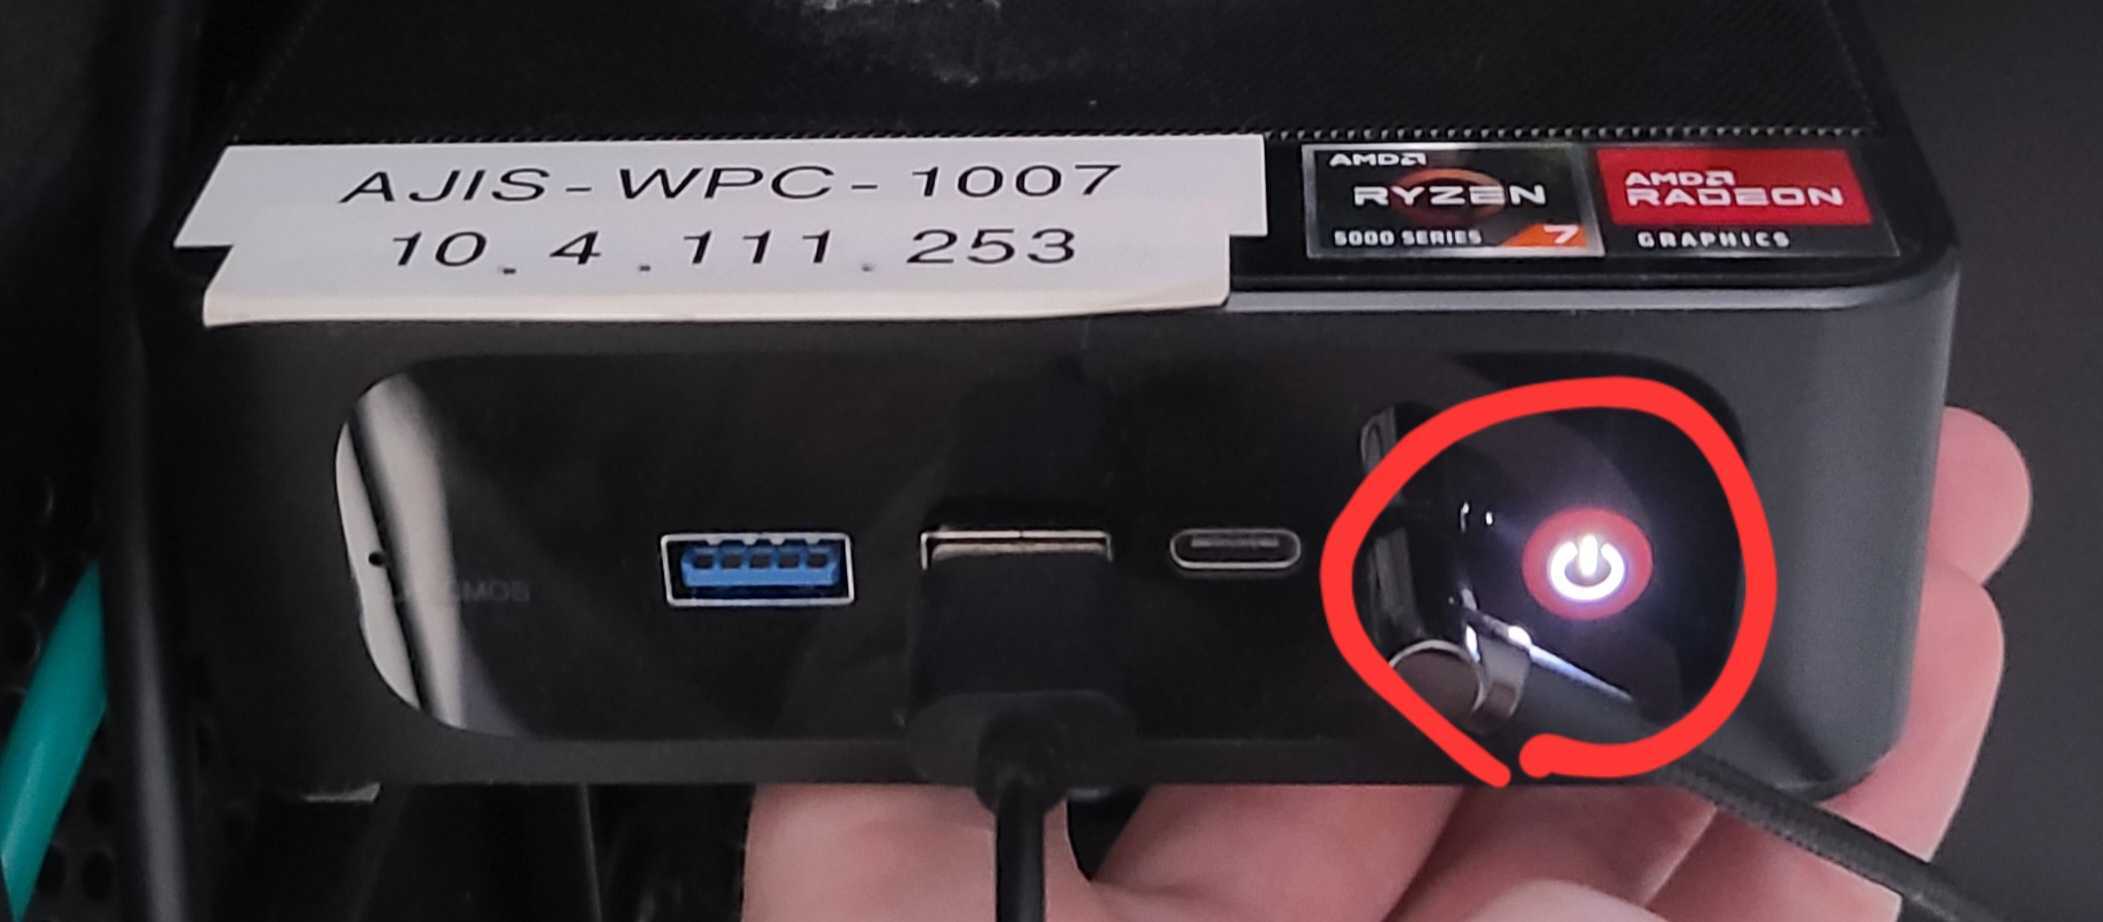
If not already on, turn on Mini PC by pressing power button (found on the back right side)
The power button will be white if it’s on.
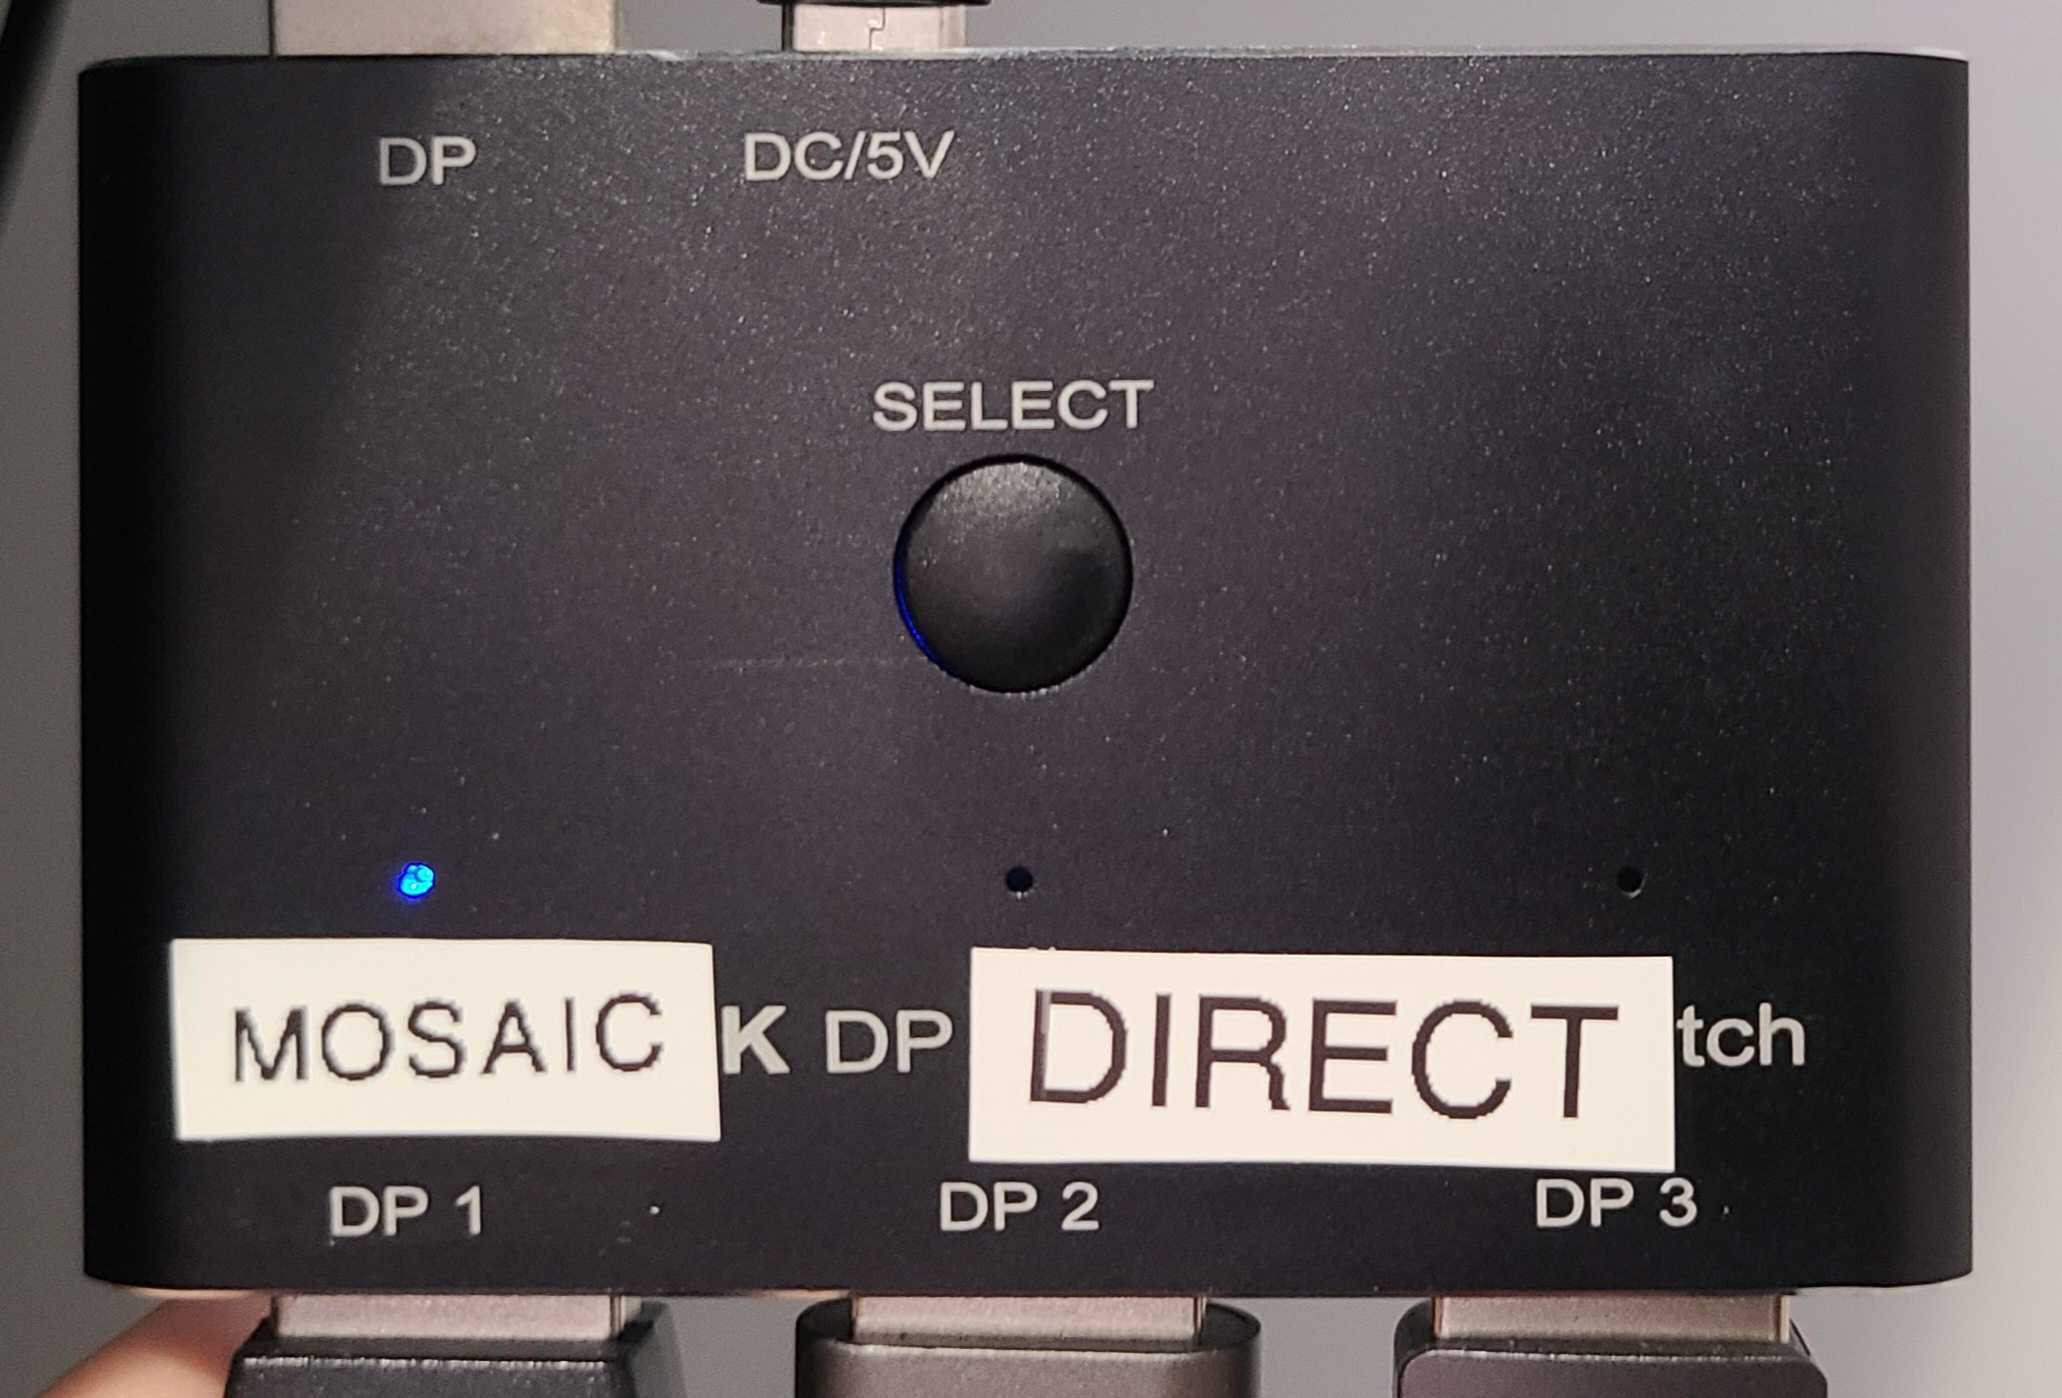
Ensure the port selector is on the MOSAIC display (see behind the monitor by the mini PC) by pressing the ‘select’ button.
Use connected mouse to sign-into the Mini PC (VideoWall Account / No password)
If nothing shows up, check steps above. Otherwise, hold down power button, wait 30 seconds, and power on again (power cycling).
(Optional) Turn on speaker below displays for audio. (Remote is placed top of speaker)
Ensure the AUX cable is plugged in and the light is on. (blue or green)
Play using the Controller
Step 1: Use the Controller section from the left navigation menu to open the list of file explorer.
Step 2: Select the file you wish to display
Step 3: Select the screen you wish to display the item on from the list on the bottom left.
Step 4: Click the “Send to Video Wall” button to push the video to that display. The video will play and loop in silent mode.
File Manager
File Upload
Step 1: Click the “Choose File” button to select a file you want to upload.
Step 2: Click the “Upload” button to upload the file to the server.
The file will be uploaded to an approvals folder awaiting approval
Accepted Video Files: .mp4, .mkv
Accepted Image File: .png, .jpg, .jpeg, .heic, .gif
File Approval
Step 1: Open the “approvals” folder. ** Faculty and Staff only **
Step 2: Select the file you wish to view.
Step 3: Click the “APPROVE” button to approve the file which will make it available to be used on the video wall.
or
Click the “DENY” button to reject the video file and move it to the trash folder.
Using the Wall Editor
Step 1: Select the “Wall Editor” link from the navigation menu.
Step 2: Select the file you wish to add from the right side window and drag it onto the timeline.
Step 3: Right click on the item in the timeline to enable additional parameters for the item.
Step 4:Press the “Send to Video Wall” button to process the playlist so that the Video Wall can play the playlist.
Pedagogical & Creative Use Cases
Interactive Presentations: Students can create multimedia presentations and showcase them across the video wall with autoplay, allowing for a dynamic and immersive display of their work.
Virtual Field Trips: Utilize the video wall to take students on virtual field trips, exploring historical sites, museums, or even distant locations through large high-definition videos and images.
Data Visualization: Display data, charts, and graphs to illustrate scientific concepts or showcase results from experiments or surveys. Alternatively, showing stock trading graphical data for business class purposes.
Sports Analysis: Analyze game footage, demonstrate sports techniques, or showcase inspirational sports stories to motivate athletes.
Fitness Programs: Display workout routines, fitness challenges, or yoga sessions to encourage indoor physical activity.
Nature and Science Documentaries: Showcase documentaries about nature, space, or scientific discoveries to spark curiosity and interest in science.
Environmental Awareness: Display information about sustainability, climate change, and conservation efforts to raise awareness among students.
Art Exhibitions: Display student artwork or digital portfolios in a gallery-style format, celebrating creativity and providing exposure to the school community.
Film Screenings: Show student-created films, documentaries, or video projects during film festivals or special events.