
How to install Adobe Creative Cloud and Applications

This guide will instruct you how to get applications like Photoshop and other Adobe apps installed on your computer.
You will NOT be able to install apps if you don’t have a Adobe CC license assigned to your Google Account.
Note: All students at Aoba (G4-12) will be given a license from their 1st day of enrollment.
Instructions:
Step 1:
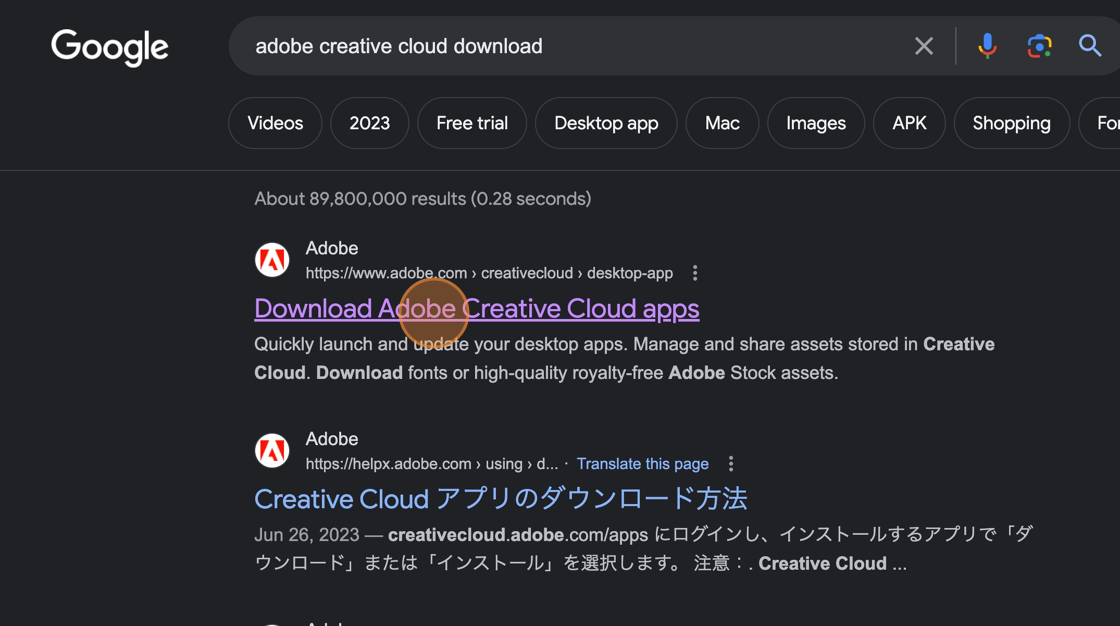
Go to website https://www.adobe.com/creativecloud/desktop-app.html or search Google with ‘adobe creative cloud download’
Step 2:
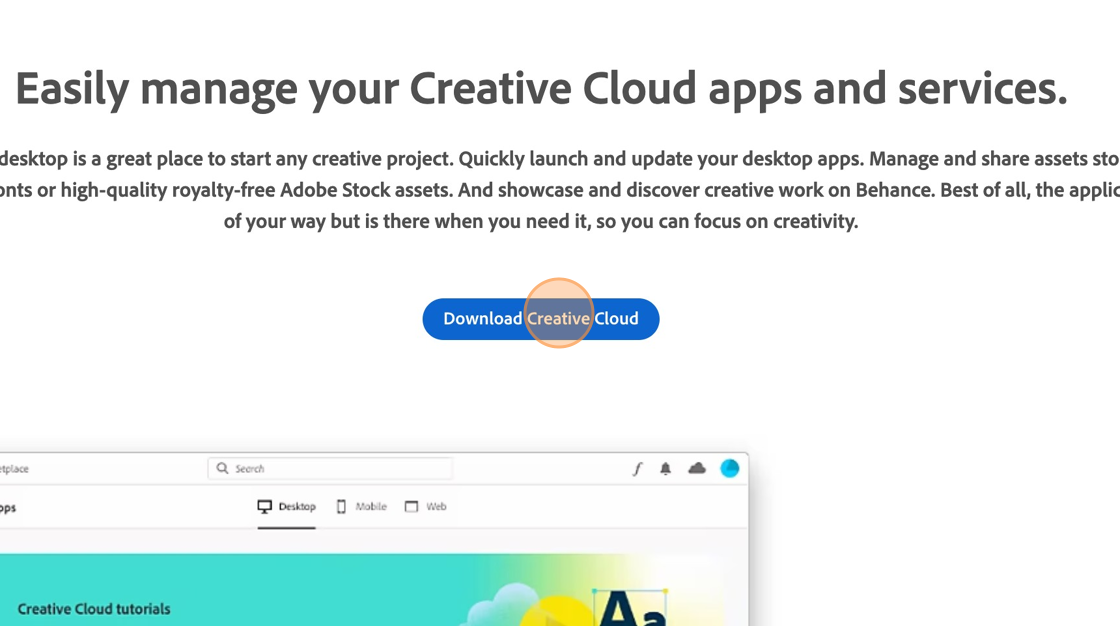
Download Creative Cloud & install on your computer
If you are installing Adobe CC on a school provided device (faculty/staff), you will need ICT to help input admin credentials. You can, however, install the Adobe applications yourself from Creative Cloud after it has been installed.
Step 3:
Launch the Adobe Creative Cloud application & sign in with your Aoba’s Google account credentials.
‘Continue with Google’
It may launch your browser to authenticate so please hold tight while it verifies.
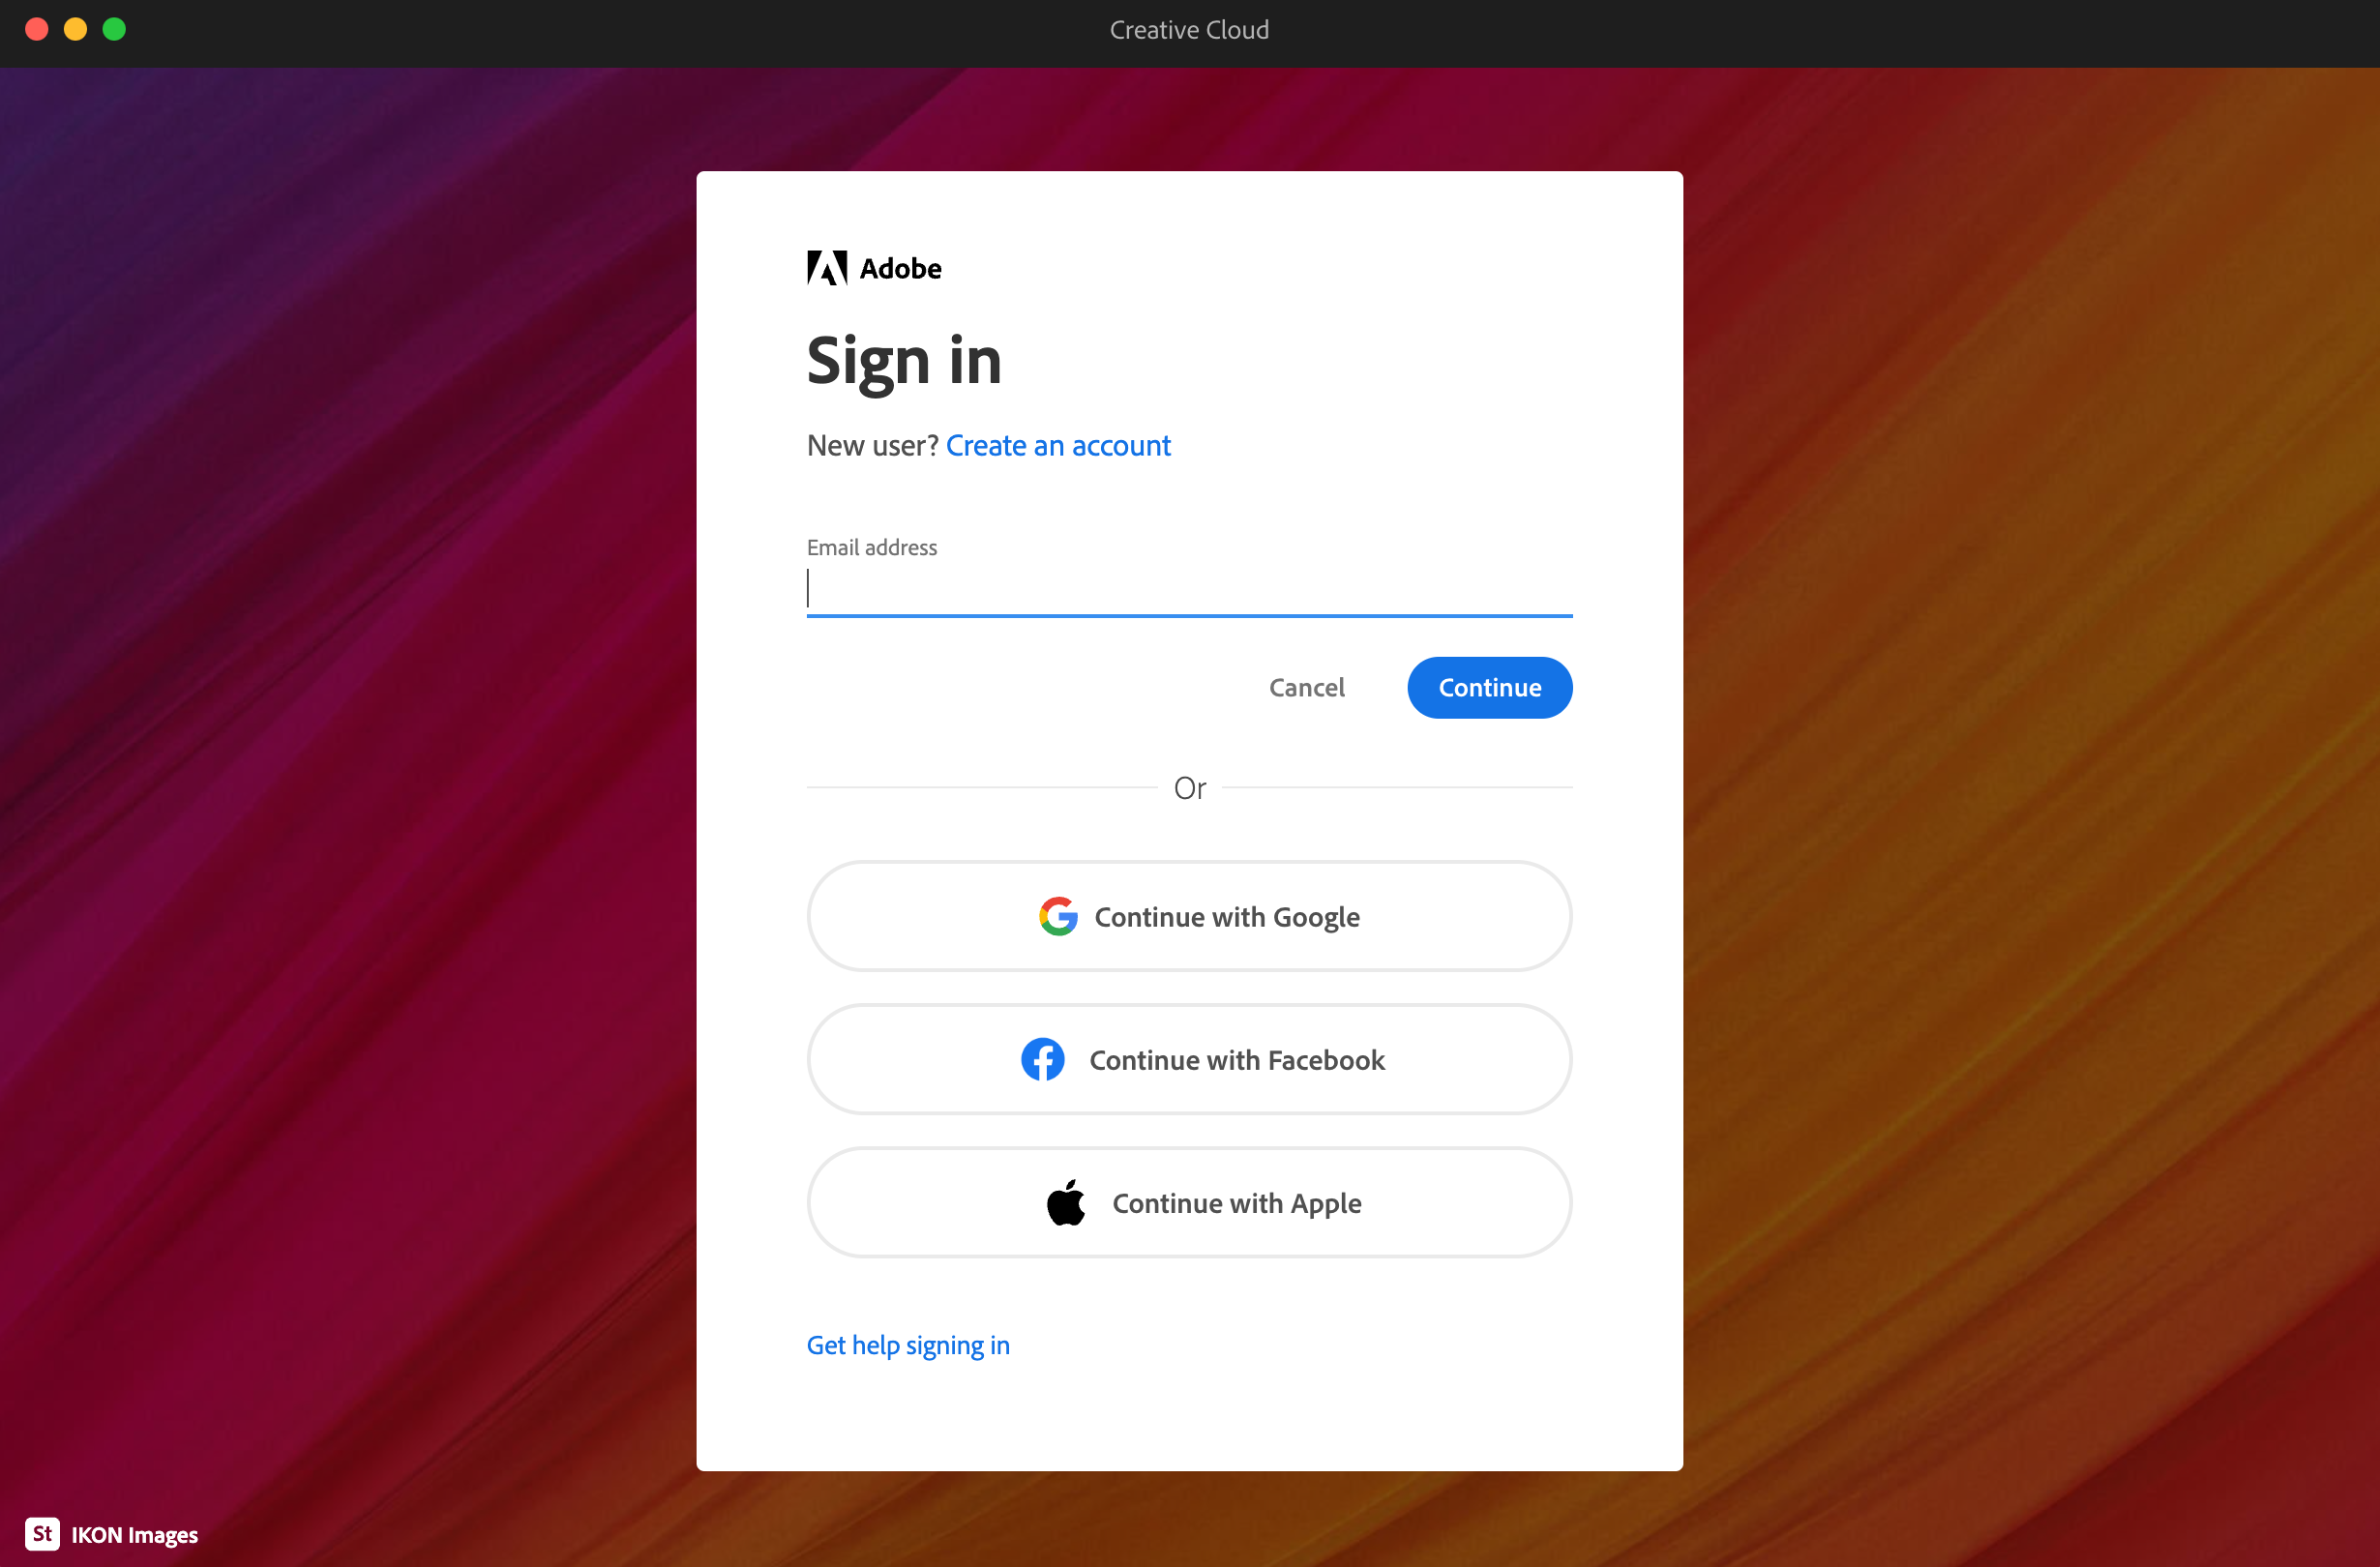
After you login with your Google account, it will ask if this is for PERSONAL or WORKSPACE.
Please select WORKPLACE.
Step 4:
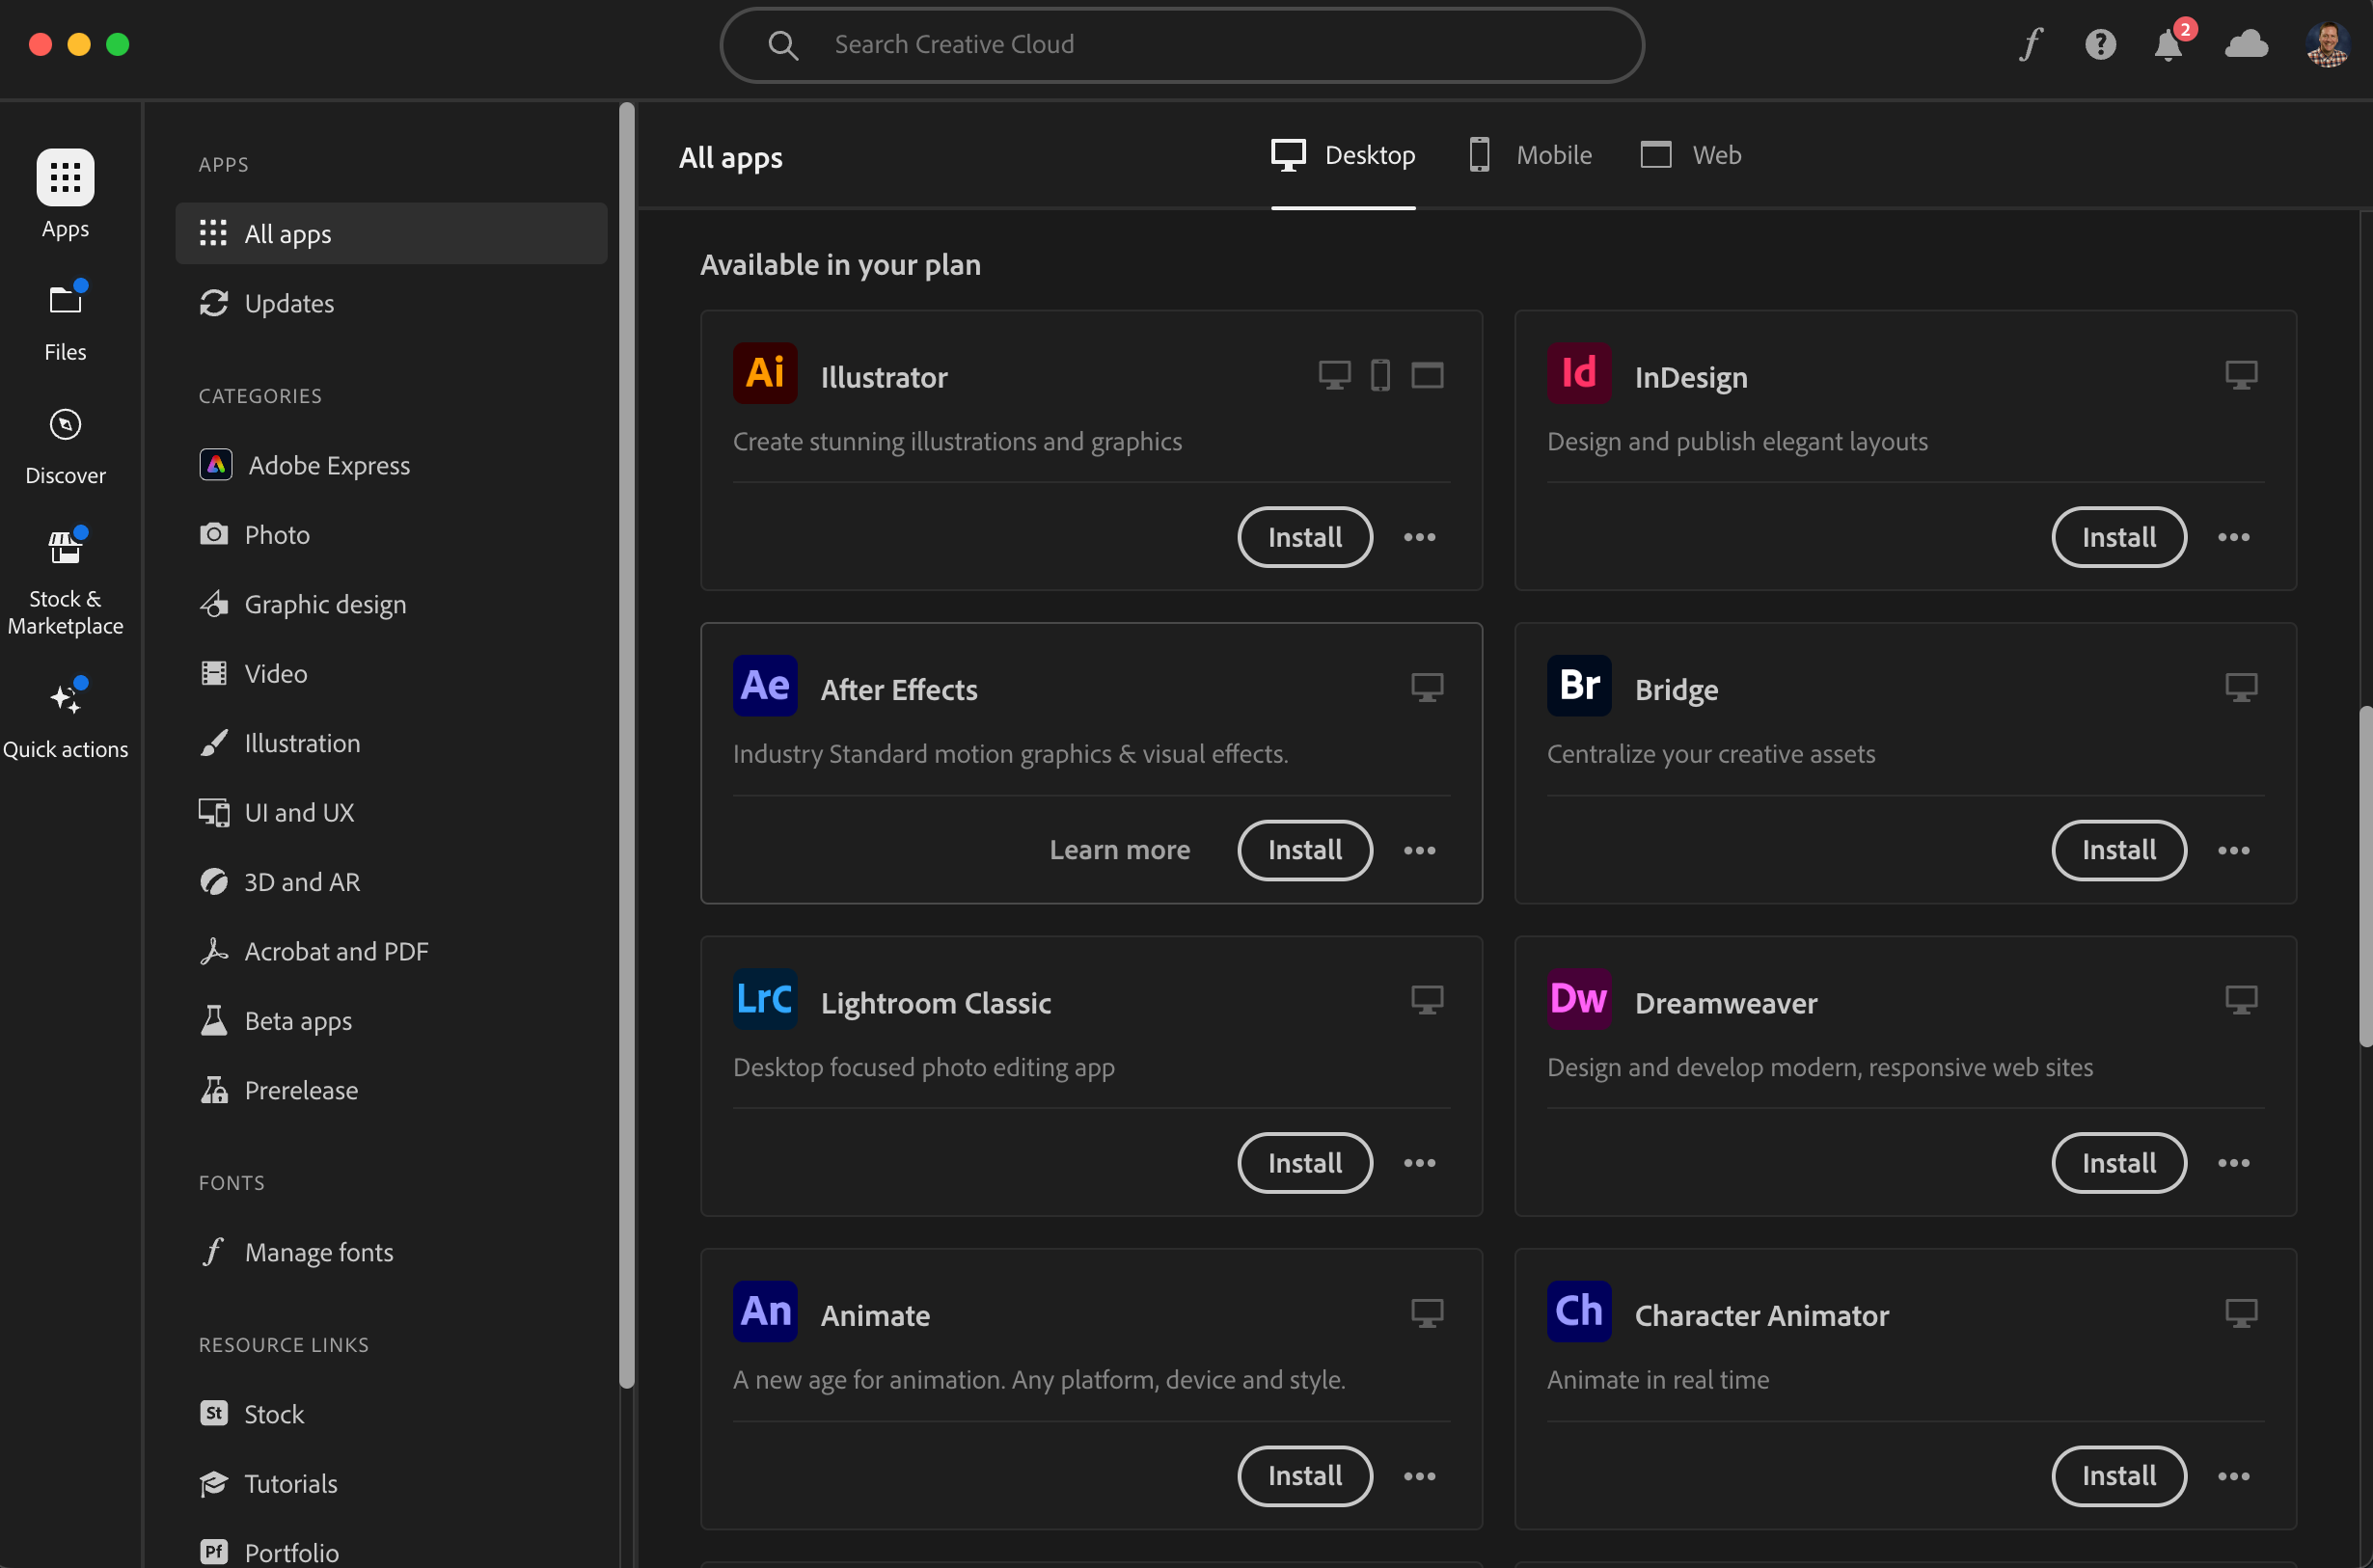
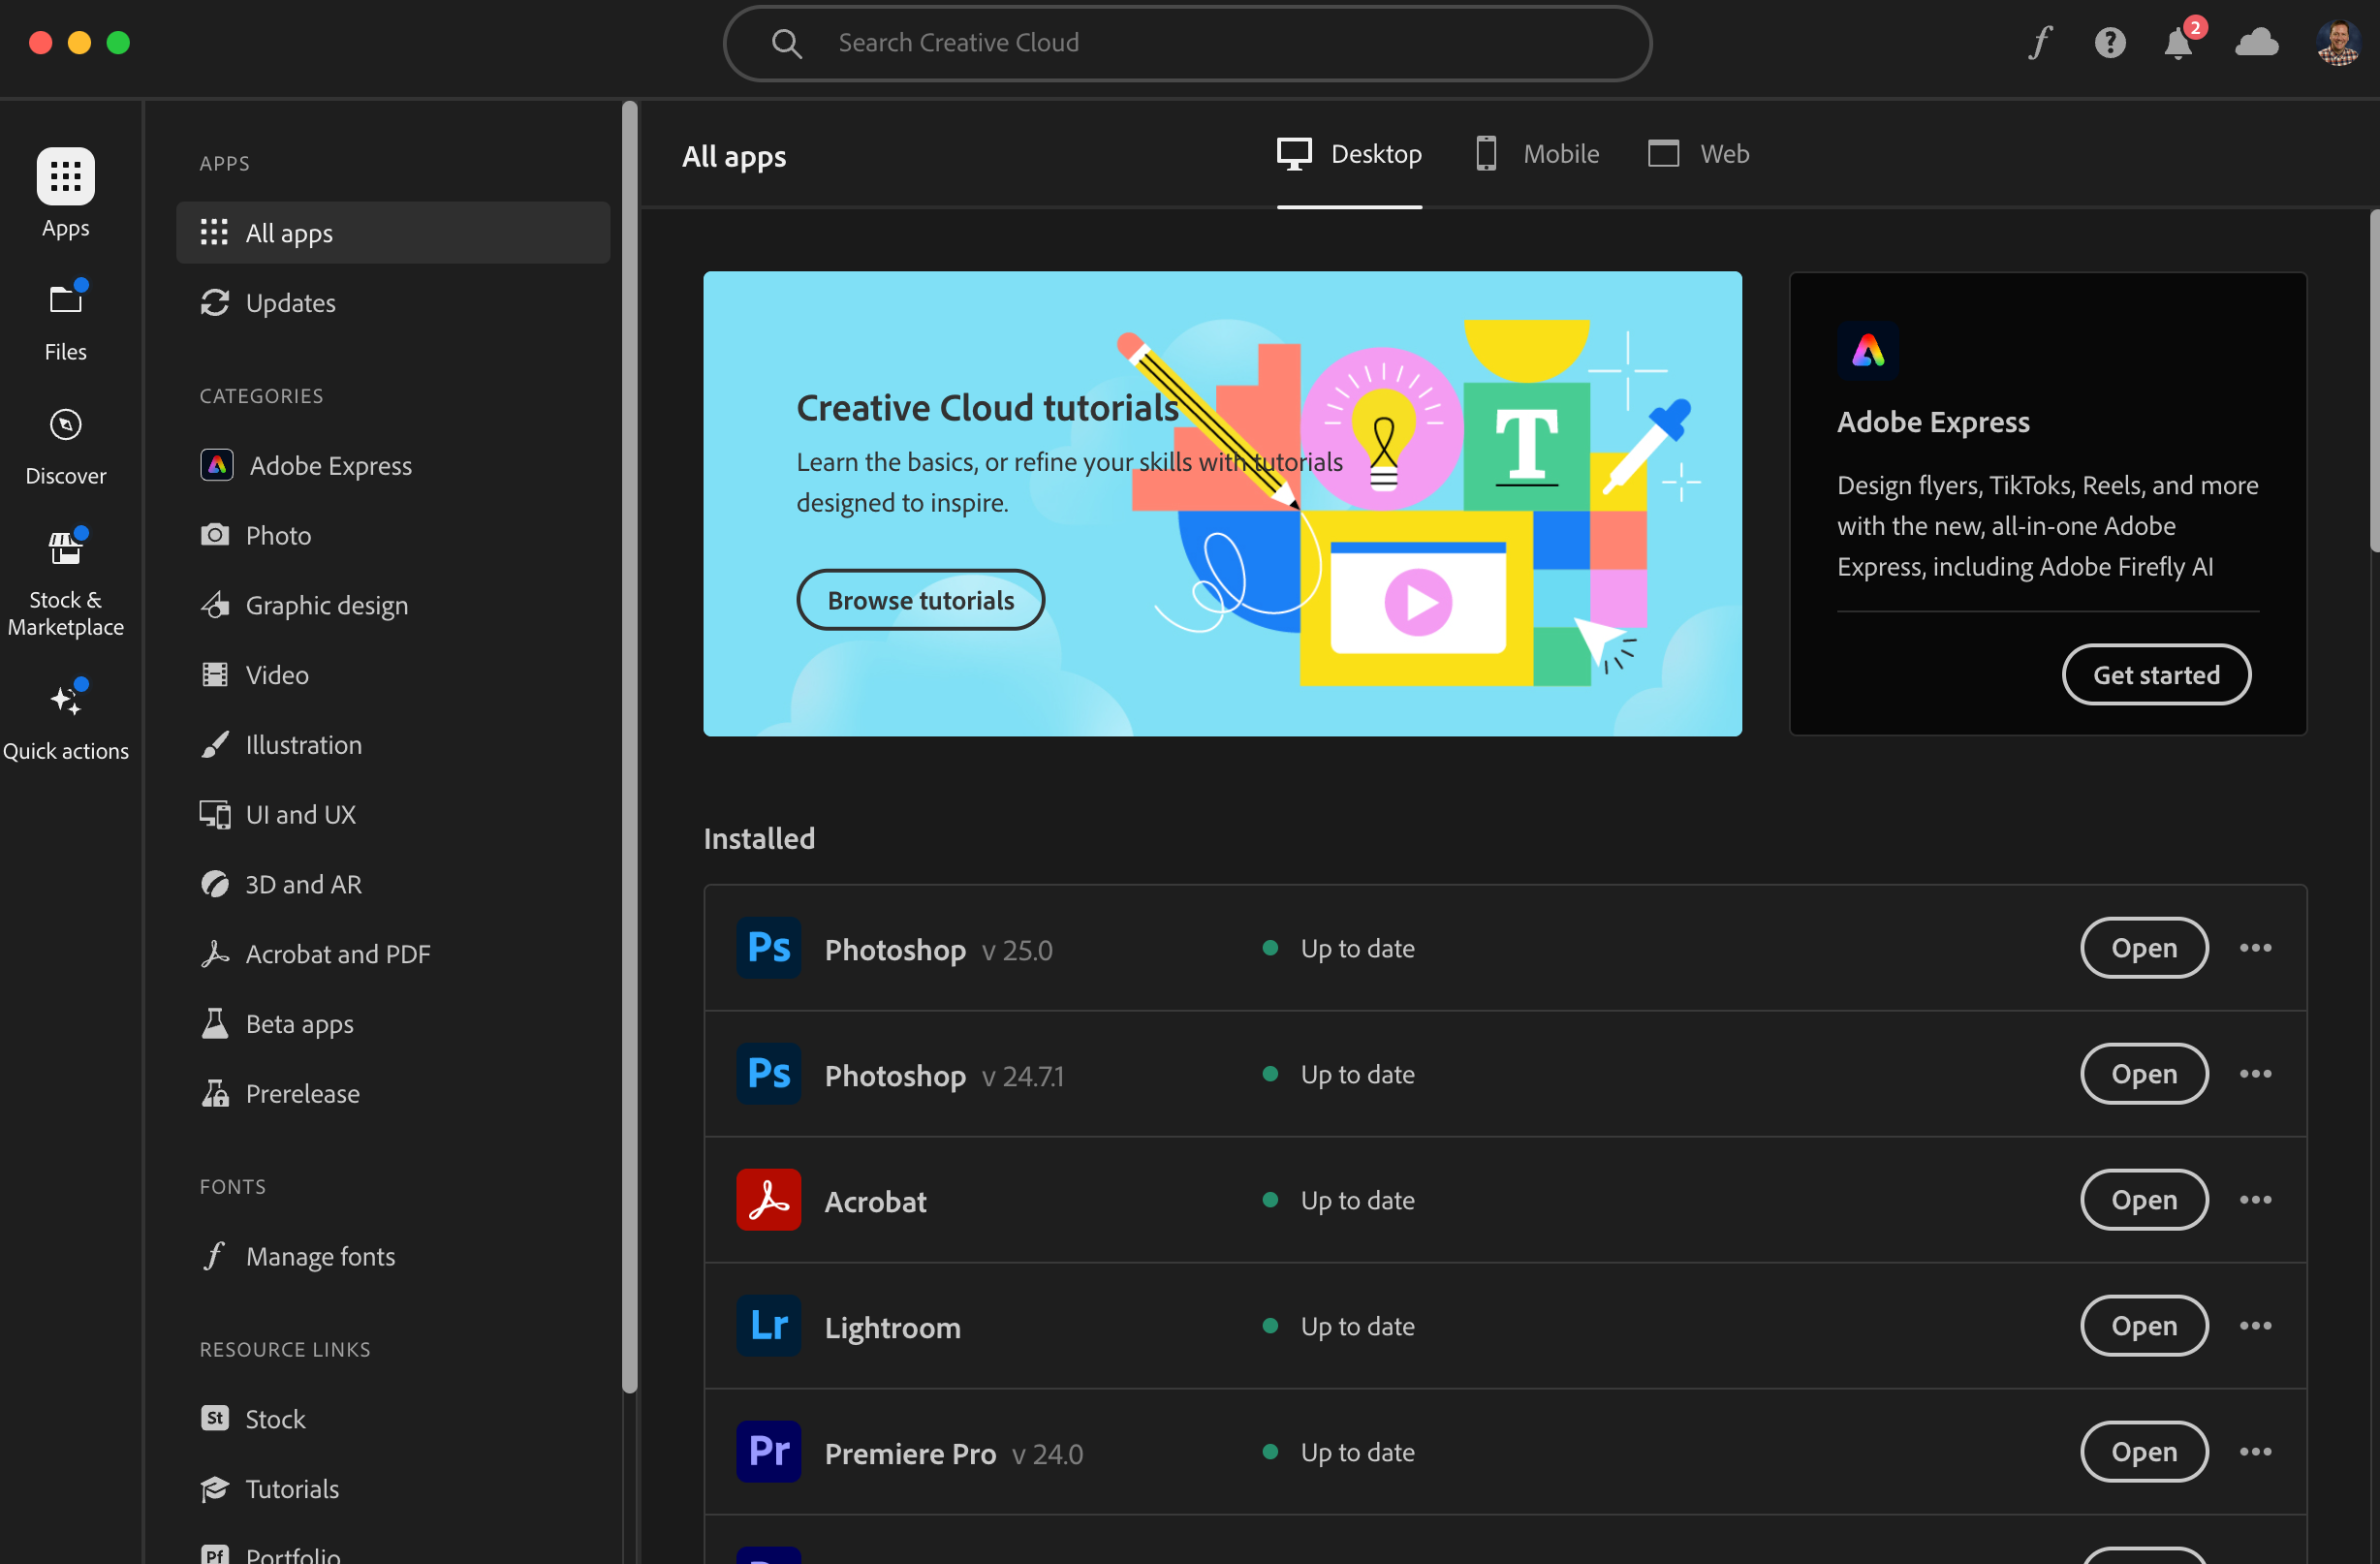
In the Adobe Creative Cloud application, install the applications you want. For example, Photoshop.
Step 5:
After the desired programs have installed, click ‘open’ to launch them.
Extra Step:
Be sure to update CC and the applications now and then to ensure everything works smoothly.