
How to print with Bambu Studio?
Welcome! Follow the steps below to go from idea to finished print. These instructions match the quick-start poster near the printer but go into more detail.
1. Choose or Create a Model
Use a ready-made model:
You can download free 3D models from:
MakerWorld (Bambu Lab’s)
Or design your own:
Try beginner-friendly tools like:
Export your file as .STL or .3MF when you're done.
2. Getting Started with Bambu Studio
Bambu Studio is the software we use to prepare 3D models for printing on the Bambu A1 printers. It's available for Windows, macOS, and Linux.
⚙️ First-Time Setup
When launching Bambu Studio for the first time:
Choose your region.
Select the Bambu A1 printer.
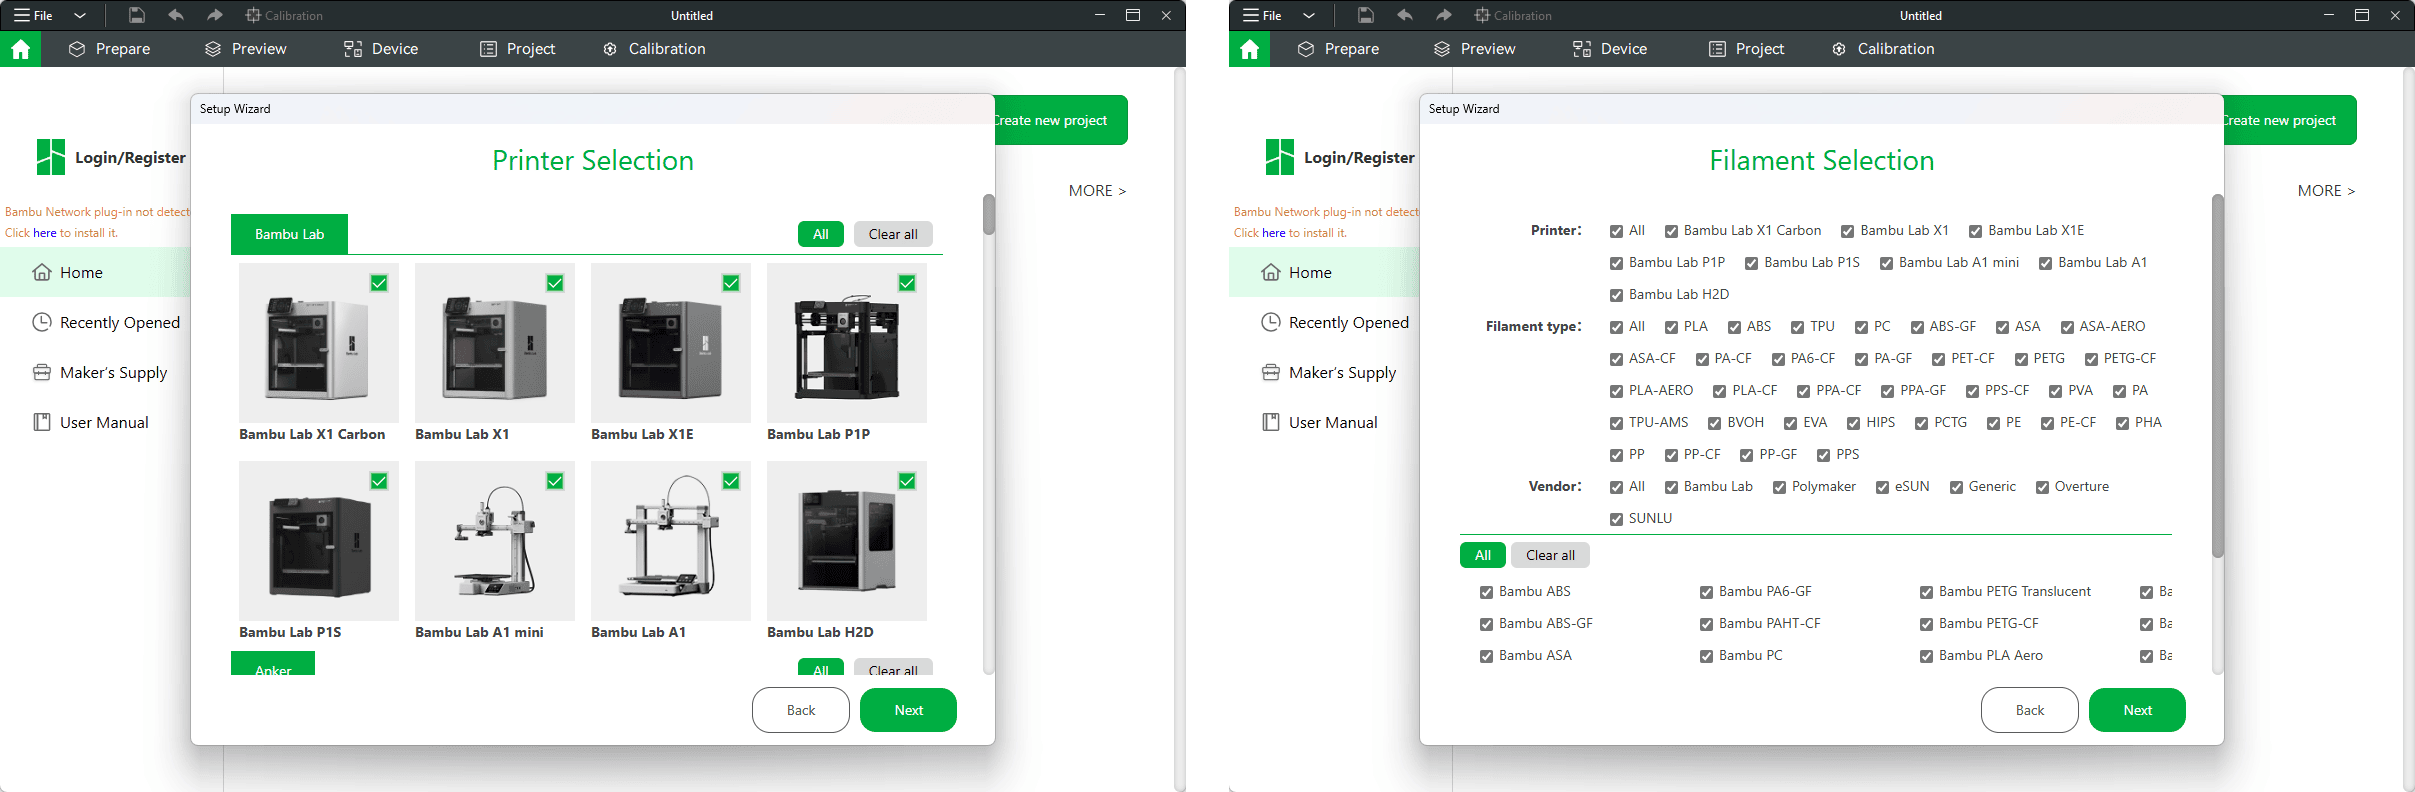
Choose compatible filament types — we mainly use PLA at school.
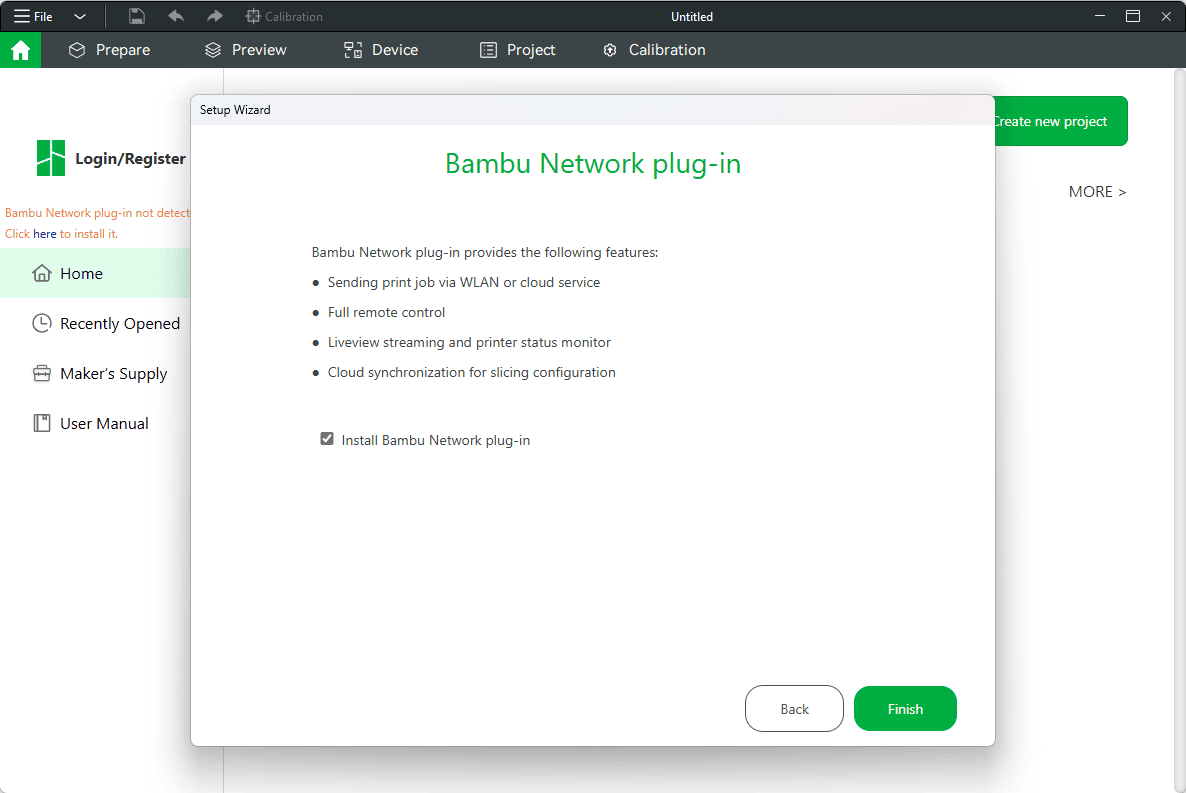
Install the Bambu Network Plugin (this allows you to send files wirelessly to the printer).
Once that’s done, you’re ready to start printing!
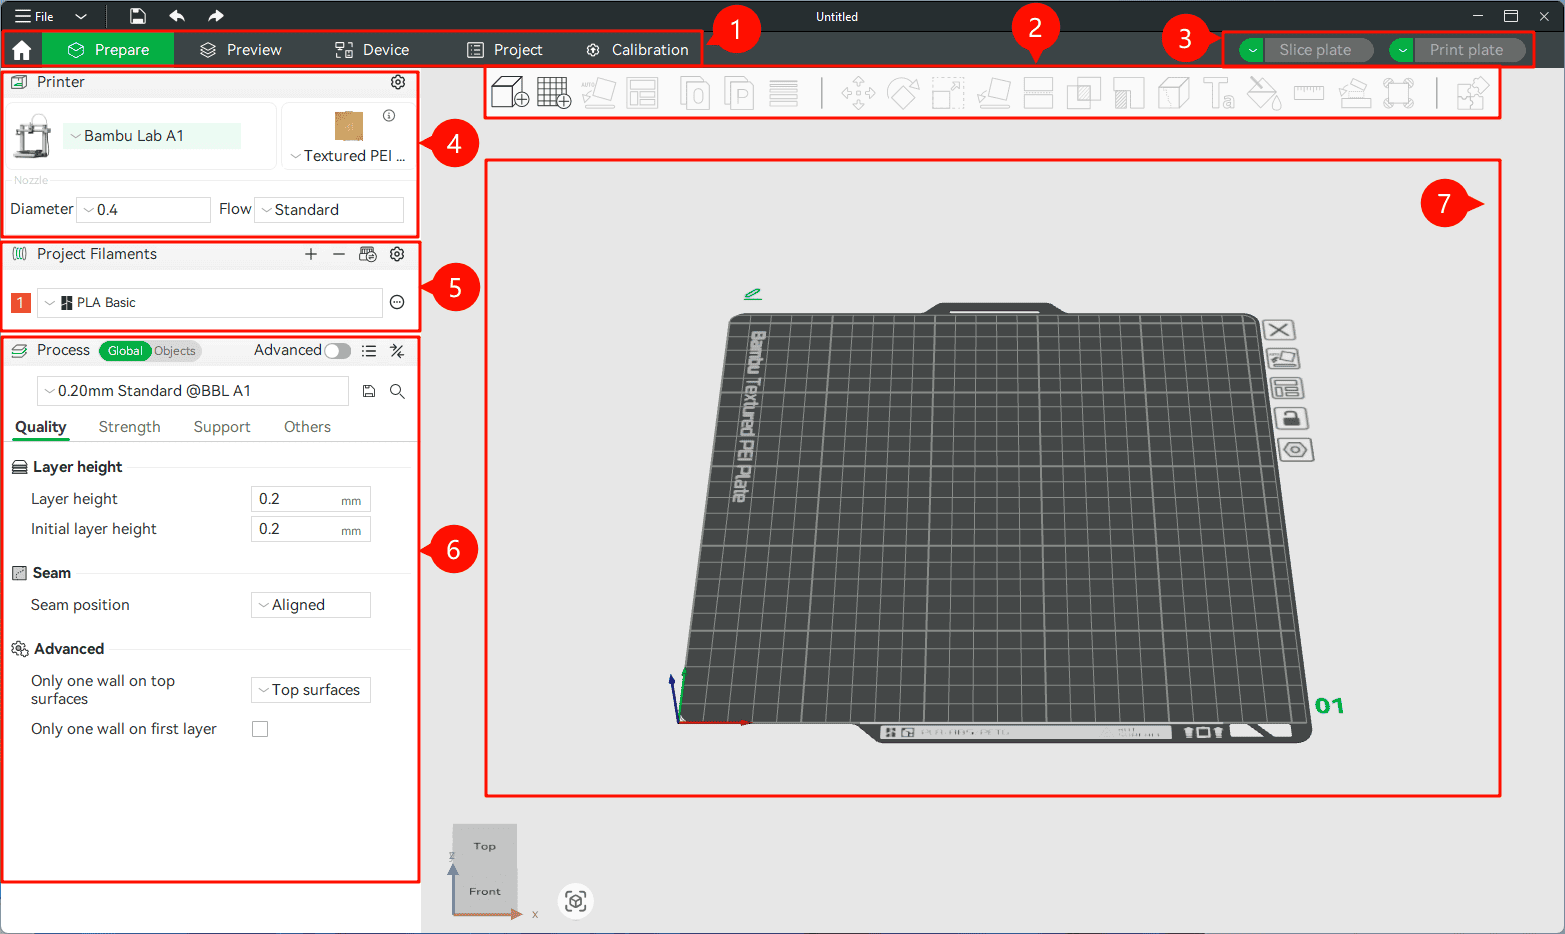
Tabs Bar: This includes six tabs: Home, Prepare, Preview, Devices, Projects, and Calibration.
Toolbar: Contains a set of functional buttons for operations such as adding, moving, rotating, or cutting models. (For a more in-depth explanation, please refer to the Bambu Studio Toolbar)
Action Buttons: At the top right of the interface, slicing and printing are controlled via two main buttons. One button slices the model based on current settings, and the other initiates the print process.
Printer: In this section, you can adjust printer hardware-related settings, including printer model, build plate, and nozzle type.
Project Filaments: You can add, edit, or delete different types of materials here and configure specific print settings for each material, such as nozzle temperature, heated bed temperature, etc.
Process: Used to adjust various parameters during the printing process to optimize performance in areas such as print quality, speed, and strength.
Model Interface: The core area for 3D model interaction, offering an intuitive and convenient interface for model display and editing.
3. Slice Your Model in Bambu Studio
Bambu Studio turns your 3D model into printer-friendly instructions.
In Bambu Studio, drag your model file into the workspace.
Open Bambu Studio
Download and install the latest version if you haven’t already.
Import Your Model
Drag in a .stl or .3mf file, or go to File → Import.
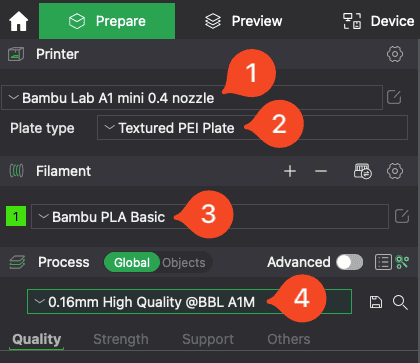
You can select the printer you wish to print the model on, and the right nozzle size (0.4mm comes as default).
Select the build plate type to match the filament you wish to print.
Select the filament type and color.
Select the layer height. A lower layer height will give you more detail, but will increase print time. This equates to the height of the layer of each line of melted filament.
ADVANCED - In addition to these, there are many more settings, such as adding support, infill density, and more. Depending on the complexity of your print, you made need to make additional tweaks. If you are unsure, ask or do your research.
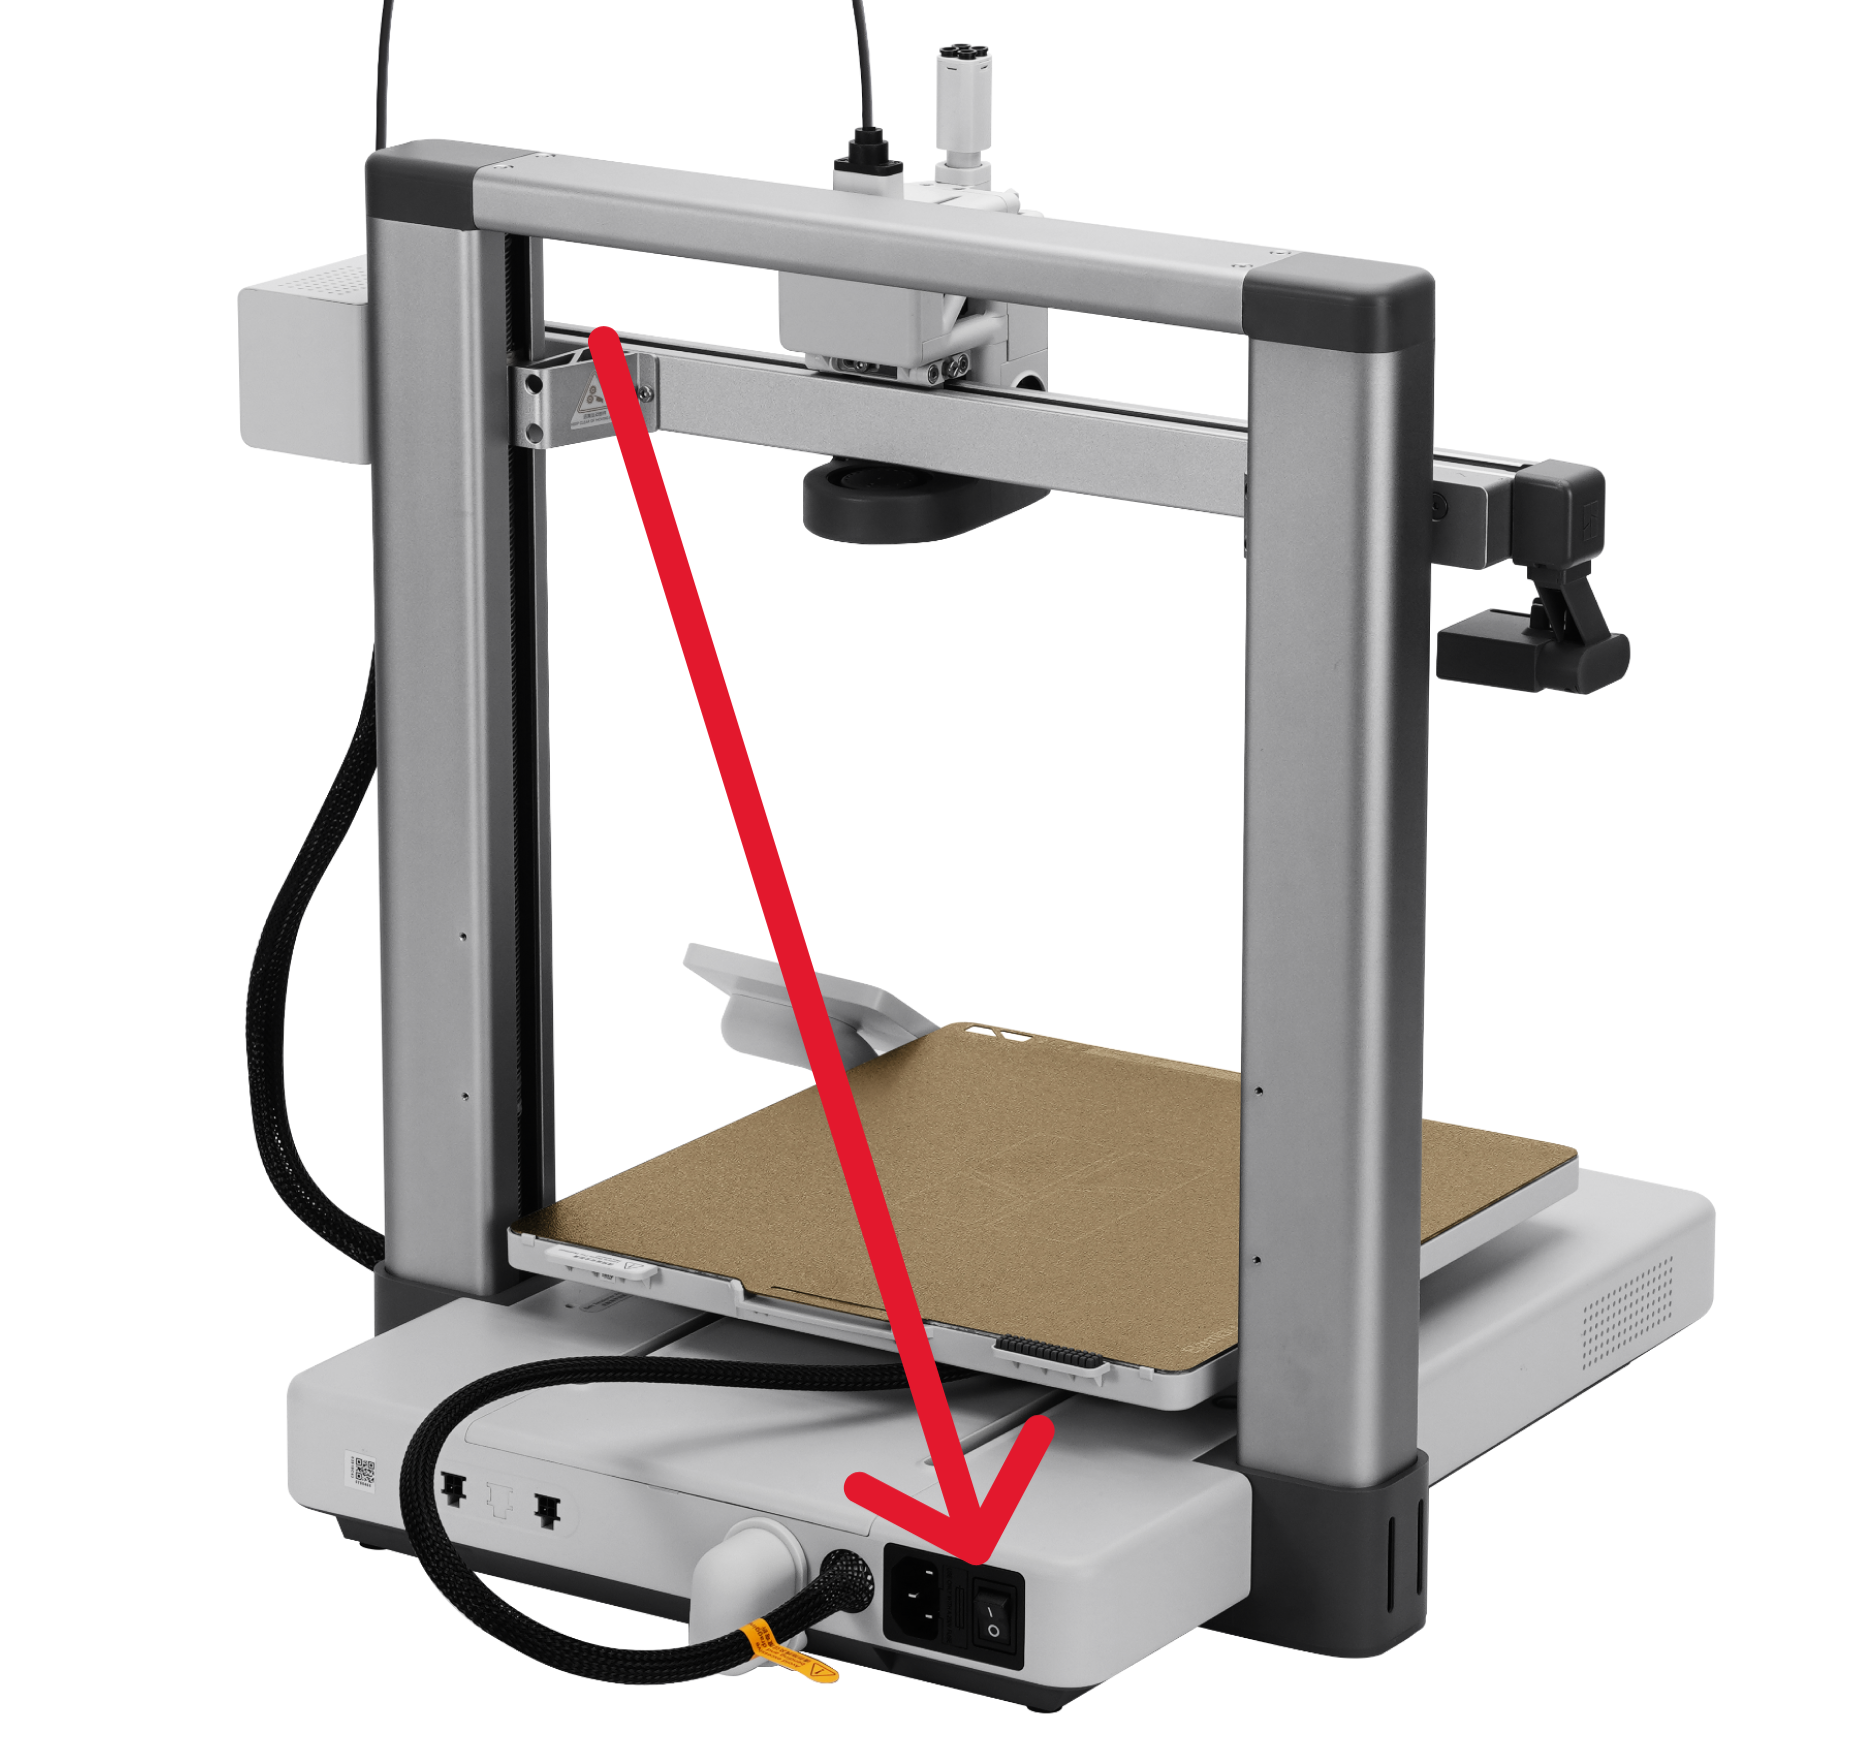
4. Prepare the Printer
Before printing, double-check:
The printer is on (switch is in the back).
The build plate is clean and empty.
No errors appear on the printer screen or "Assist" icon.
The filament is loaded properly (ask if you’re unsure).
5. Start & Finish Your Print
When you are ready, click on the Slice plate button (shown with step 1), which will start preparing the file and convert it in a .gcode which the printer understands. The slicer will display a list of information related to the time it takes for the model to be printed, how much filament is used, and other more advanced details.
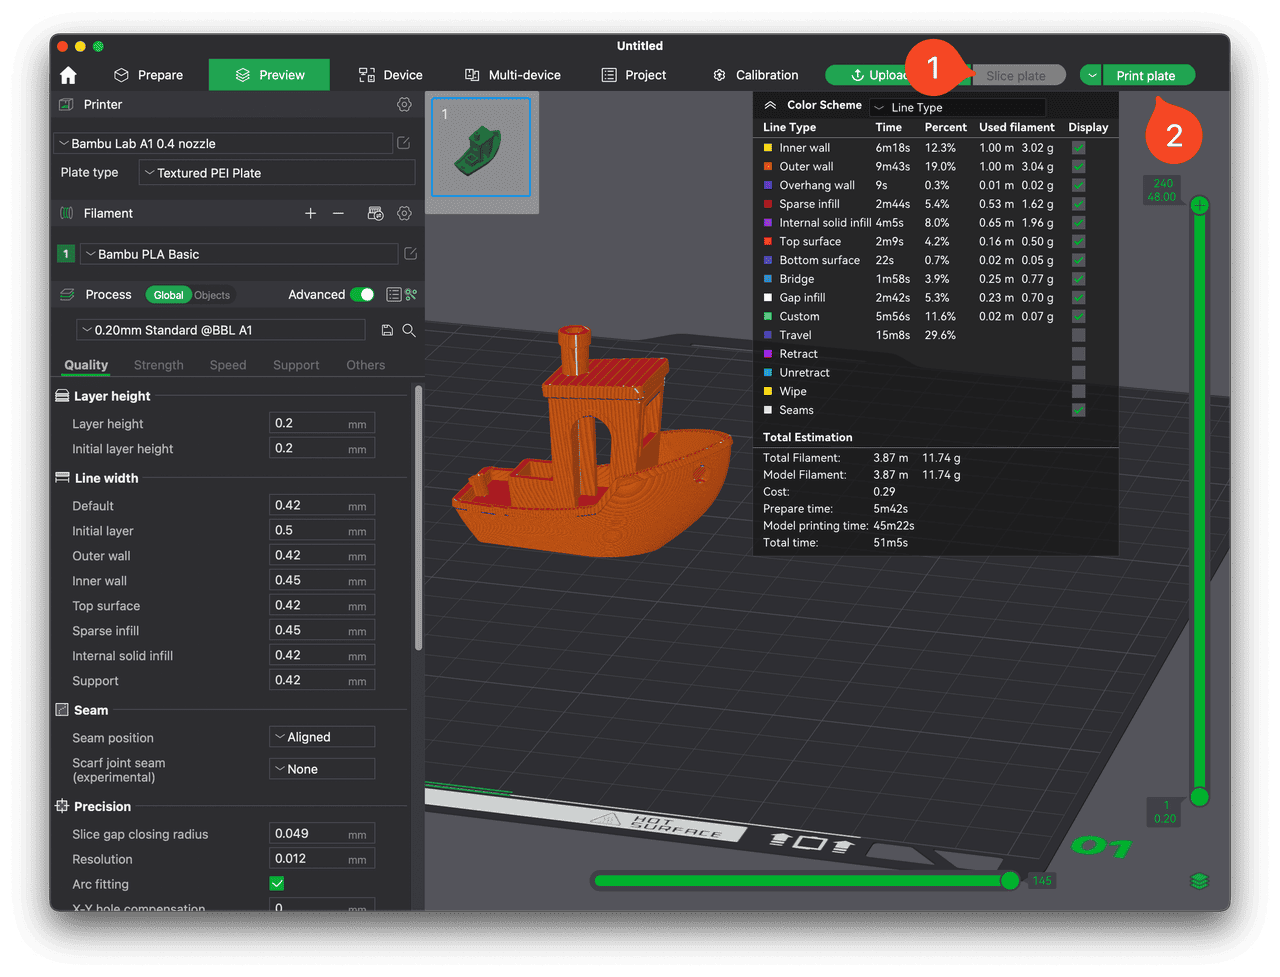
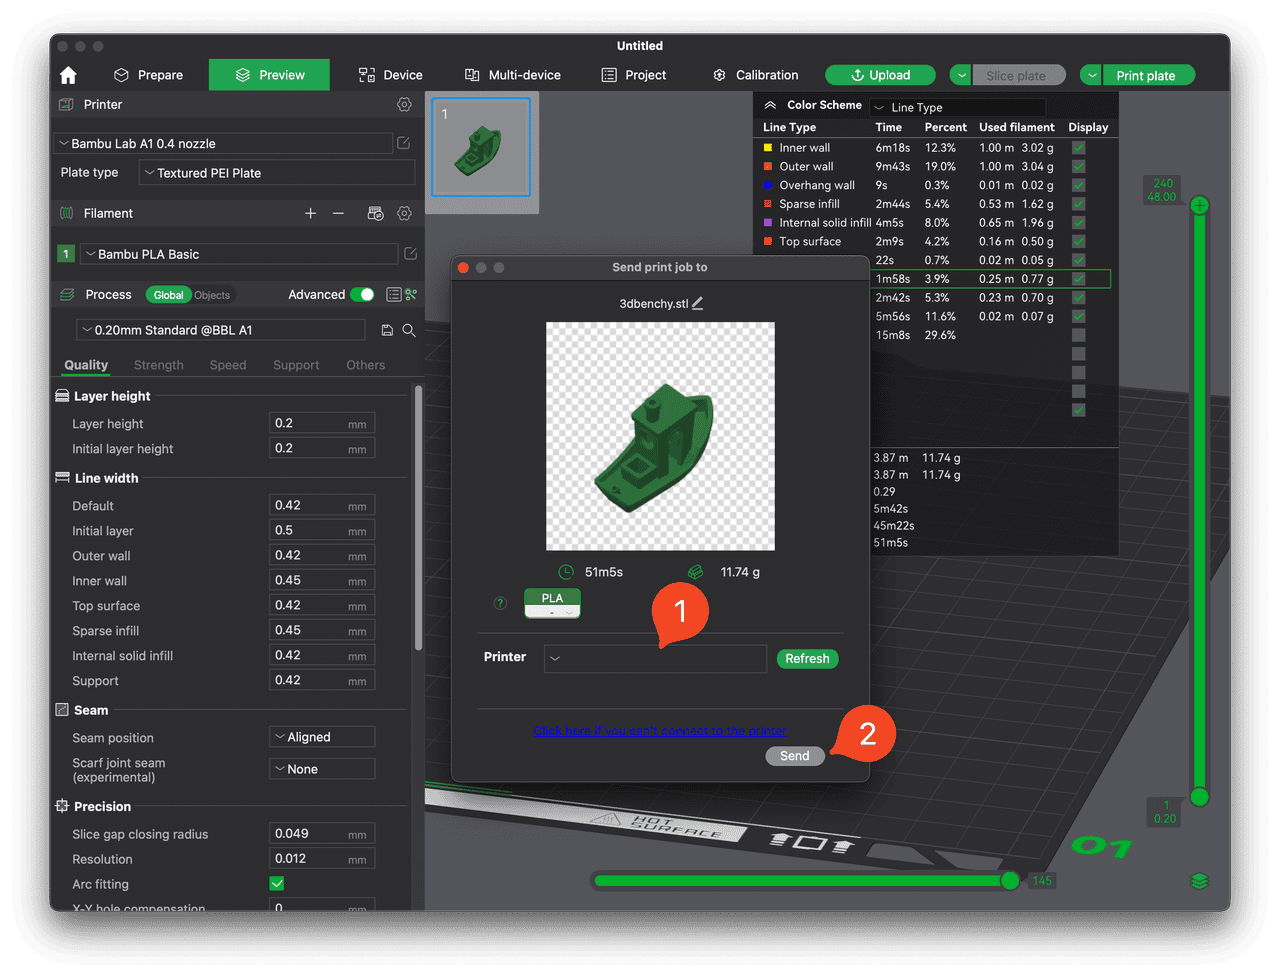
To send the model to the printer, and begin the printing process, simply click on the Print plate button (shown with step 2). This will bring up another window:
If you didn’t install the network plugin, you’ll need to load the .gcode onto a SD card and select the file manually from the printer.
If you want to know how to print wirelessly, checkout the other guide called “How to add/connect to a Bambu 3D printer?”
Select the printer from the list.
0001 is the one on the left by the door, 0002 is the one on the right by the wooden cabinet
Click the Send button.
Once you click Send, the file transfer between your computer and the printer will begin. In a few minutes, the A1 will start printing the model, and all that's left is to wait for the model to be completed! REMEMBER! Don’t touch the build plate with your oily fingers after it’s done, only the edges if you need to remove the plate to bend it. Use a tool to remove it if it’s stuck.
🔥 Parts of the printer reach up to 200°C - handle with care!
A video that explains the process is also available below:
https://youtu.be/pnd1CZ-Dp34?si=no7QeyZLtz7CanWg