
How to Scan Documents to the FileServer at A-JIS Campuses
Instructions for scanning documents using the Canon MFP at A-JIS campuses and sending them to the FileServer where the data can then be retrieved.
Retrieving your documents from the fileserver
When you are at Hikarigaoka/Meguro:
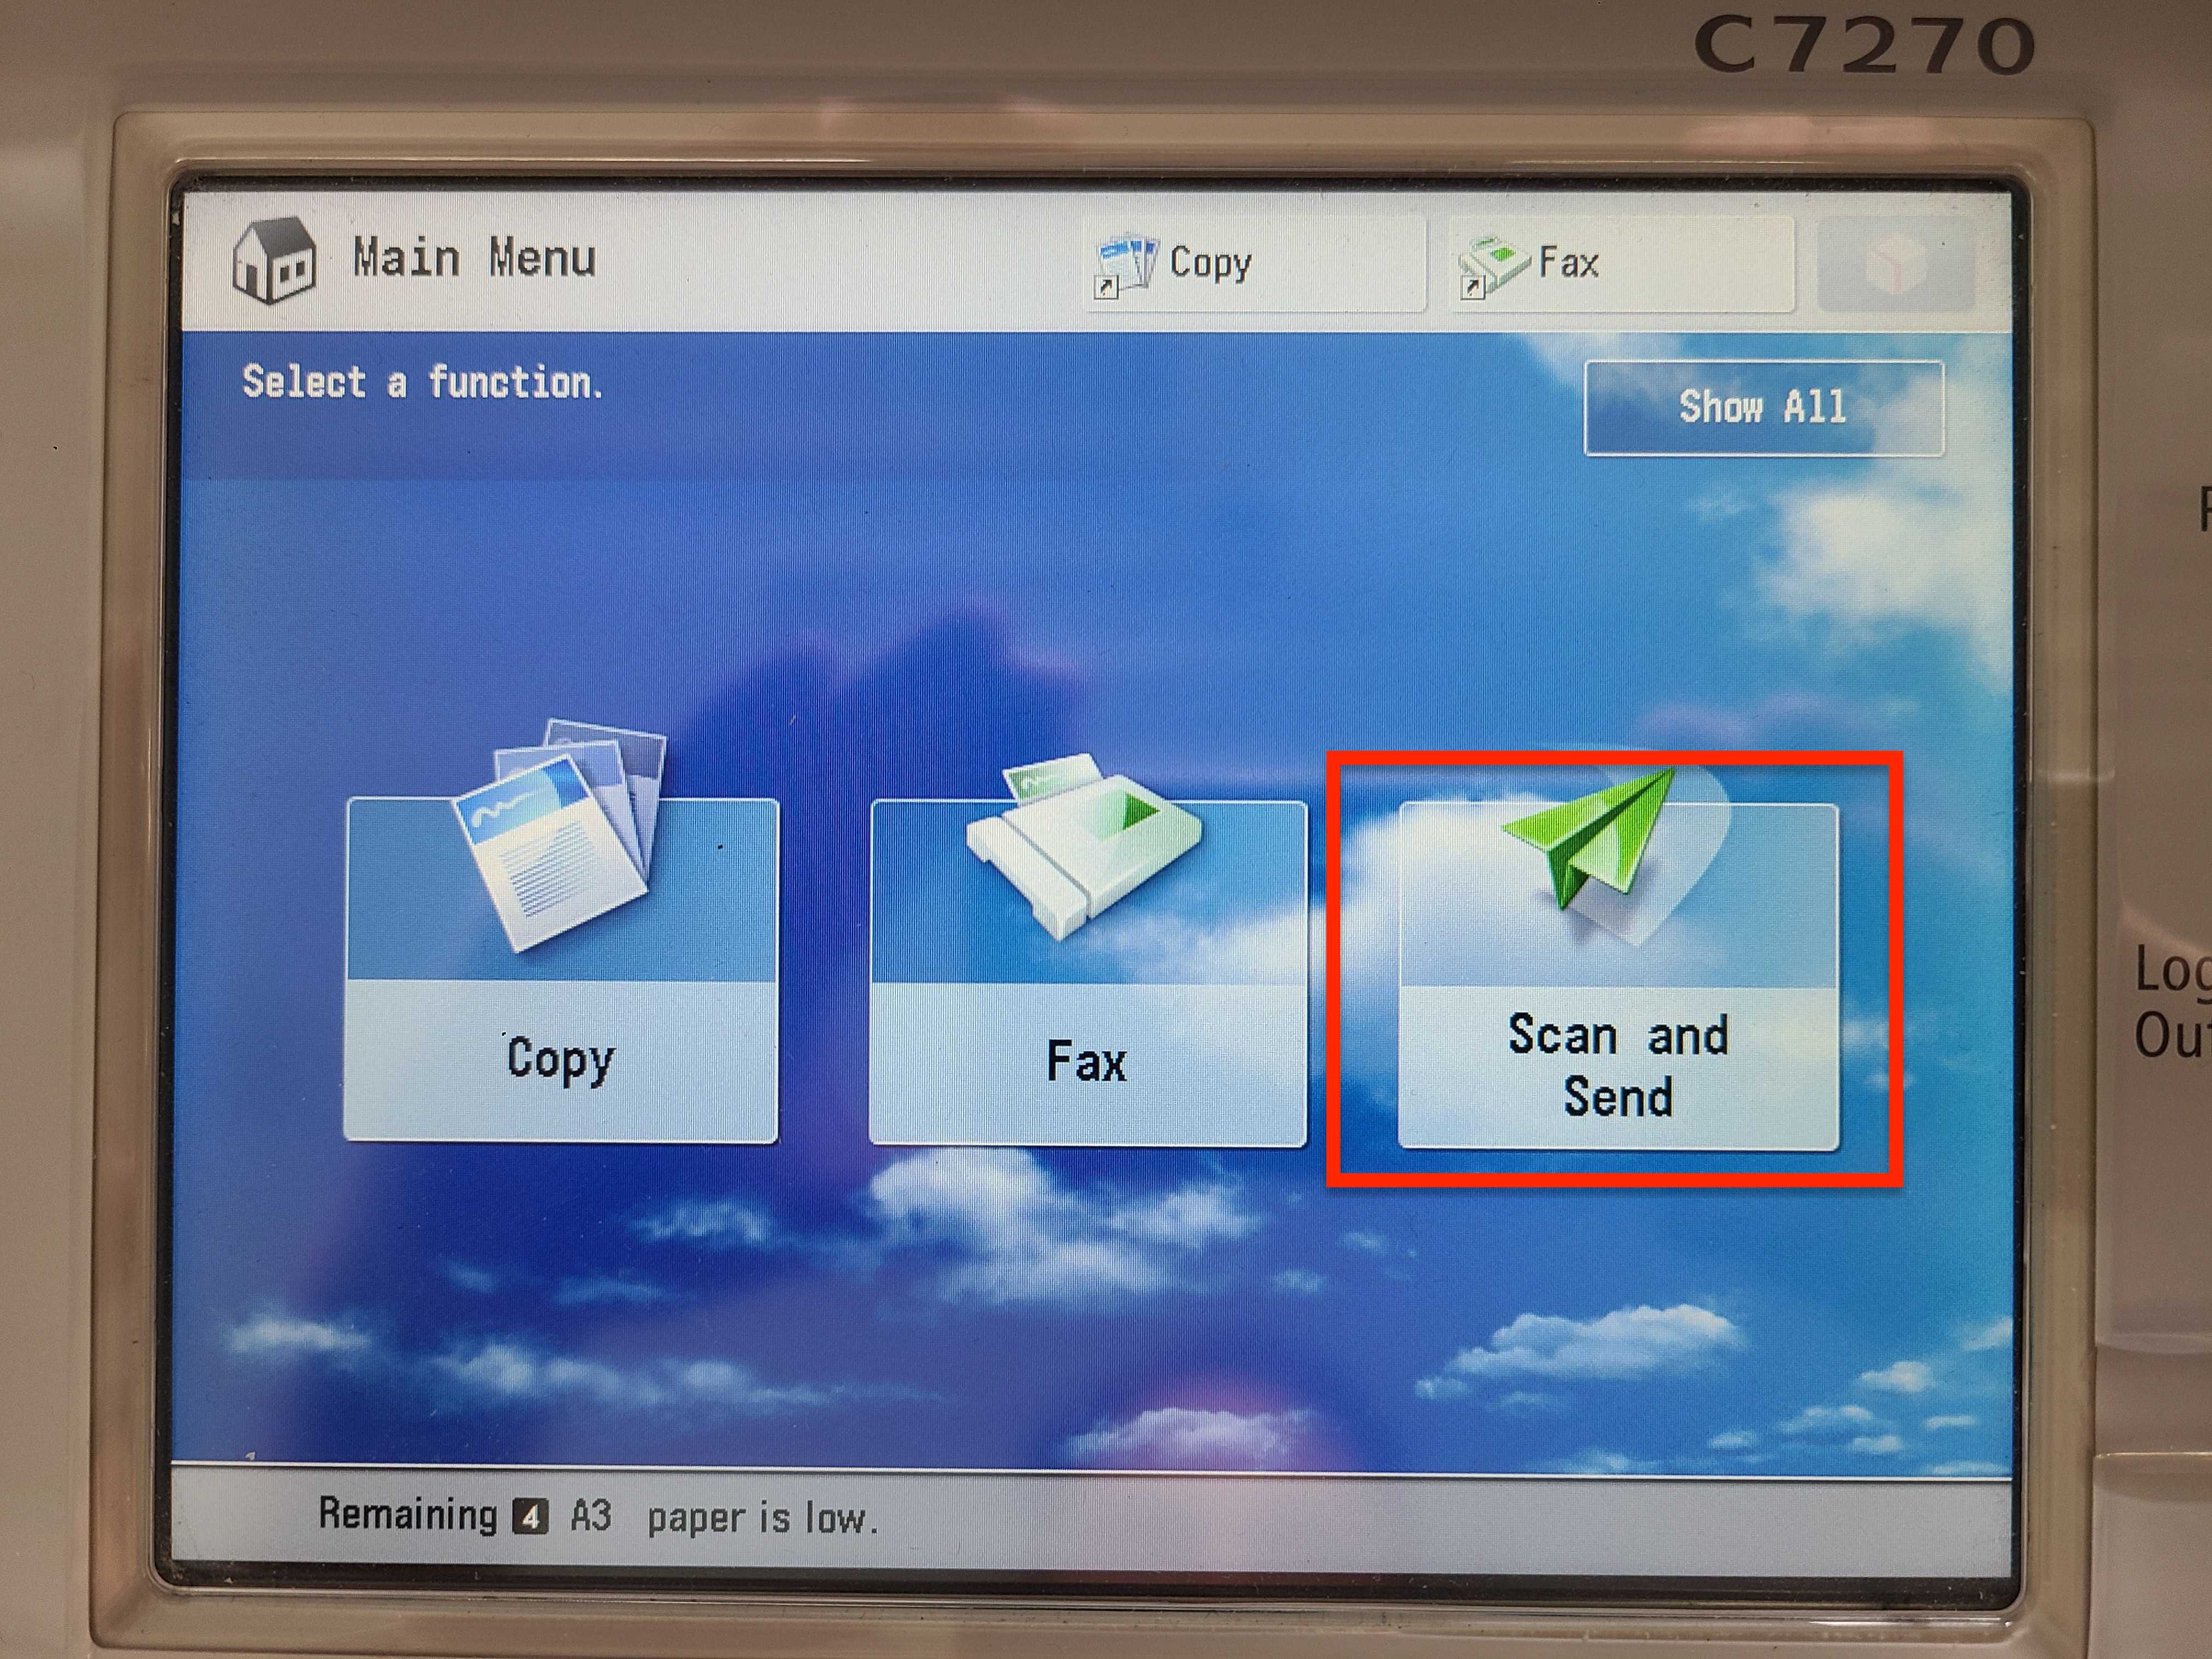
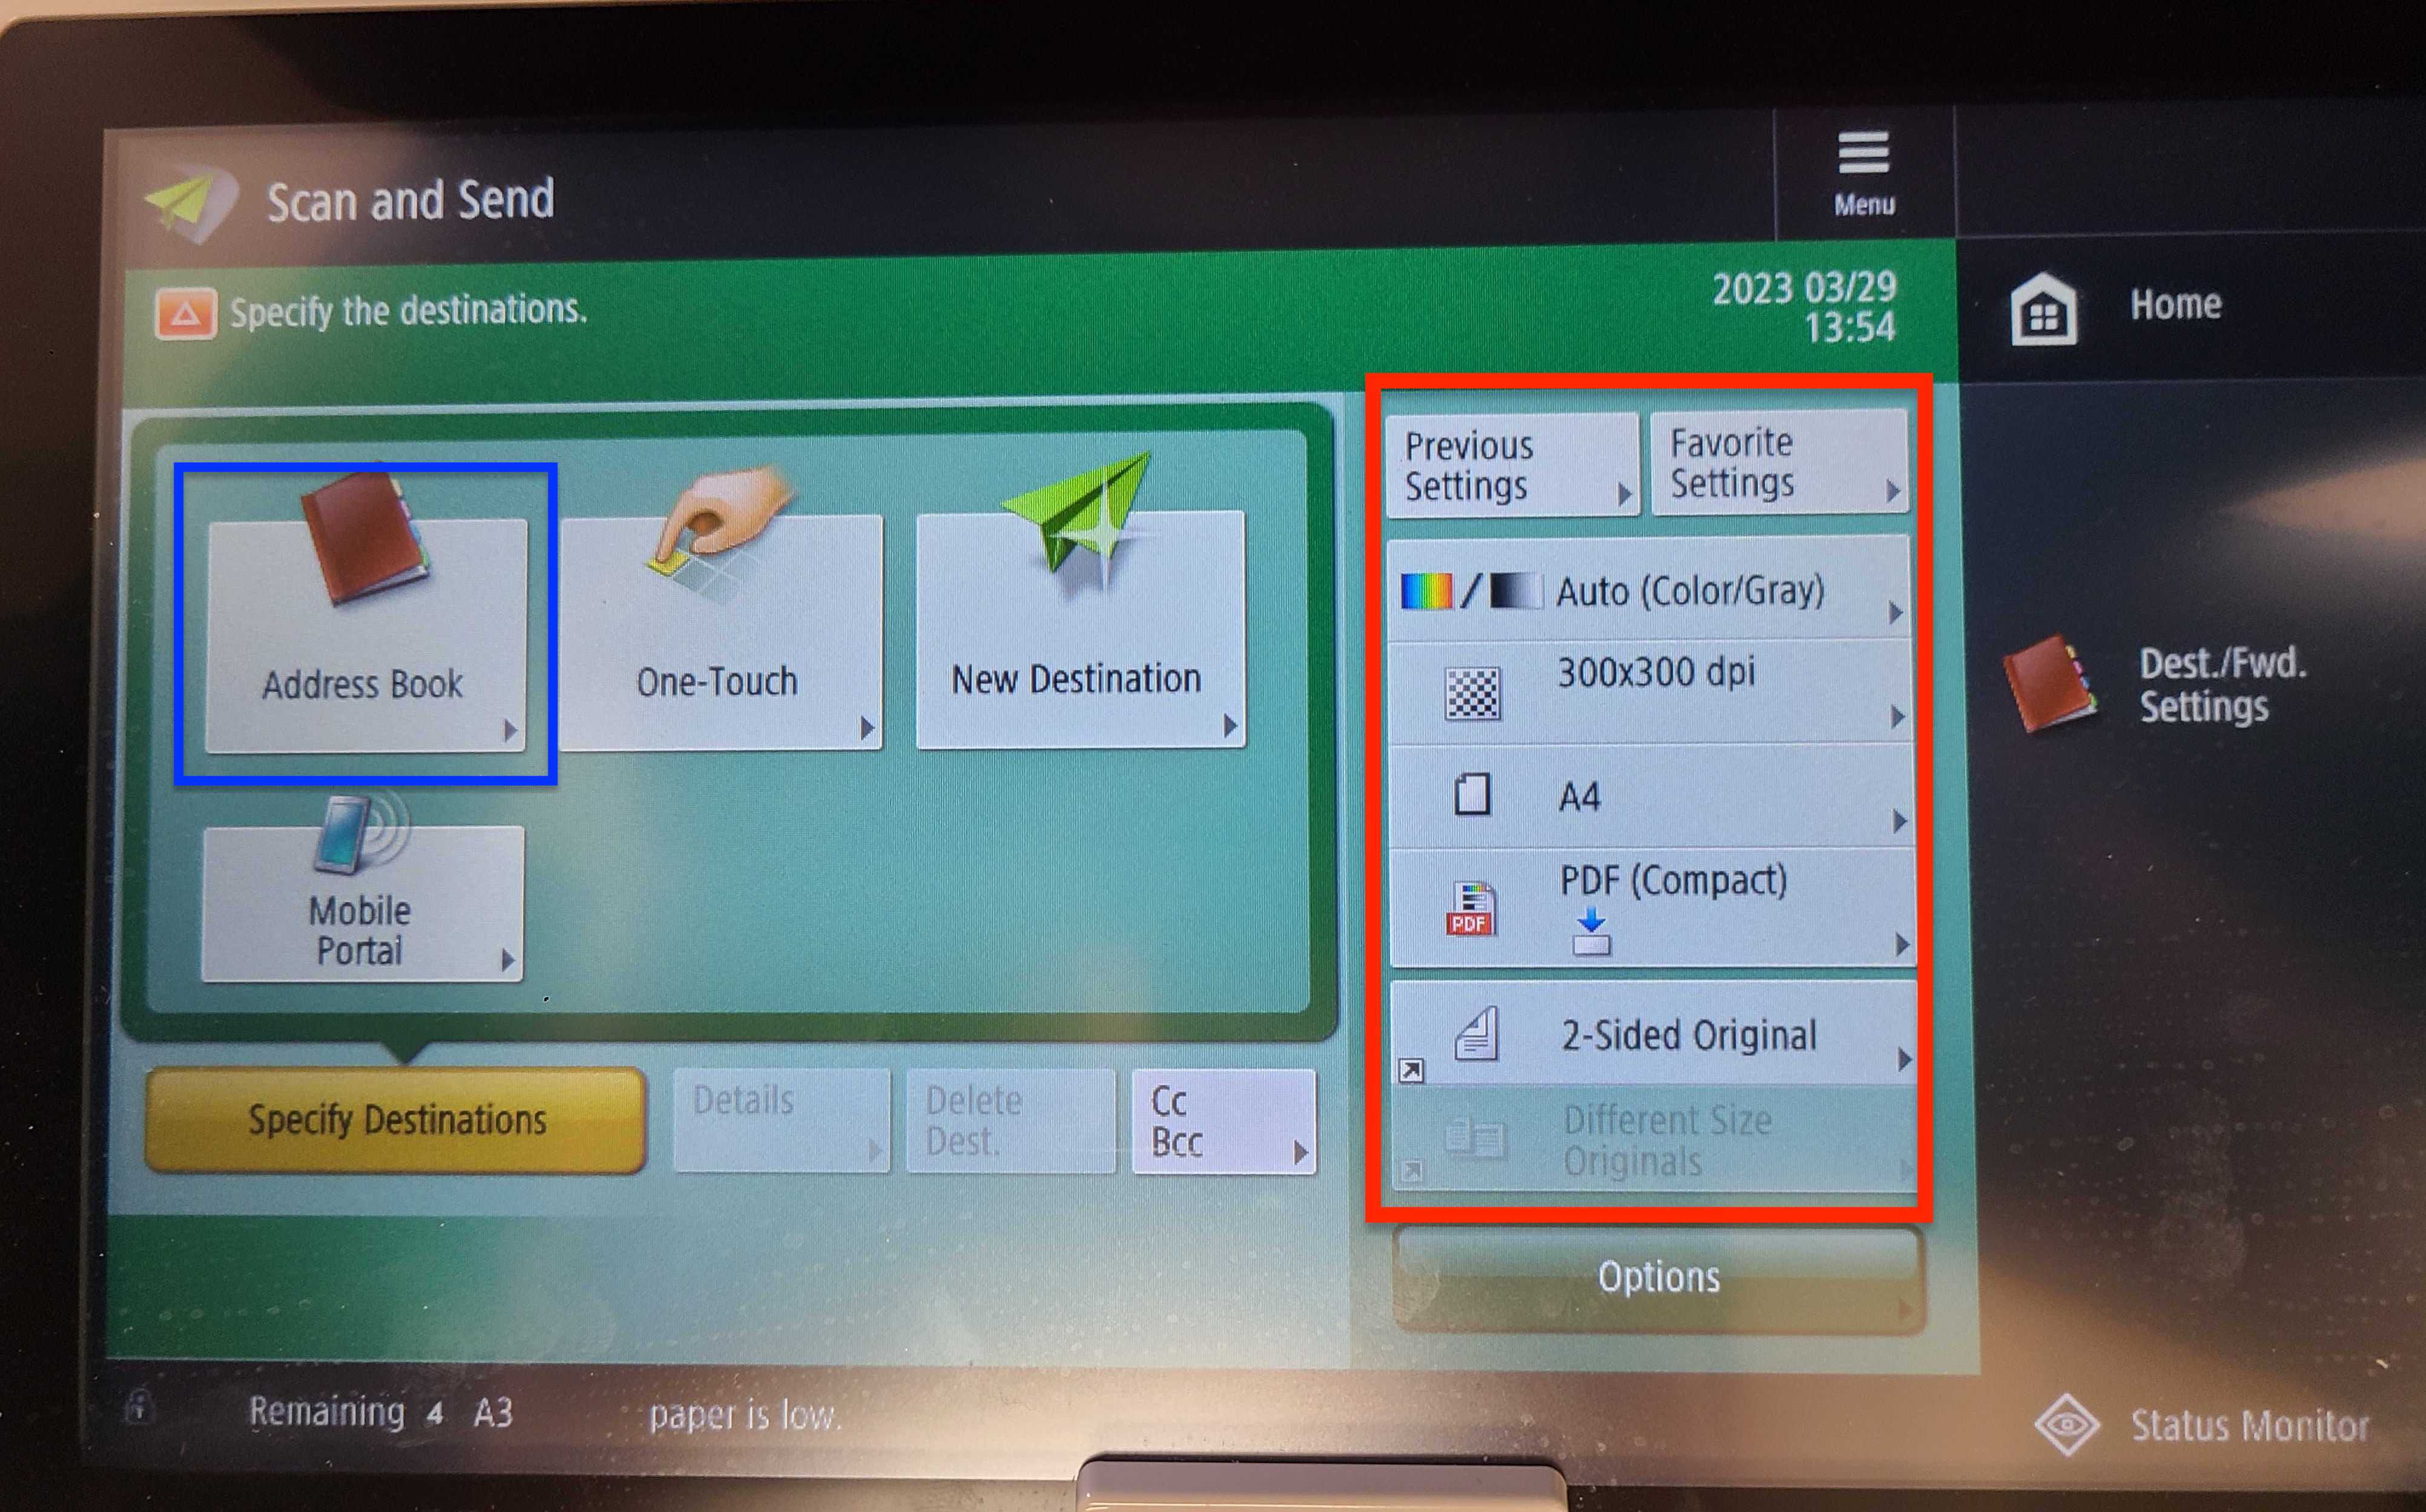
Press Scan and Send.
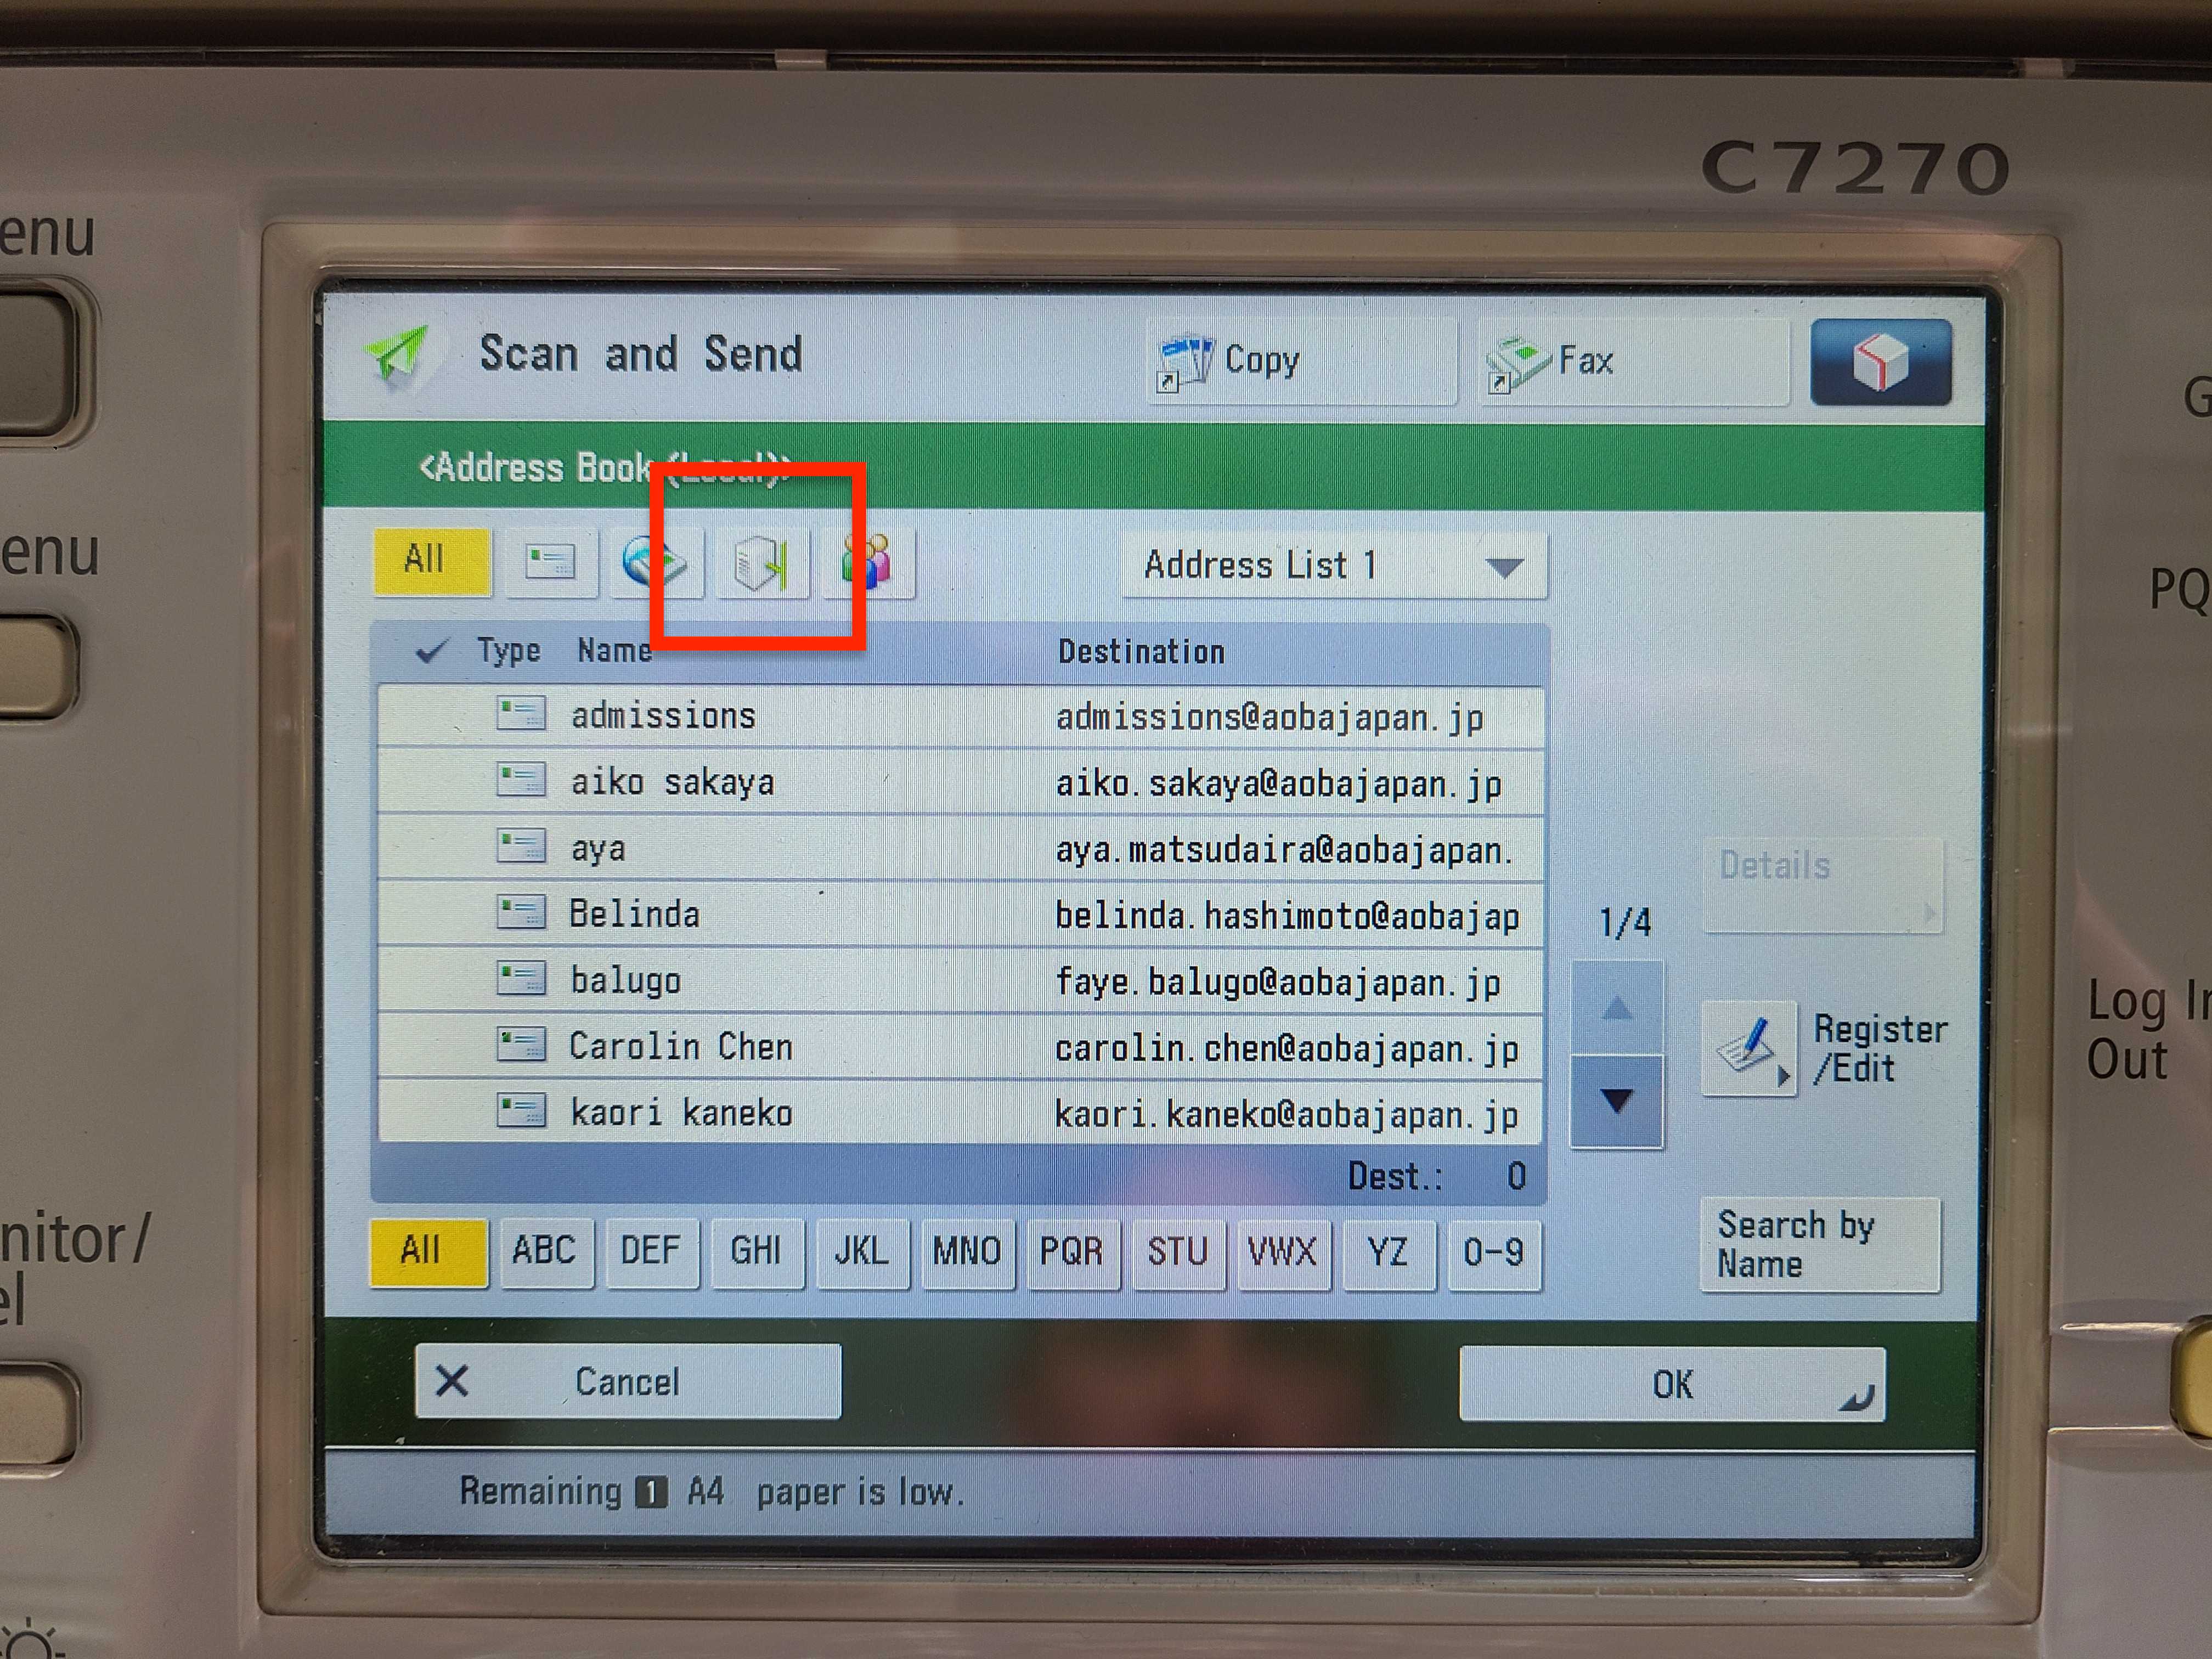
Press Address Book.

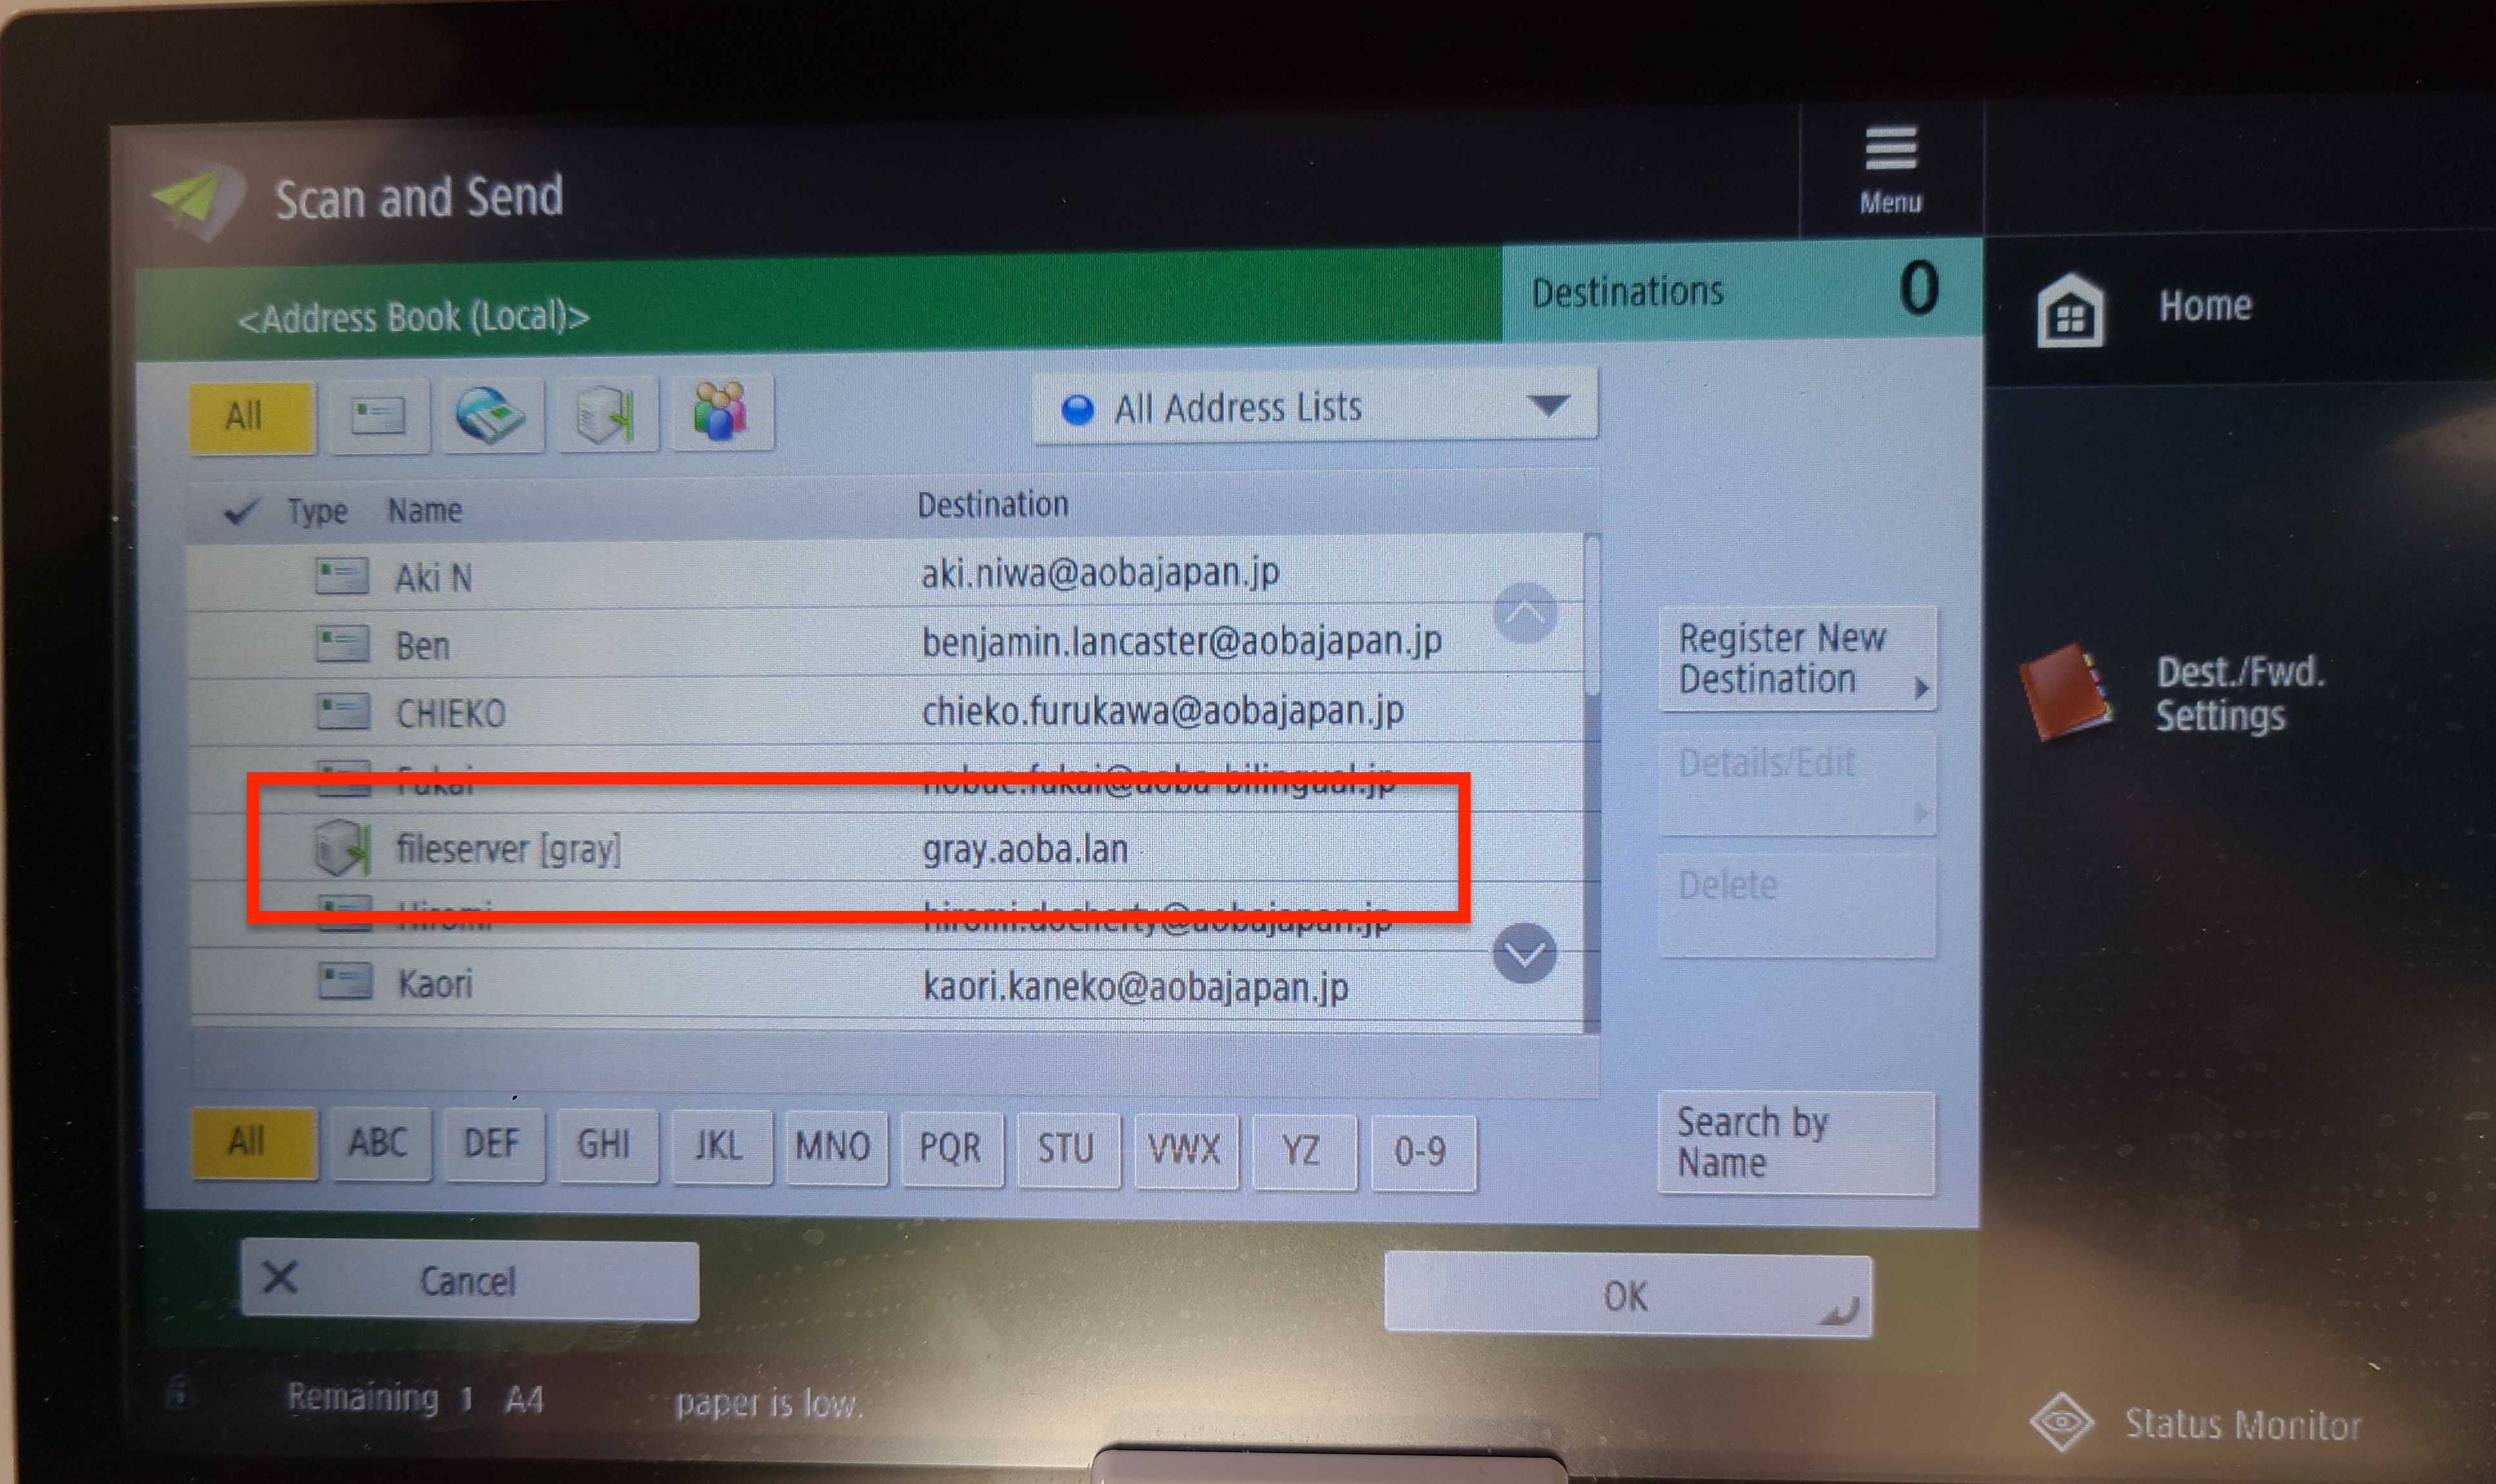
Press the fileserver icon.
Press the fileserver address.
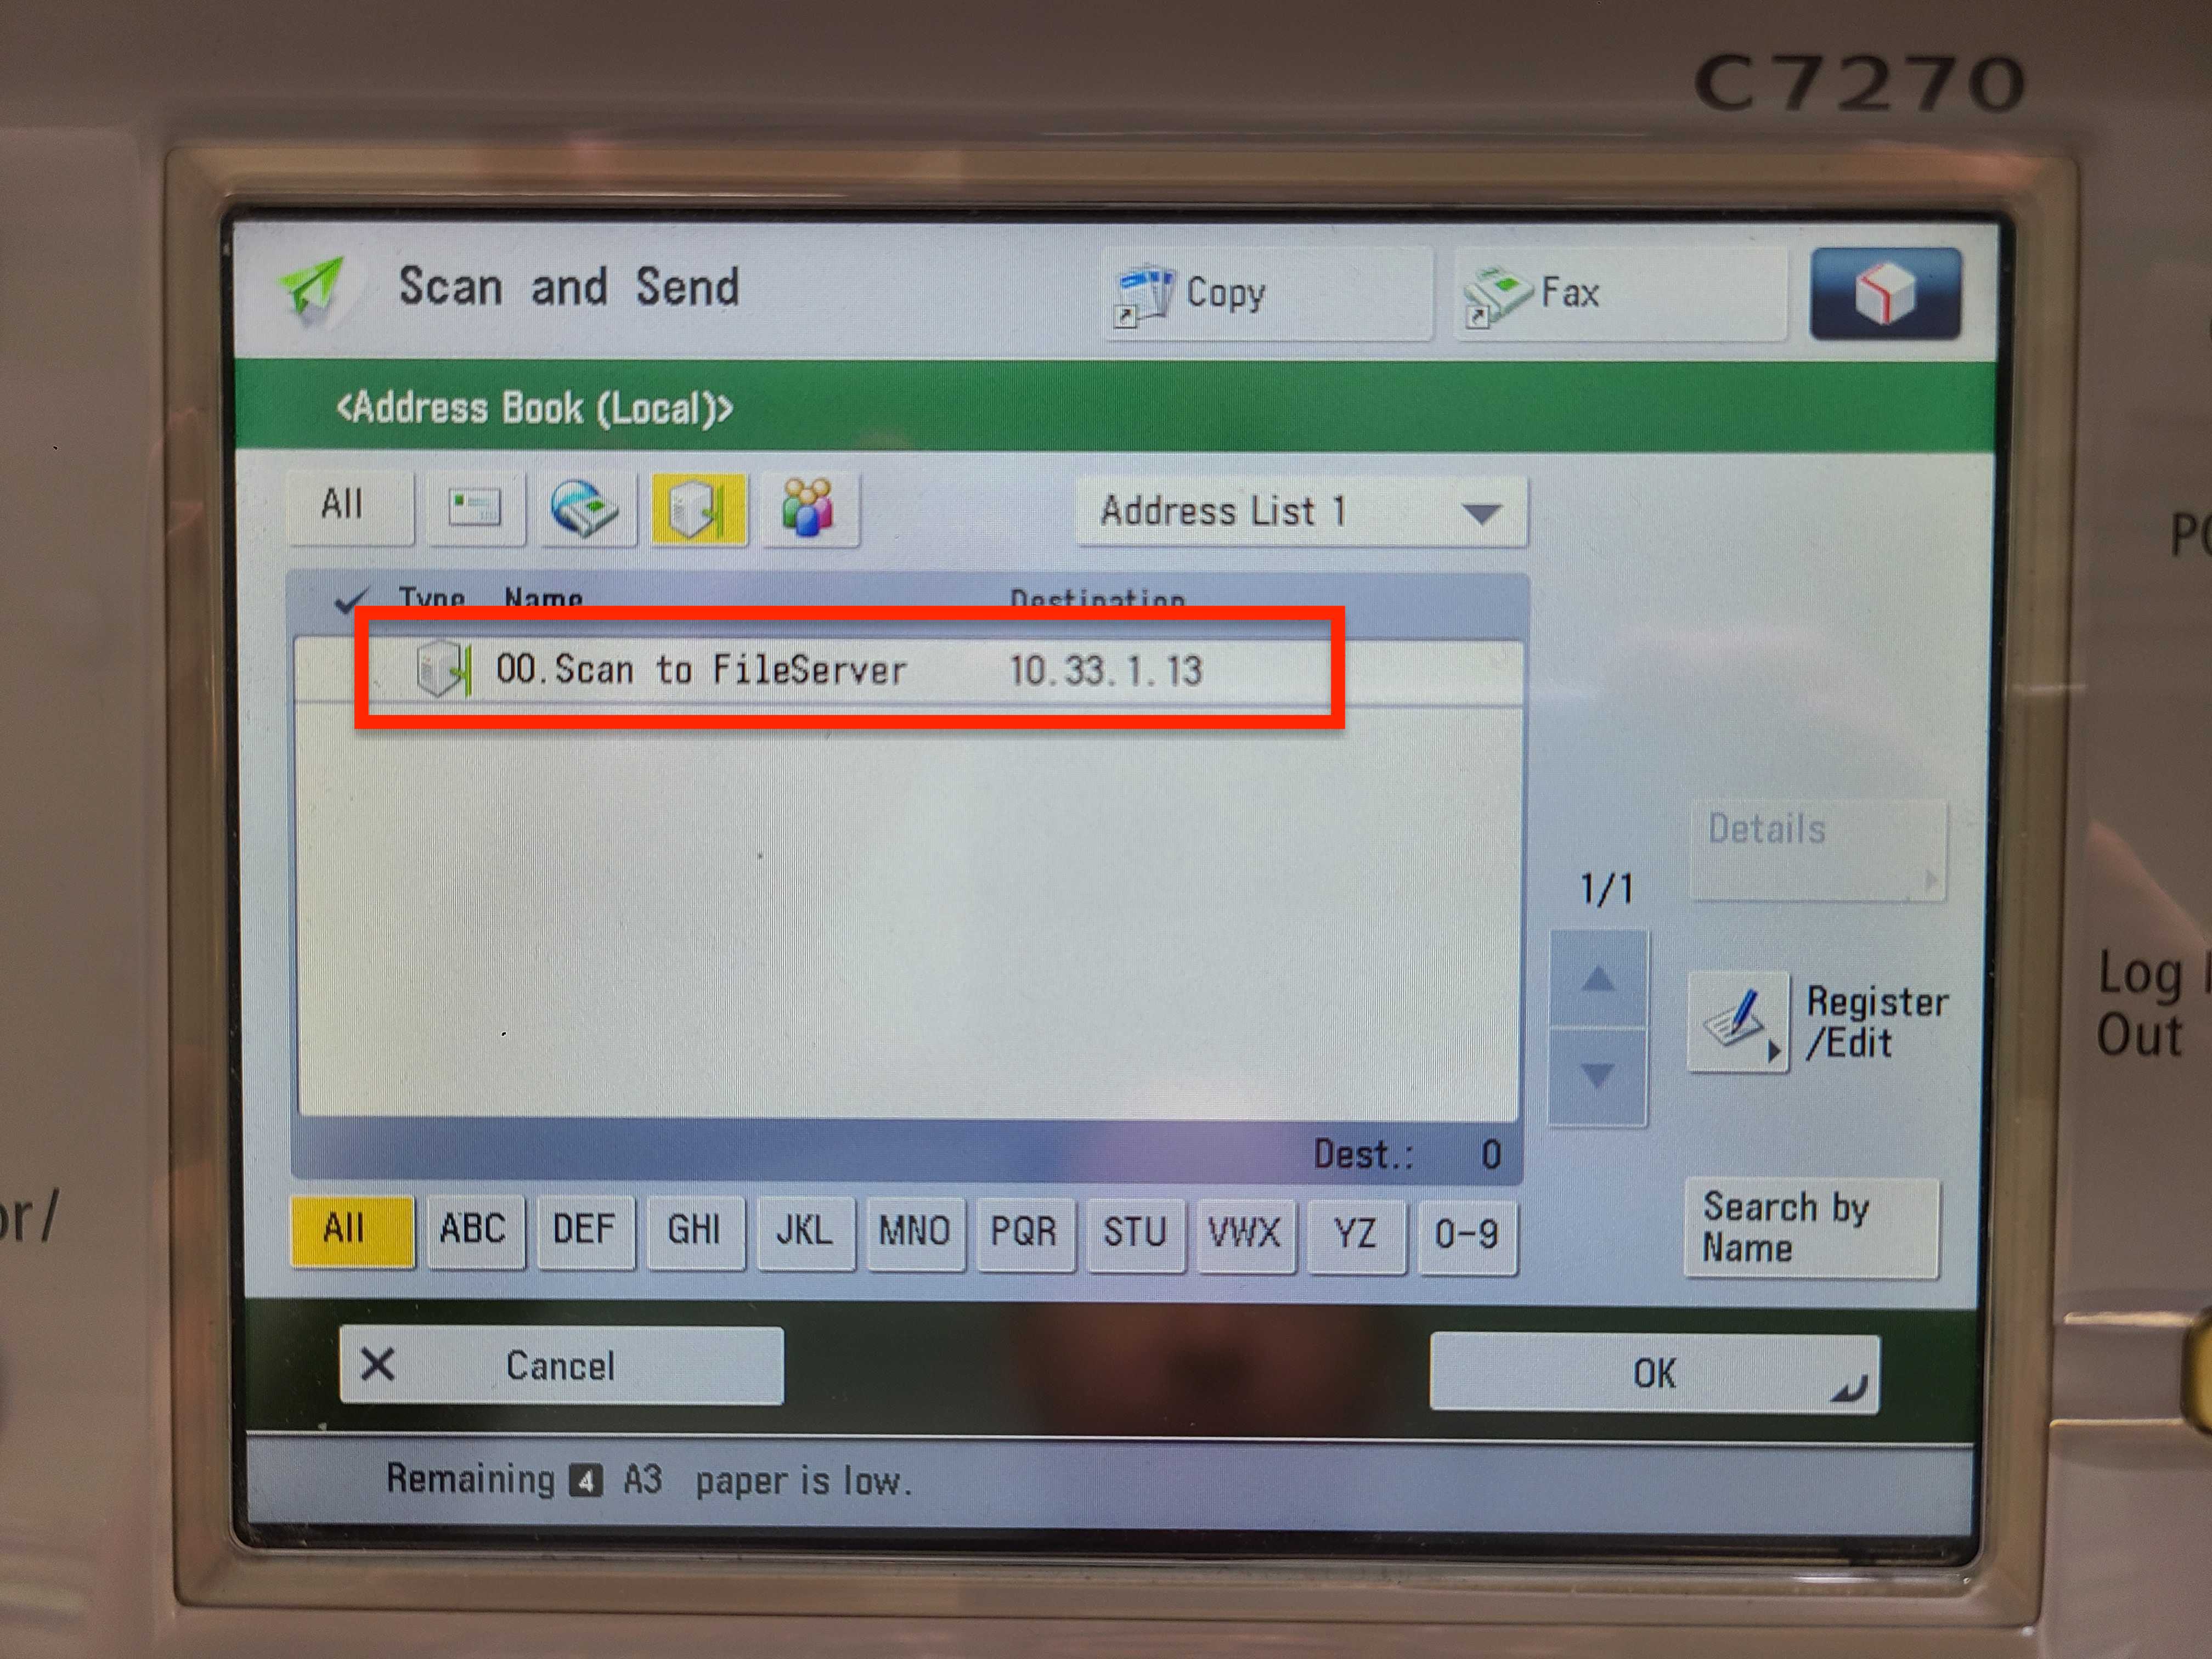
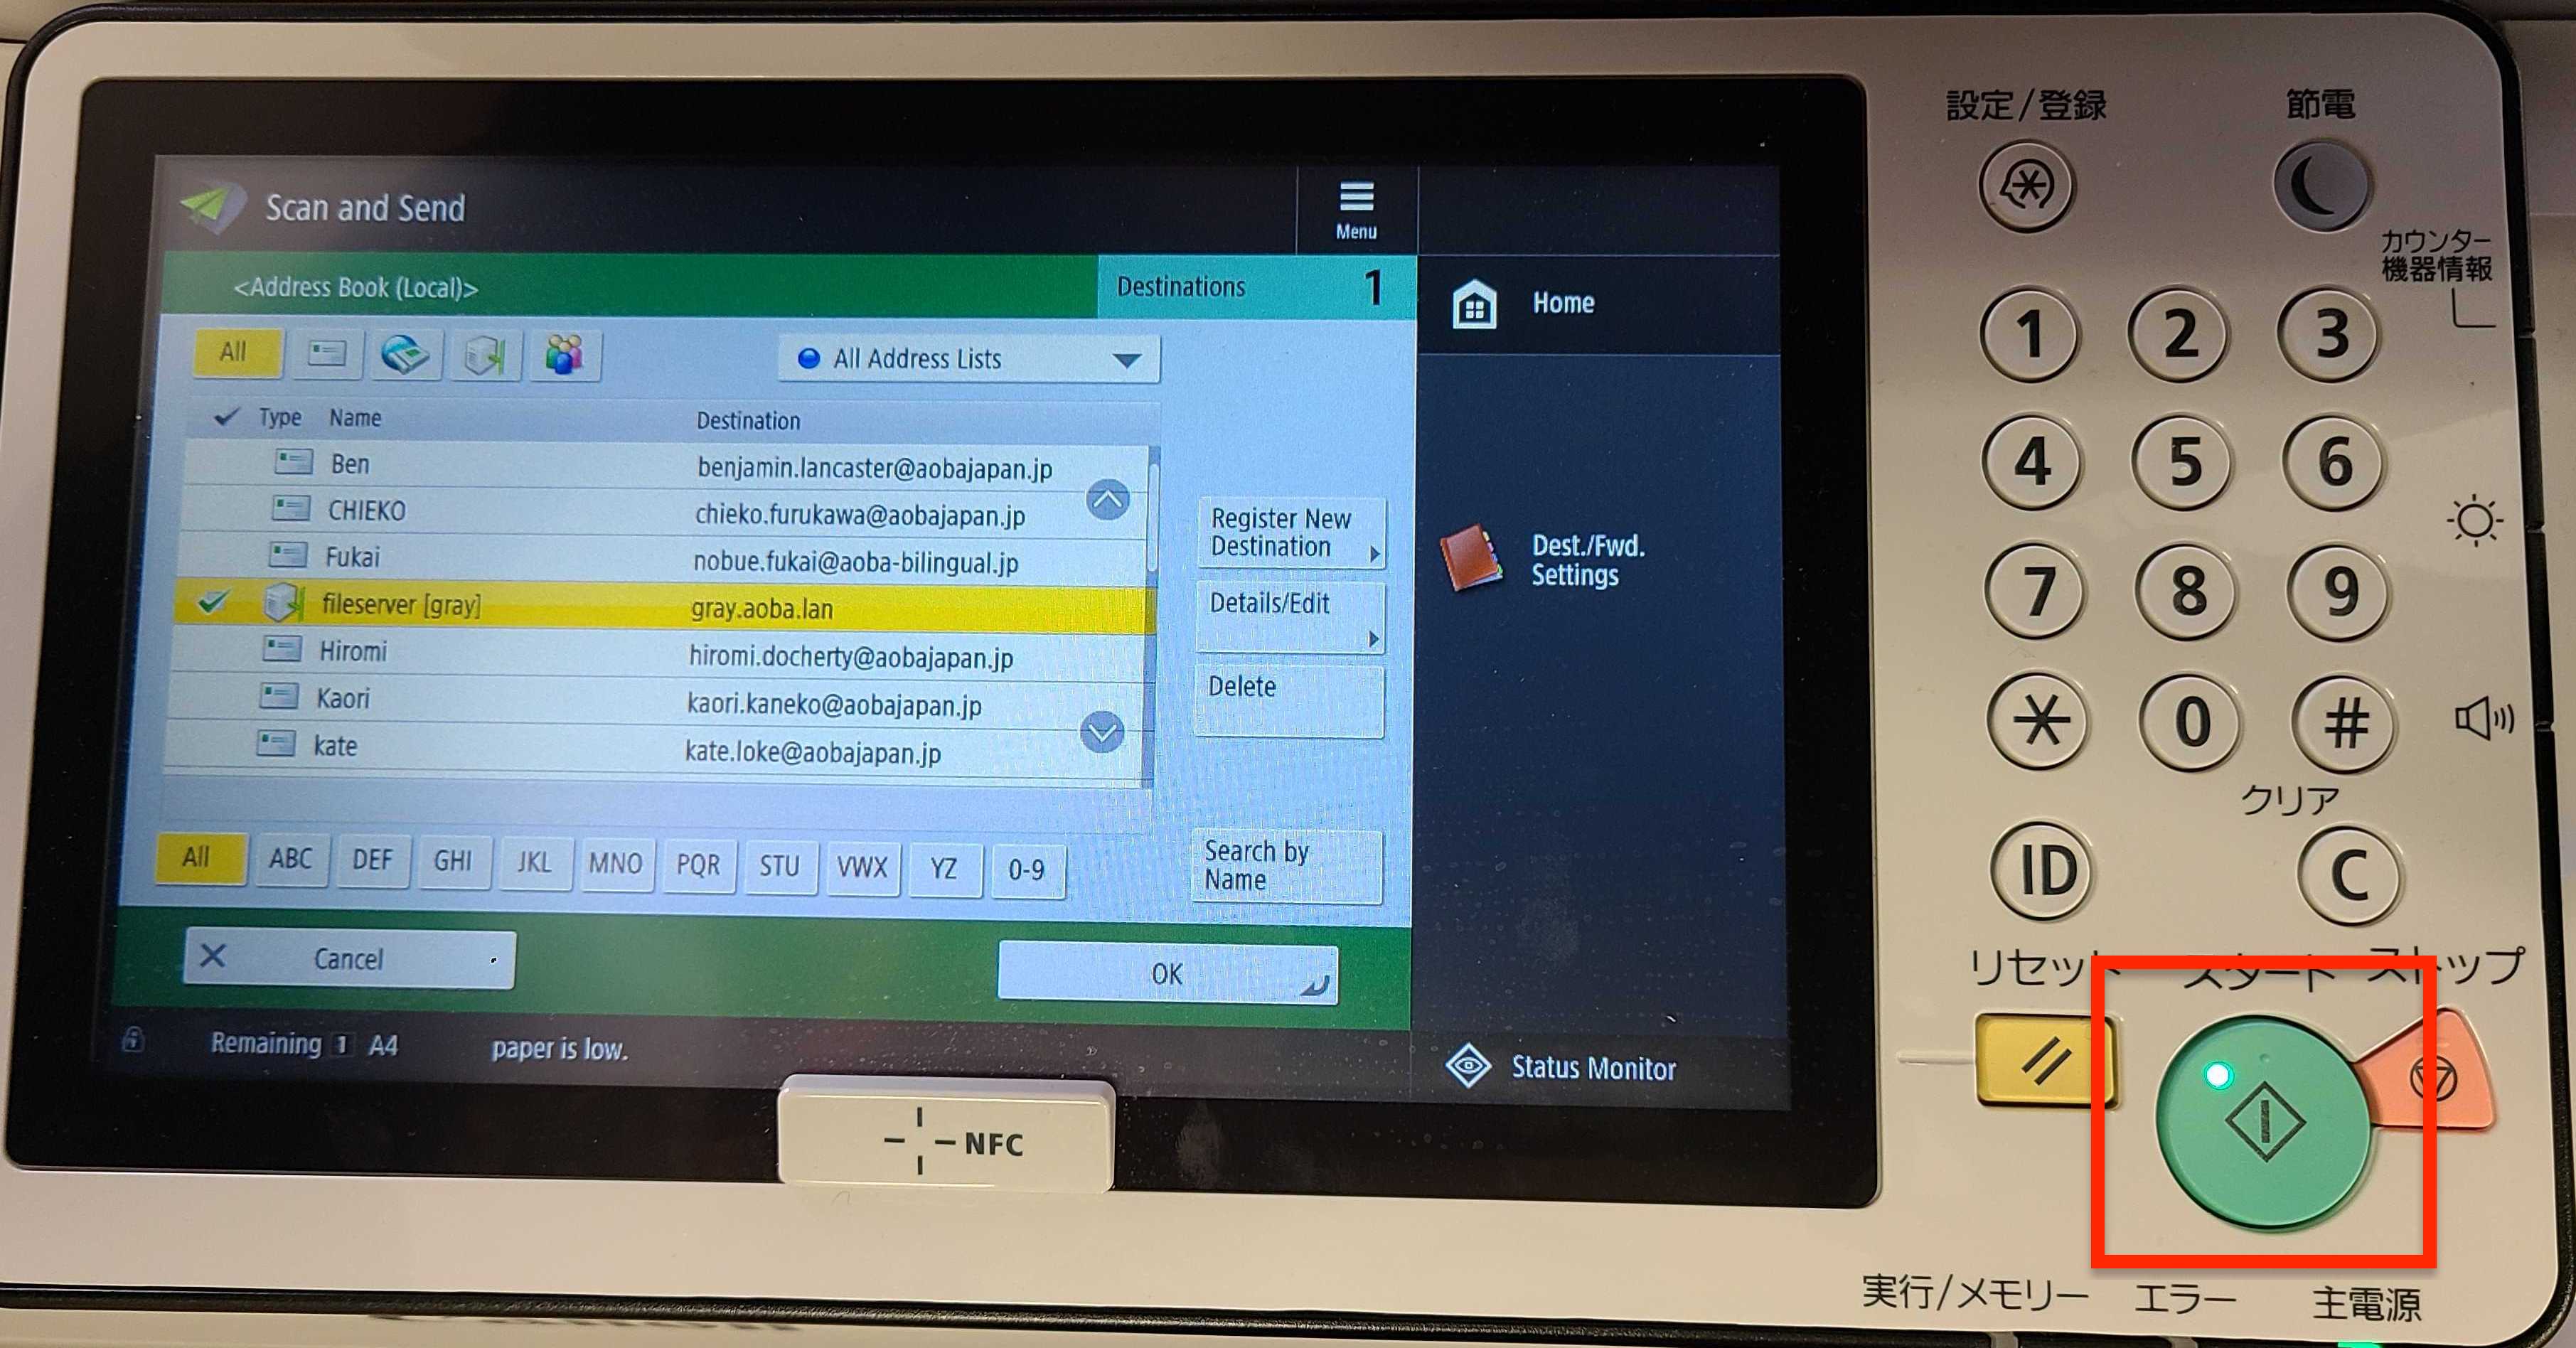
Press the green Start button.

When you are at Bunkyo:
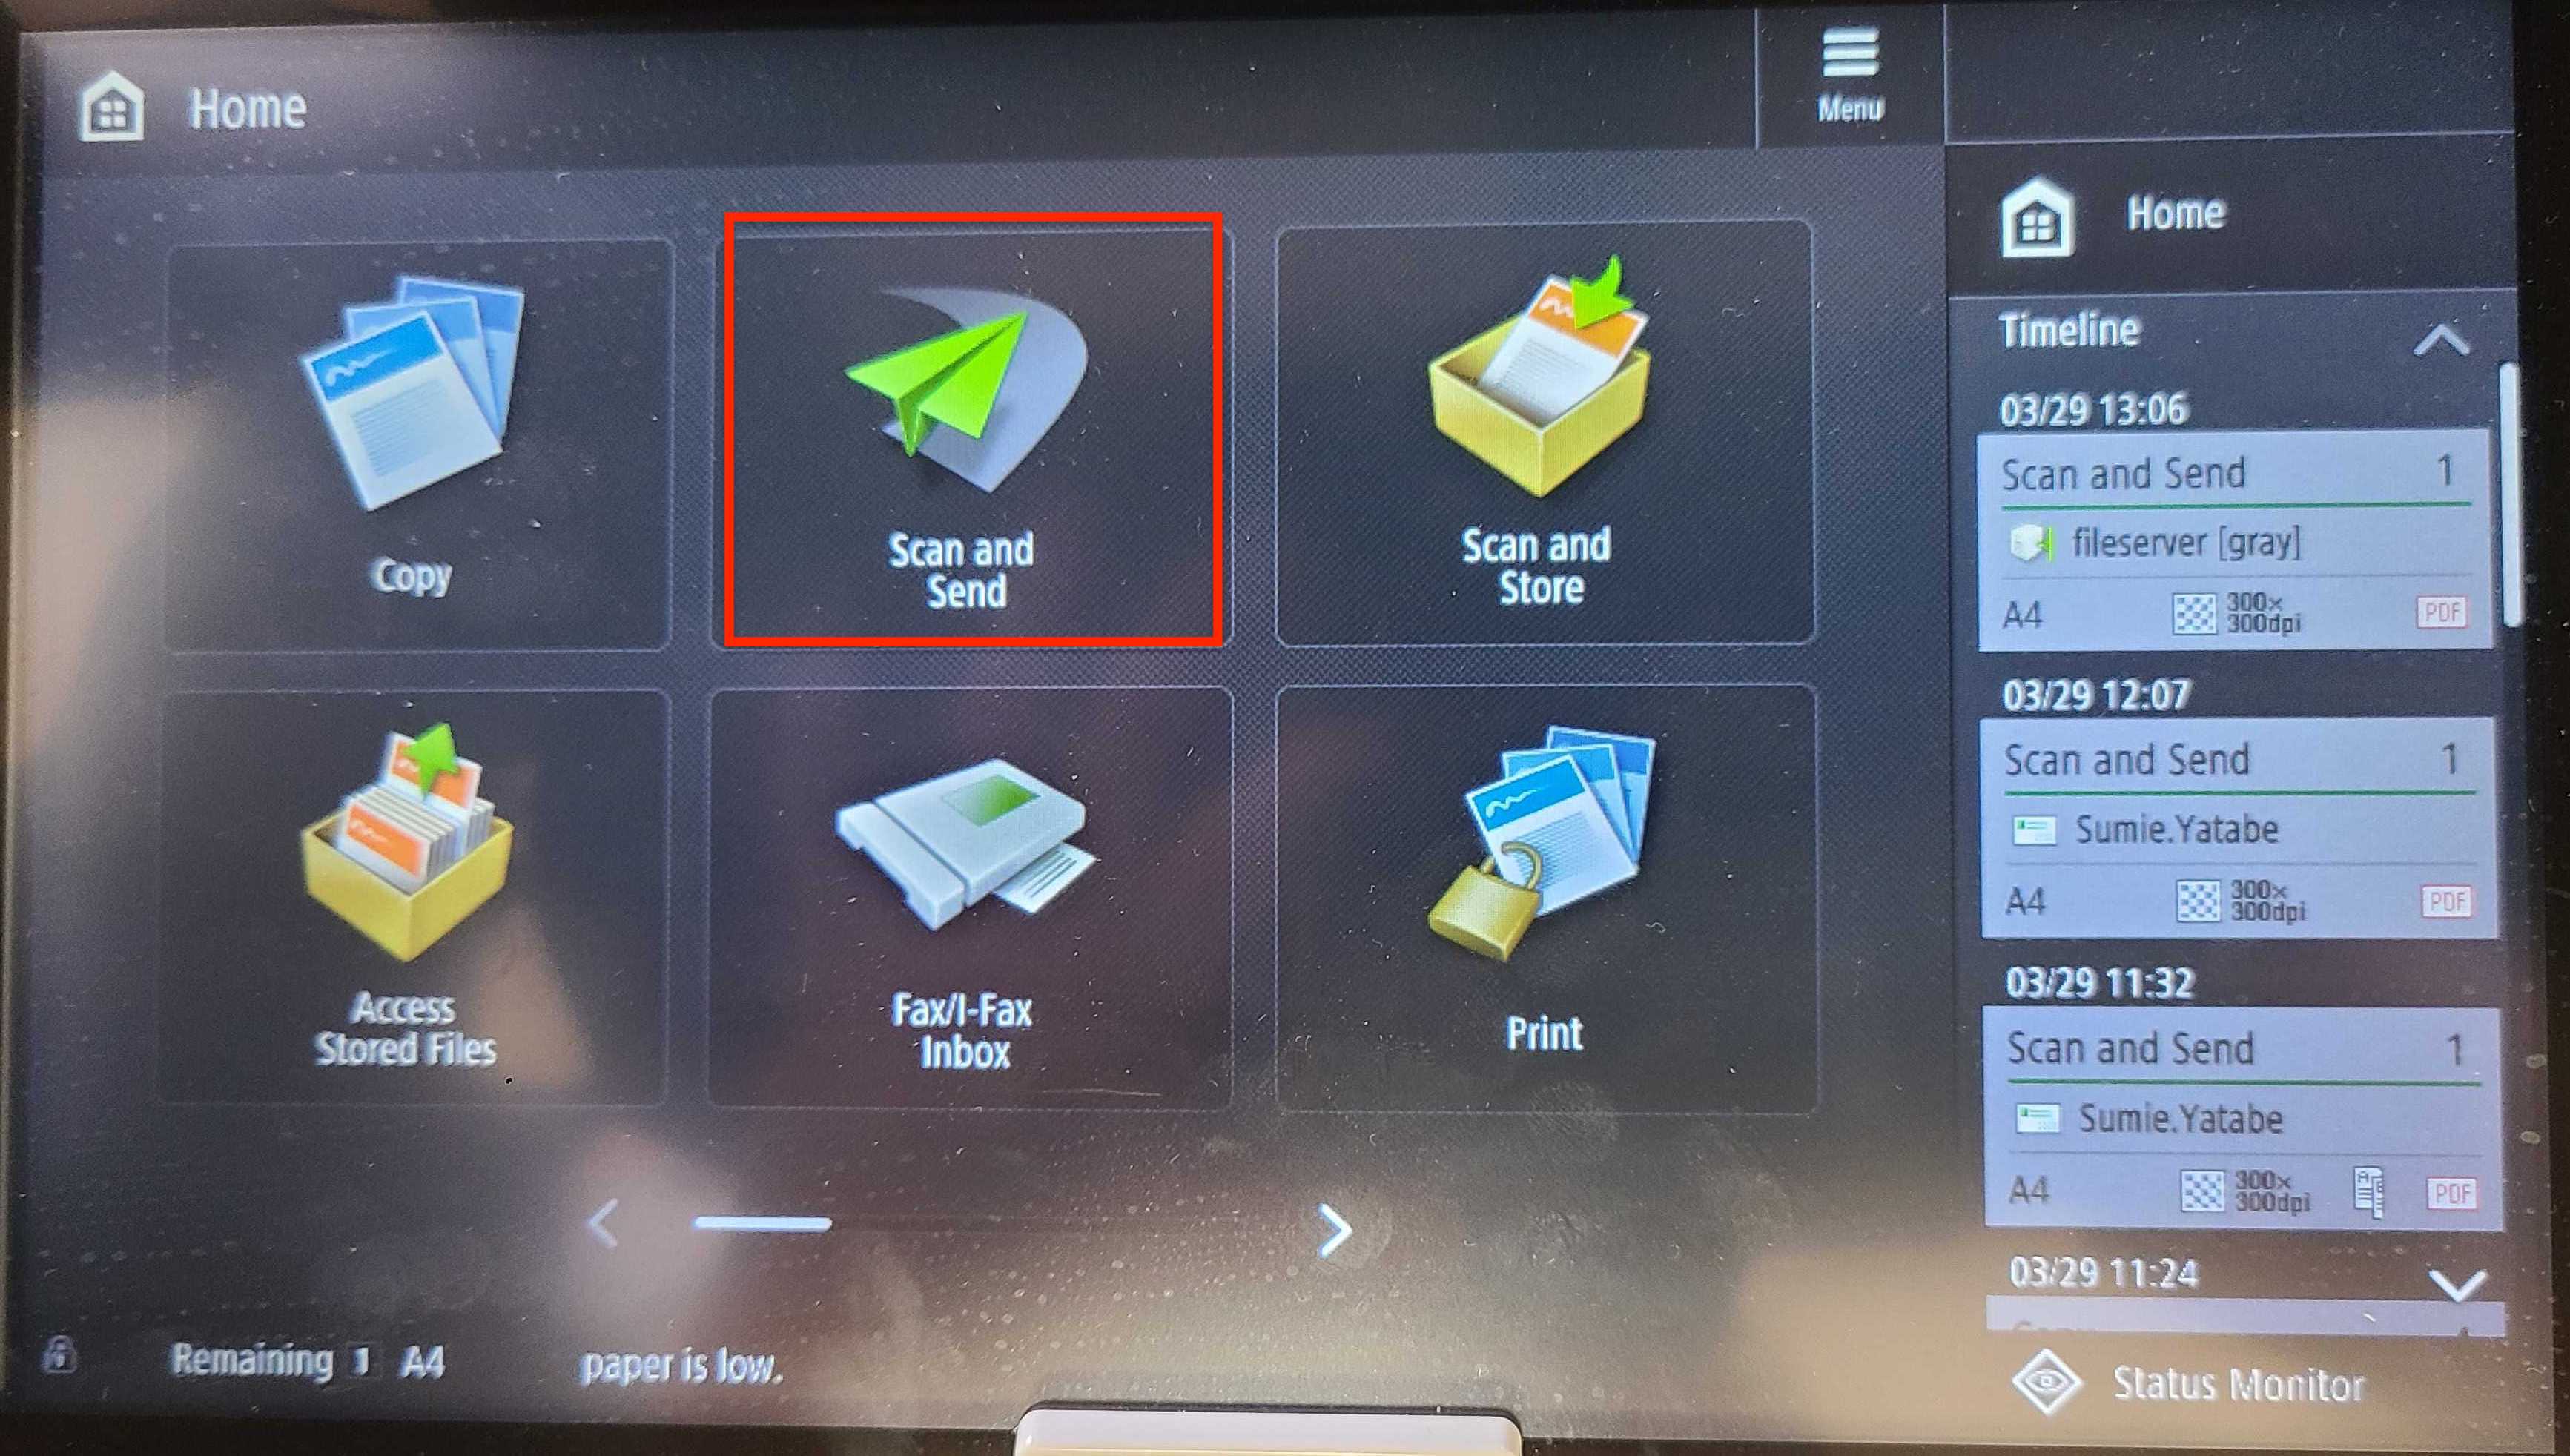
Press Scan and Send.
Choose your scan settings. Then press Address Book.
Select File Server.
Press the green Start button.
To retrieve your documents on MacOS:
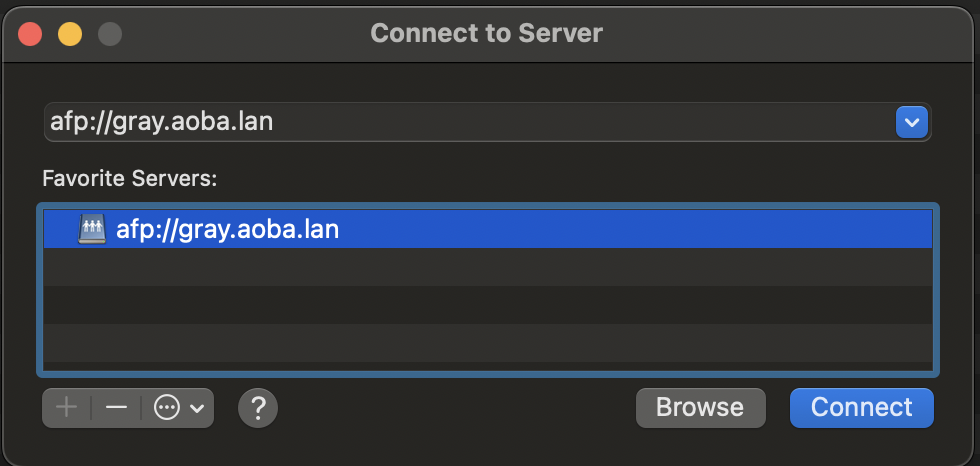
Open Finder. Click “Go” at the top of the taskbar, and select “Connect to Server”:
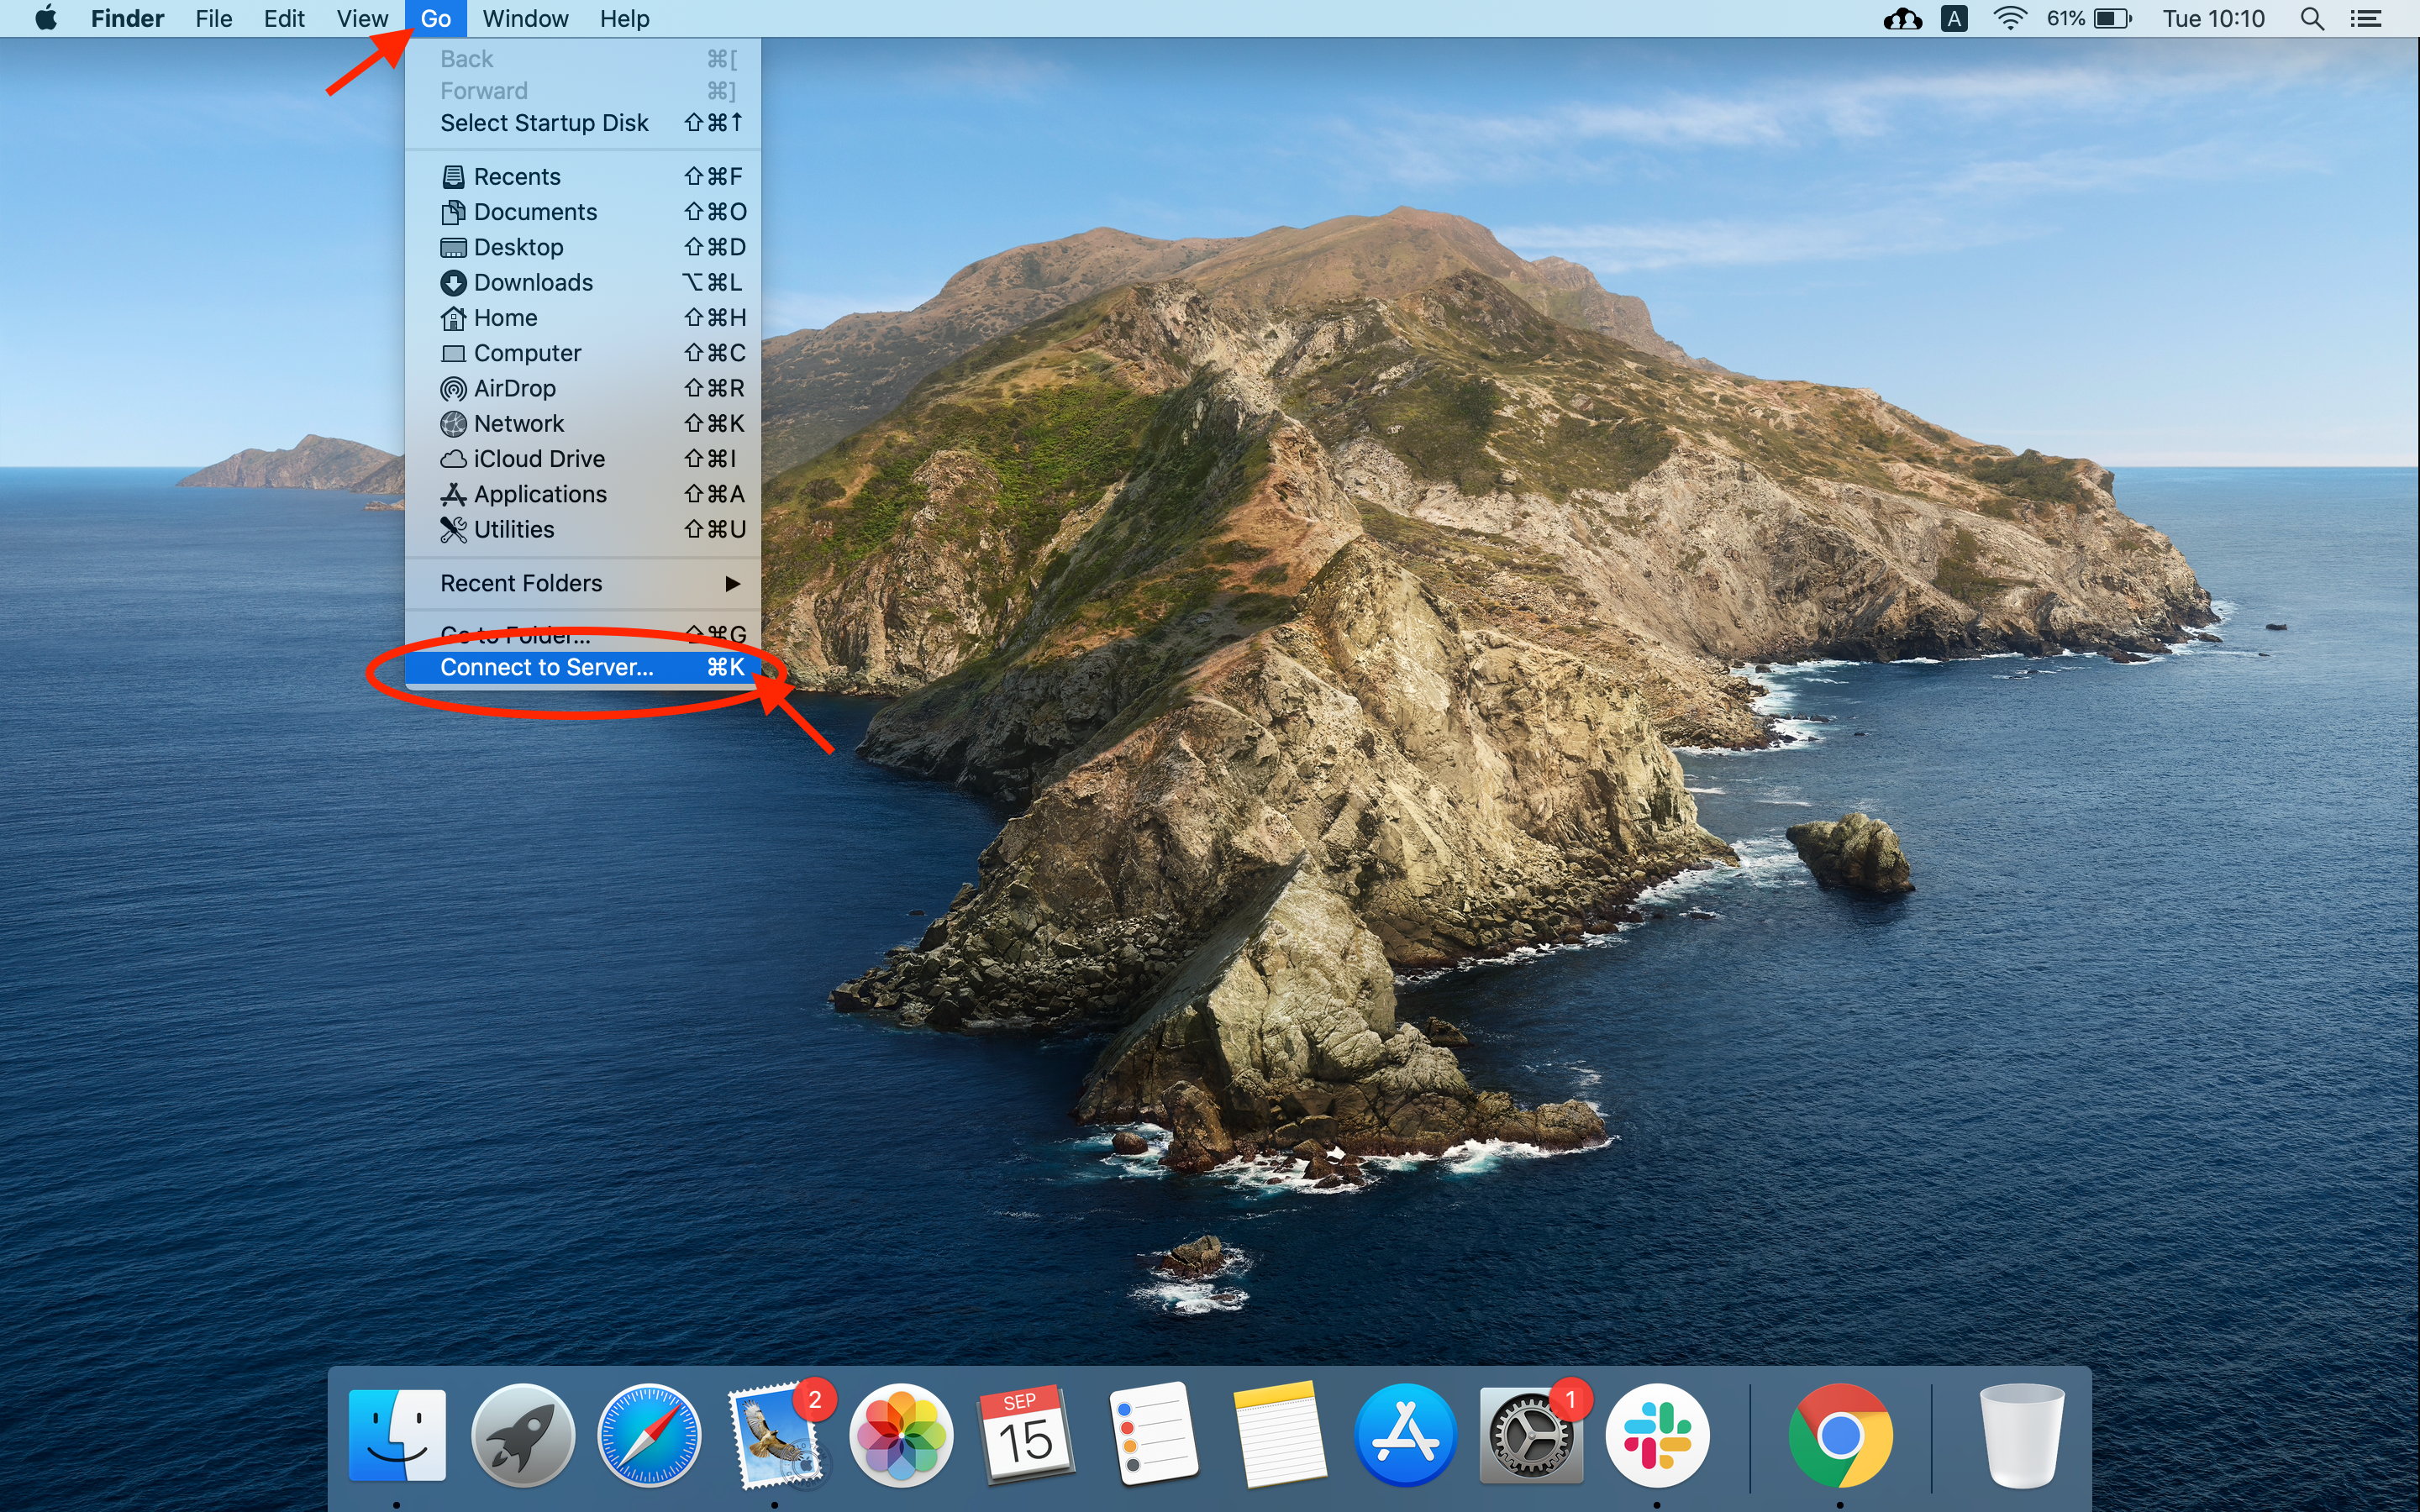
Type in the server url: afp://gray.aoba.lan/ If you are prompted for your name and password they are the same as your email or macbook login without the @aobajapan.jp domain. For example:
Name: john.doe
Password: ***********
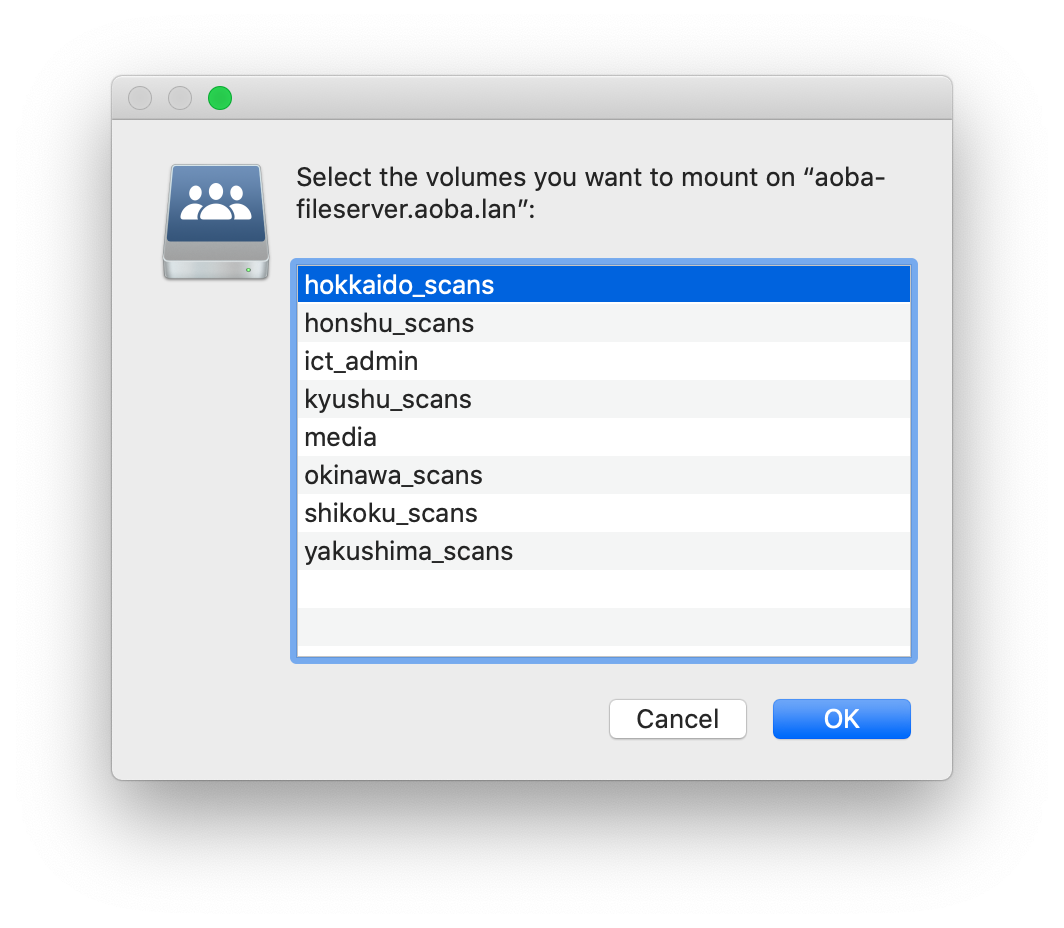
Select the machine that was used to scan, then click “OK”:
Printer Location | Name |
|---|---|
Hikarigaoka 1F | shikoku_scans |
Hikarigaoka 2F | honshu_scans |
Bunkyo | oshima_scans |
Meguro (Main) | yakushima_scans |
Meguro (Annex) | okinawa_scans |
??? | kyushu_scans |
??? | hokkaido_scans |
And locate the respective scanned documents from there:
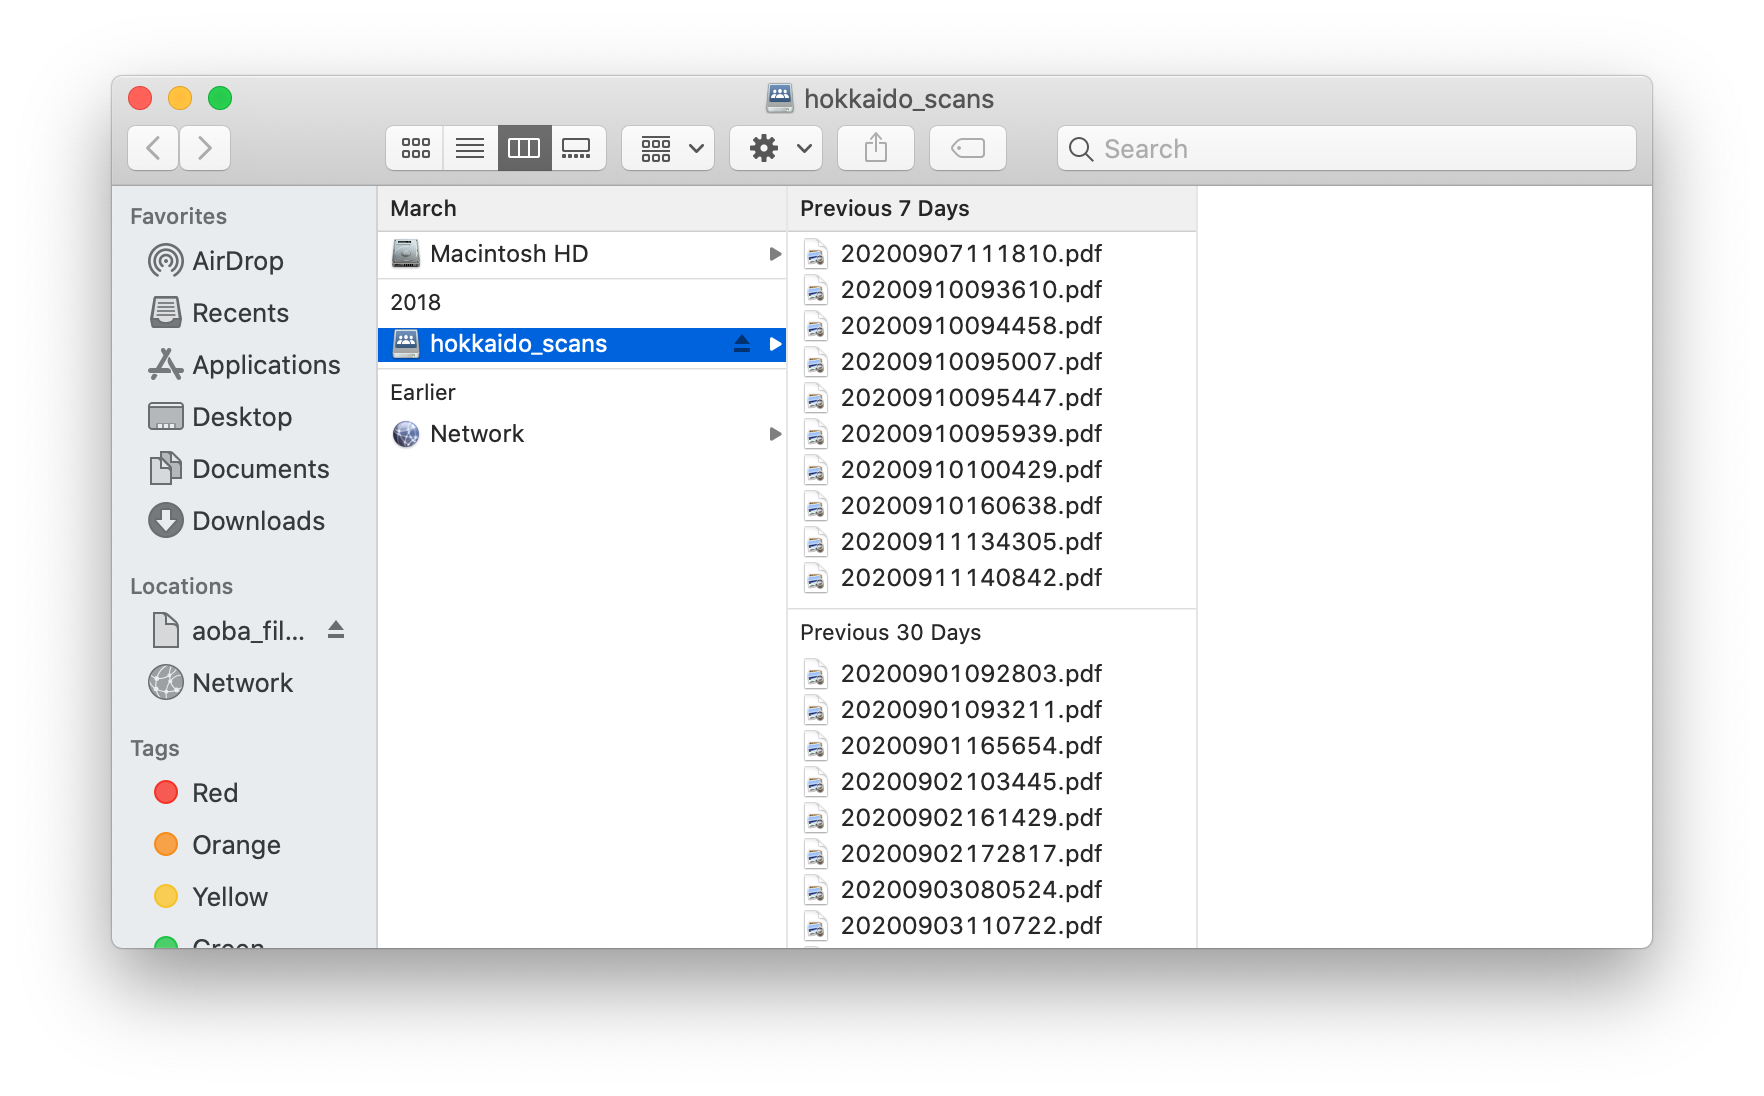
The "Scans" folder on the FileServer is emptied and deleted nightly! Retrieve your document soon after printing or else it will disappear.