
How to use the wired connection and functions?
The following information is a guide to help you connect your MacBook with the BenQ IFP display. If desired, additional touch functionally can be used in conjunction with the web version of the digital whiteboard EZWrite - which works just like the native app! If interested in the online collaborative features of EZWrite version 5 or 6, please see this article.
But first, let’s get started with the connections!
There are 2 main ways to used the wired connections by cable.
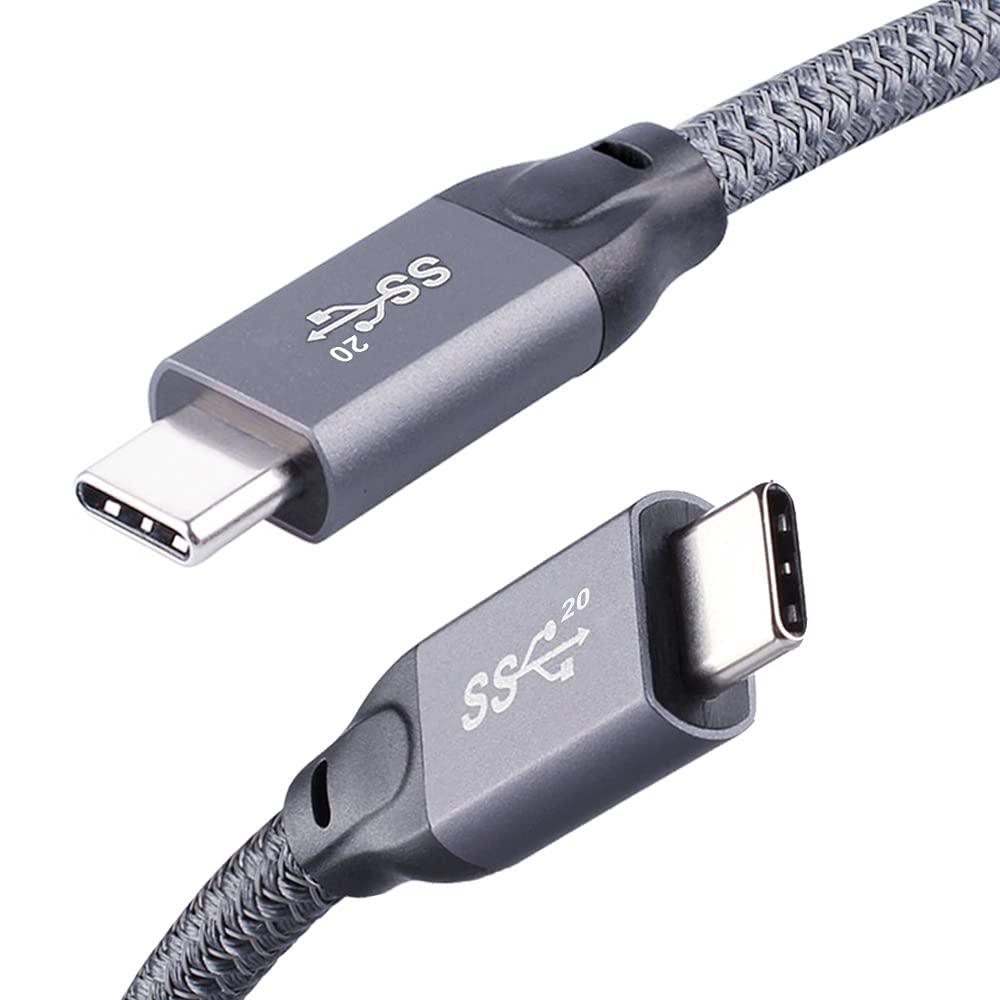
USB-C Gen 3.2
HDMI via adaptor (+ USB-B for touch)
USB-C
The usb-c cable available on some BenQ models is multifunctional. It includes, displaying (image & sound), charging your MacBook, and touch functionality. (Note: Not all USB-C cables are the same)
You will need to hit allow on your MacBook once when using the new cable
HDMI Cable
The other method is using the HDMI cable along with a supported adaptor. If you would like to use the touch capabilities of the BenQ displays with your MacBook, simply connect the HDMI and Touch USB cables from the BenQ to your computer using an adaptor. Video Instructions: https://drive.google.com/file/d/1GP0VpDhw5Z9uW0VCturZNHpyKzXKKnK6/view?usp=share_link
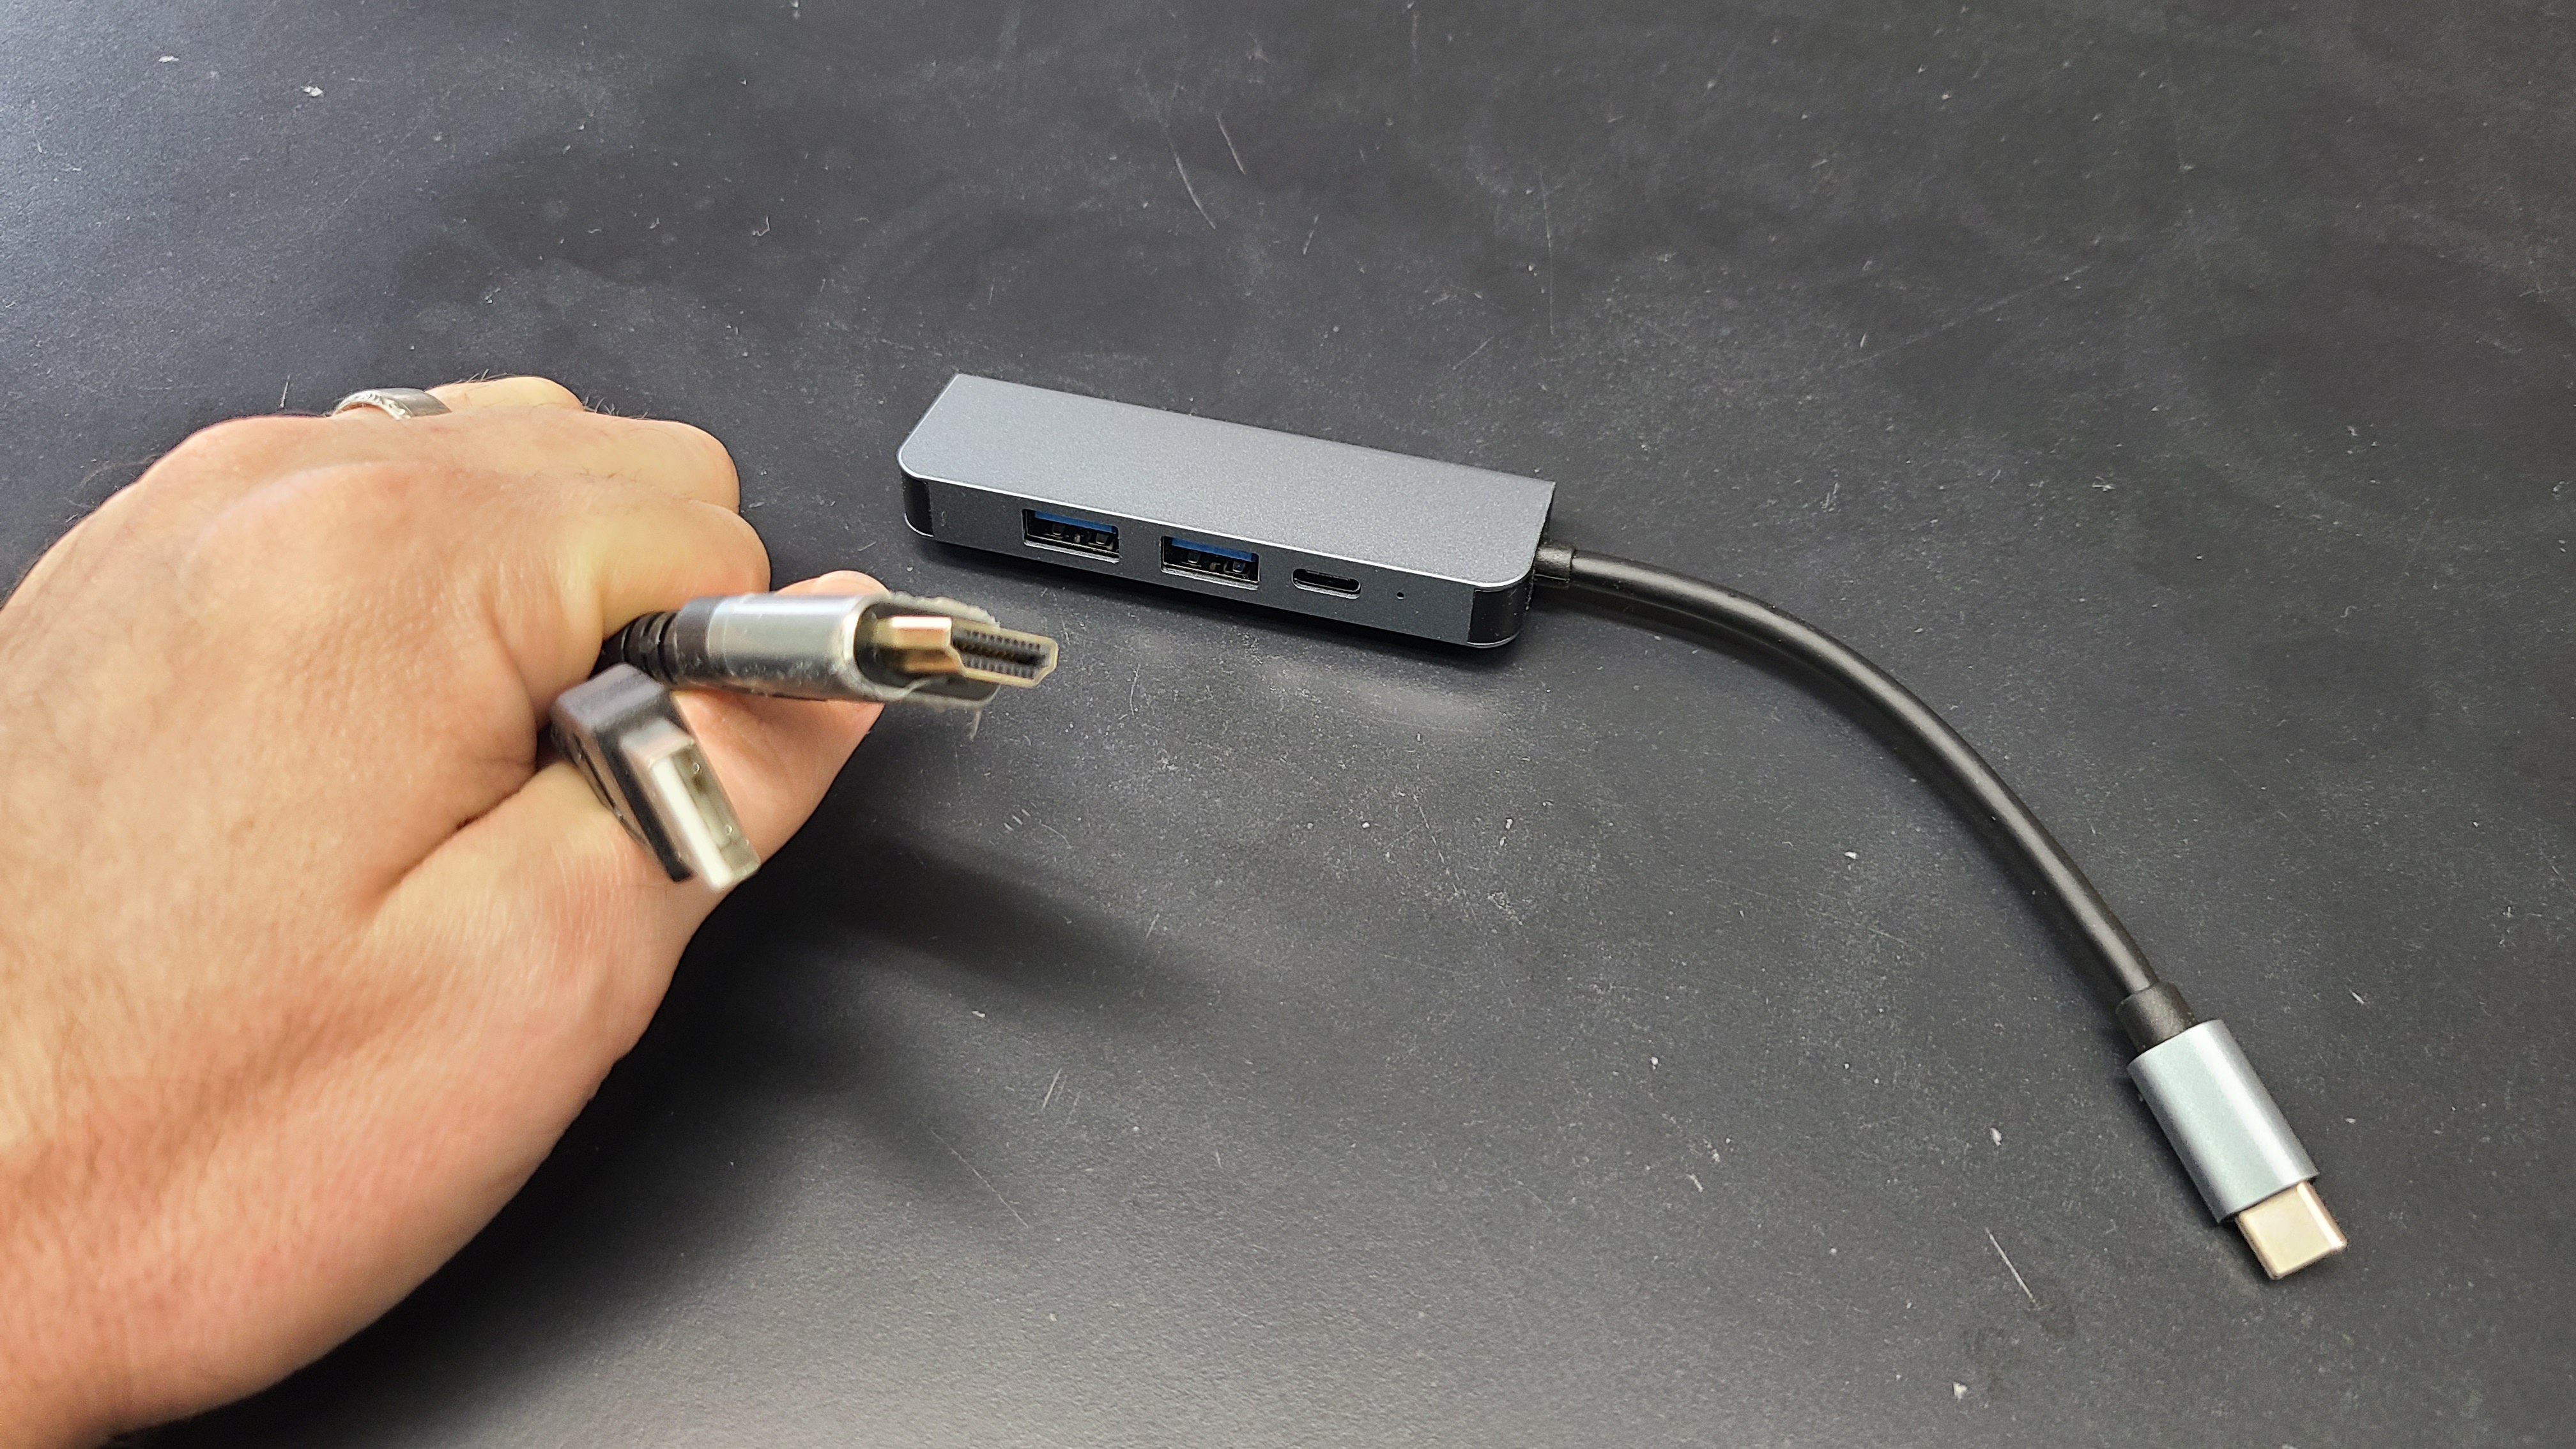
Connect both cables to adaptor
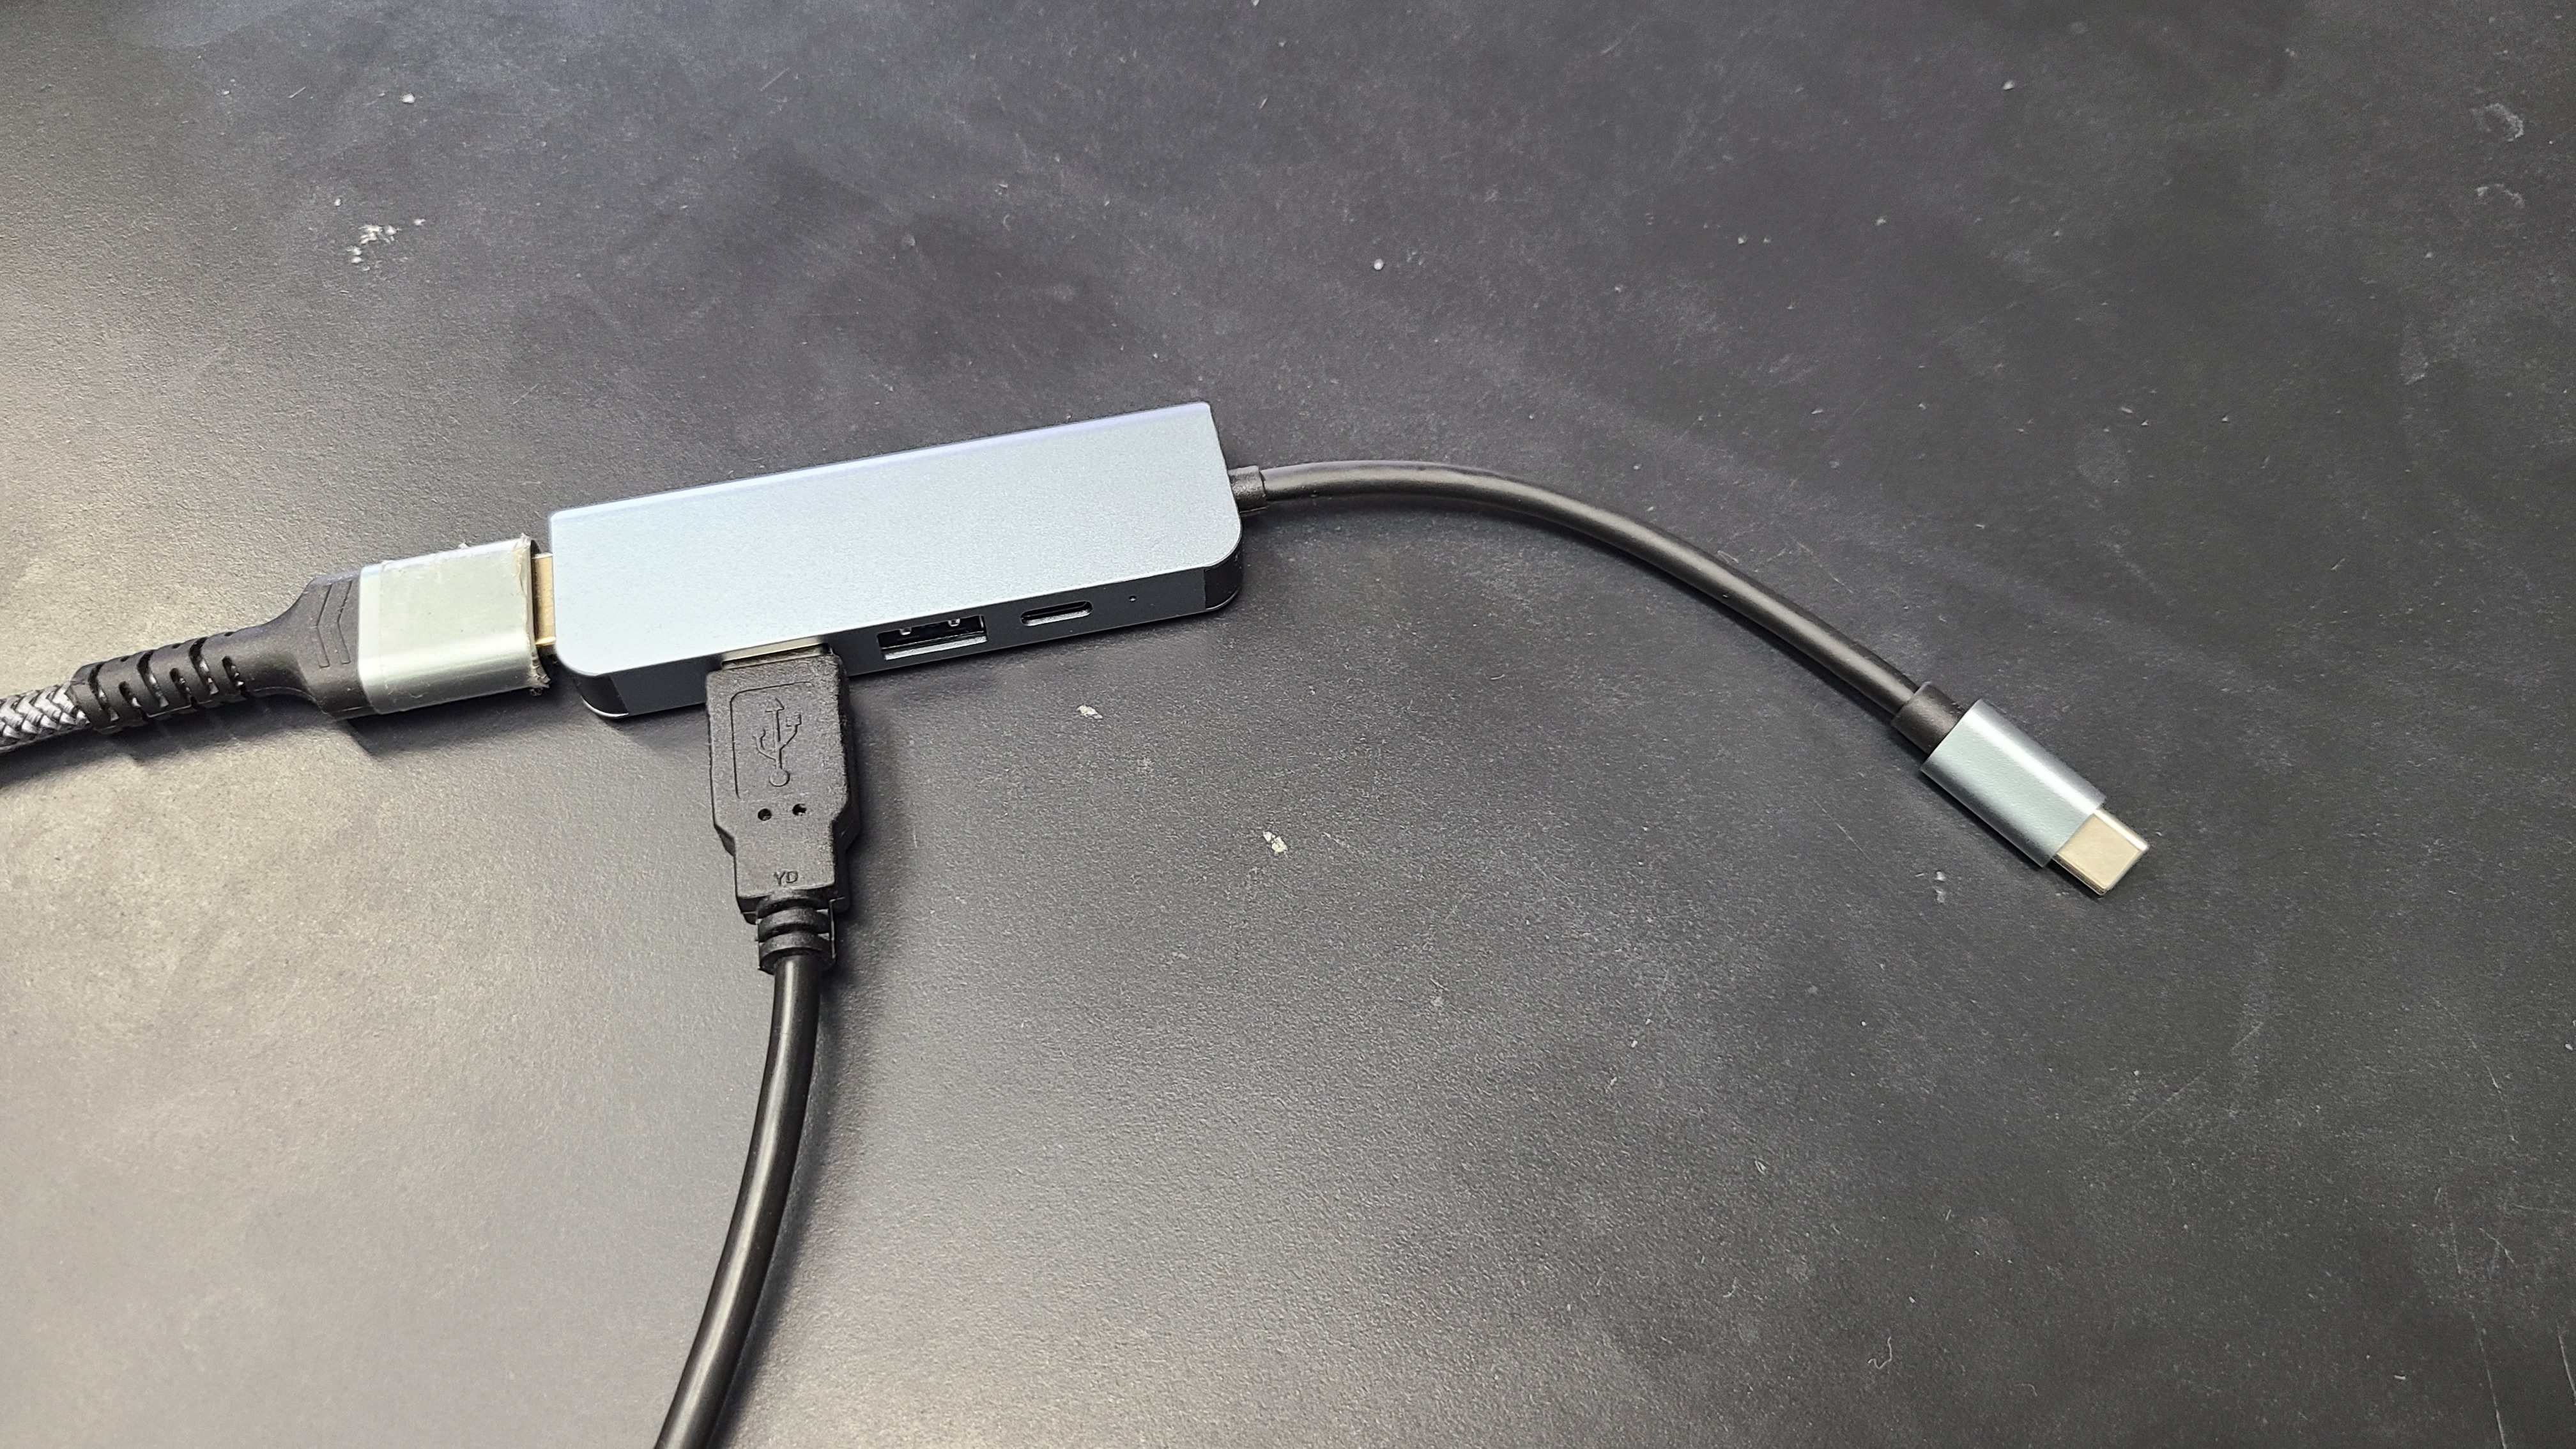
Connect adaptor to MacBook
Troubleshooting
The touch module of the BenQ display supports easy Plug-and-Play operation. There is no need to install additional drivers on the computer.
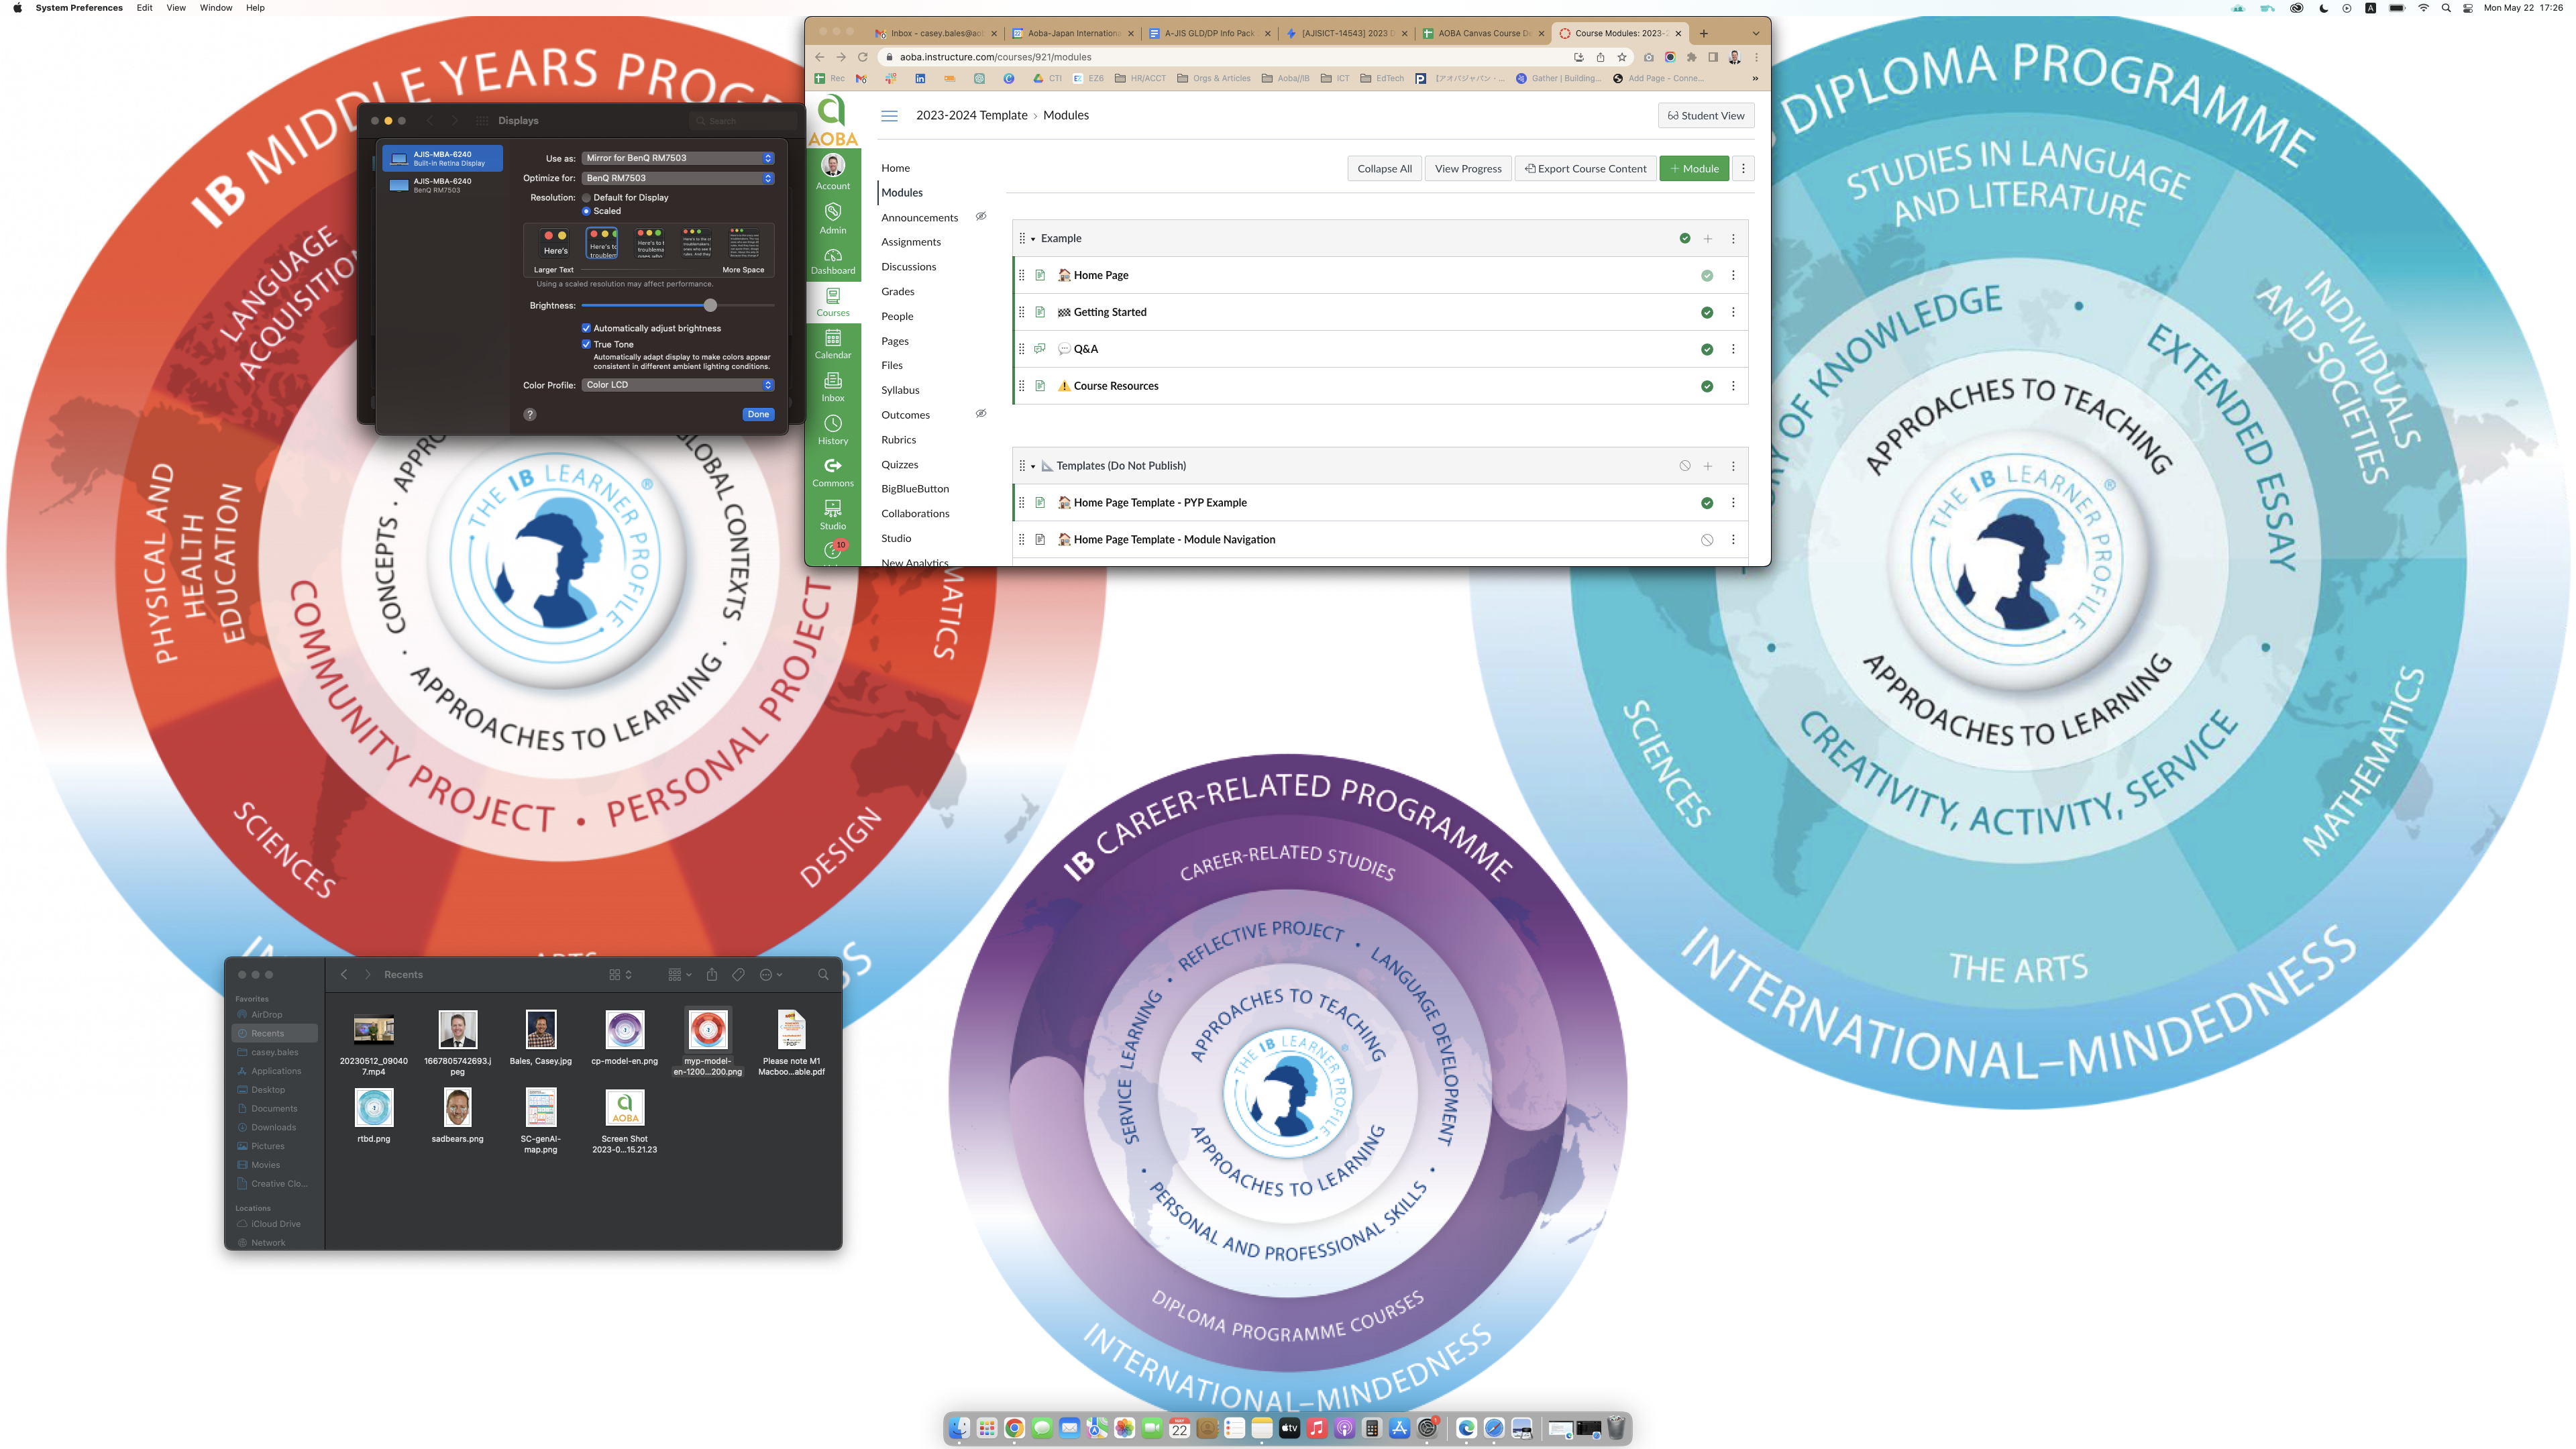 Now that your hardware is all connected, and assuming the BenQ display is turned on, your screens should be connected like usual. If things look really small like this ---> Then see below on how to fix it. |
|---|
….or if this is your first time connecting via the cable, you may need to navigate to System Preferences > Displays > Display Settings… and match the settings below.
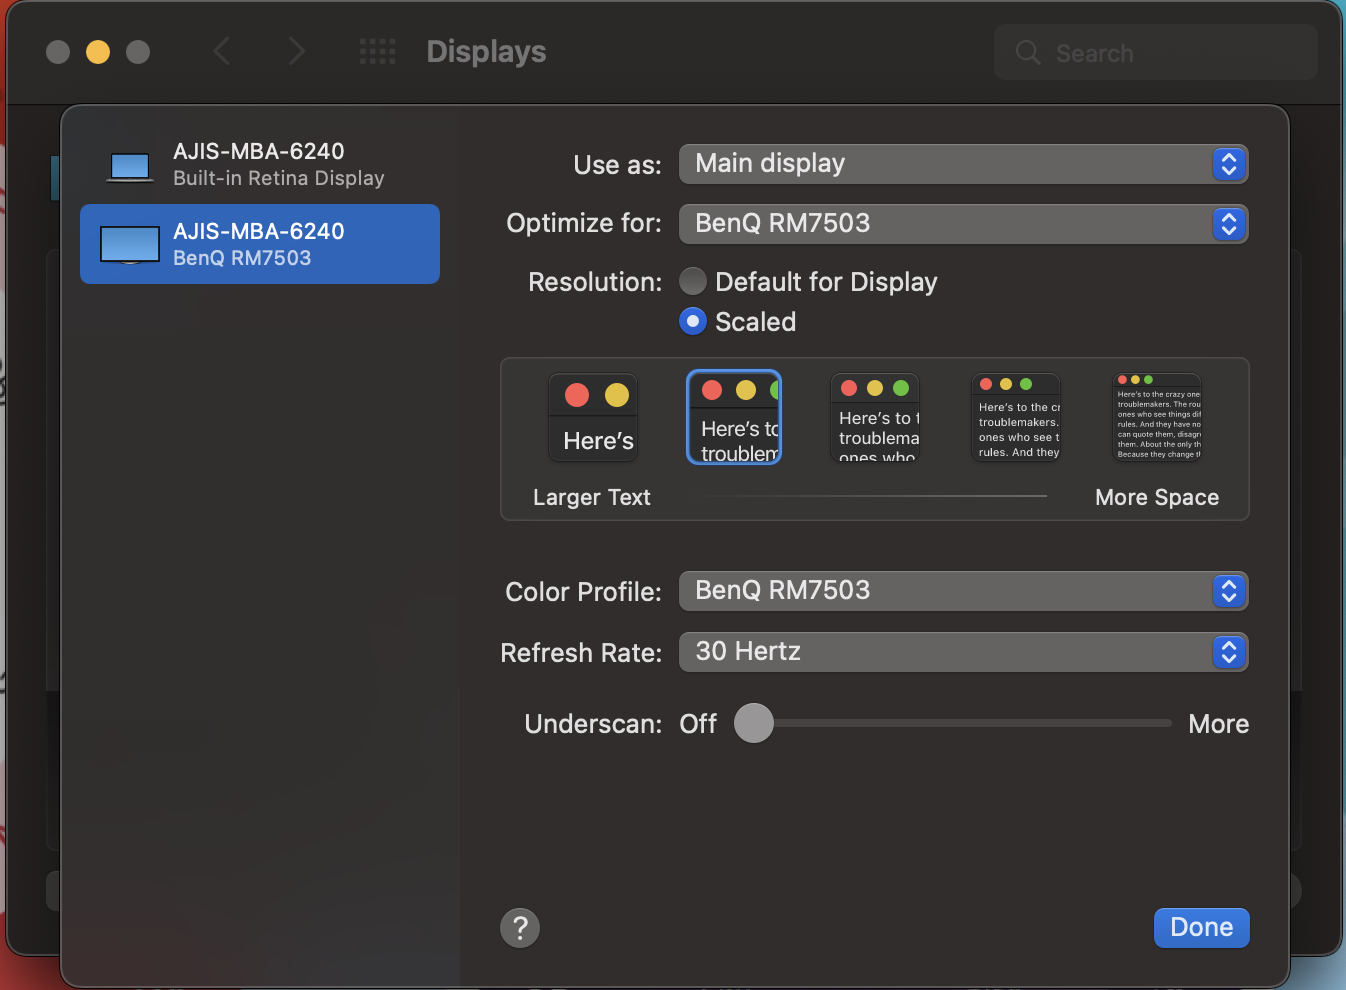
Choose Mirror Mode or Extended Mode. Mirror mode is by far easier to control.
*Optimize for the BenQ - (NOT the AJIS-MBA)
Select ‘Scaled’ and choose the size you prefer.
Done!
*This step is critical for the touch functionality to perform correctly
If you have questions, or simply want to schedule a walkthrough together, reach out to your program’s Technology Integration Specialist.
This shouldn’t be anything you need to worry about, but just purely for your information. HMDI and the USB-B (for Touch function) need to be in same group ports as shown below.
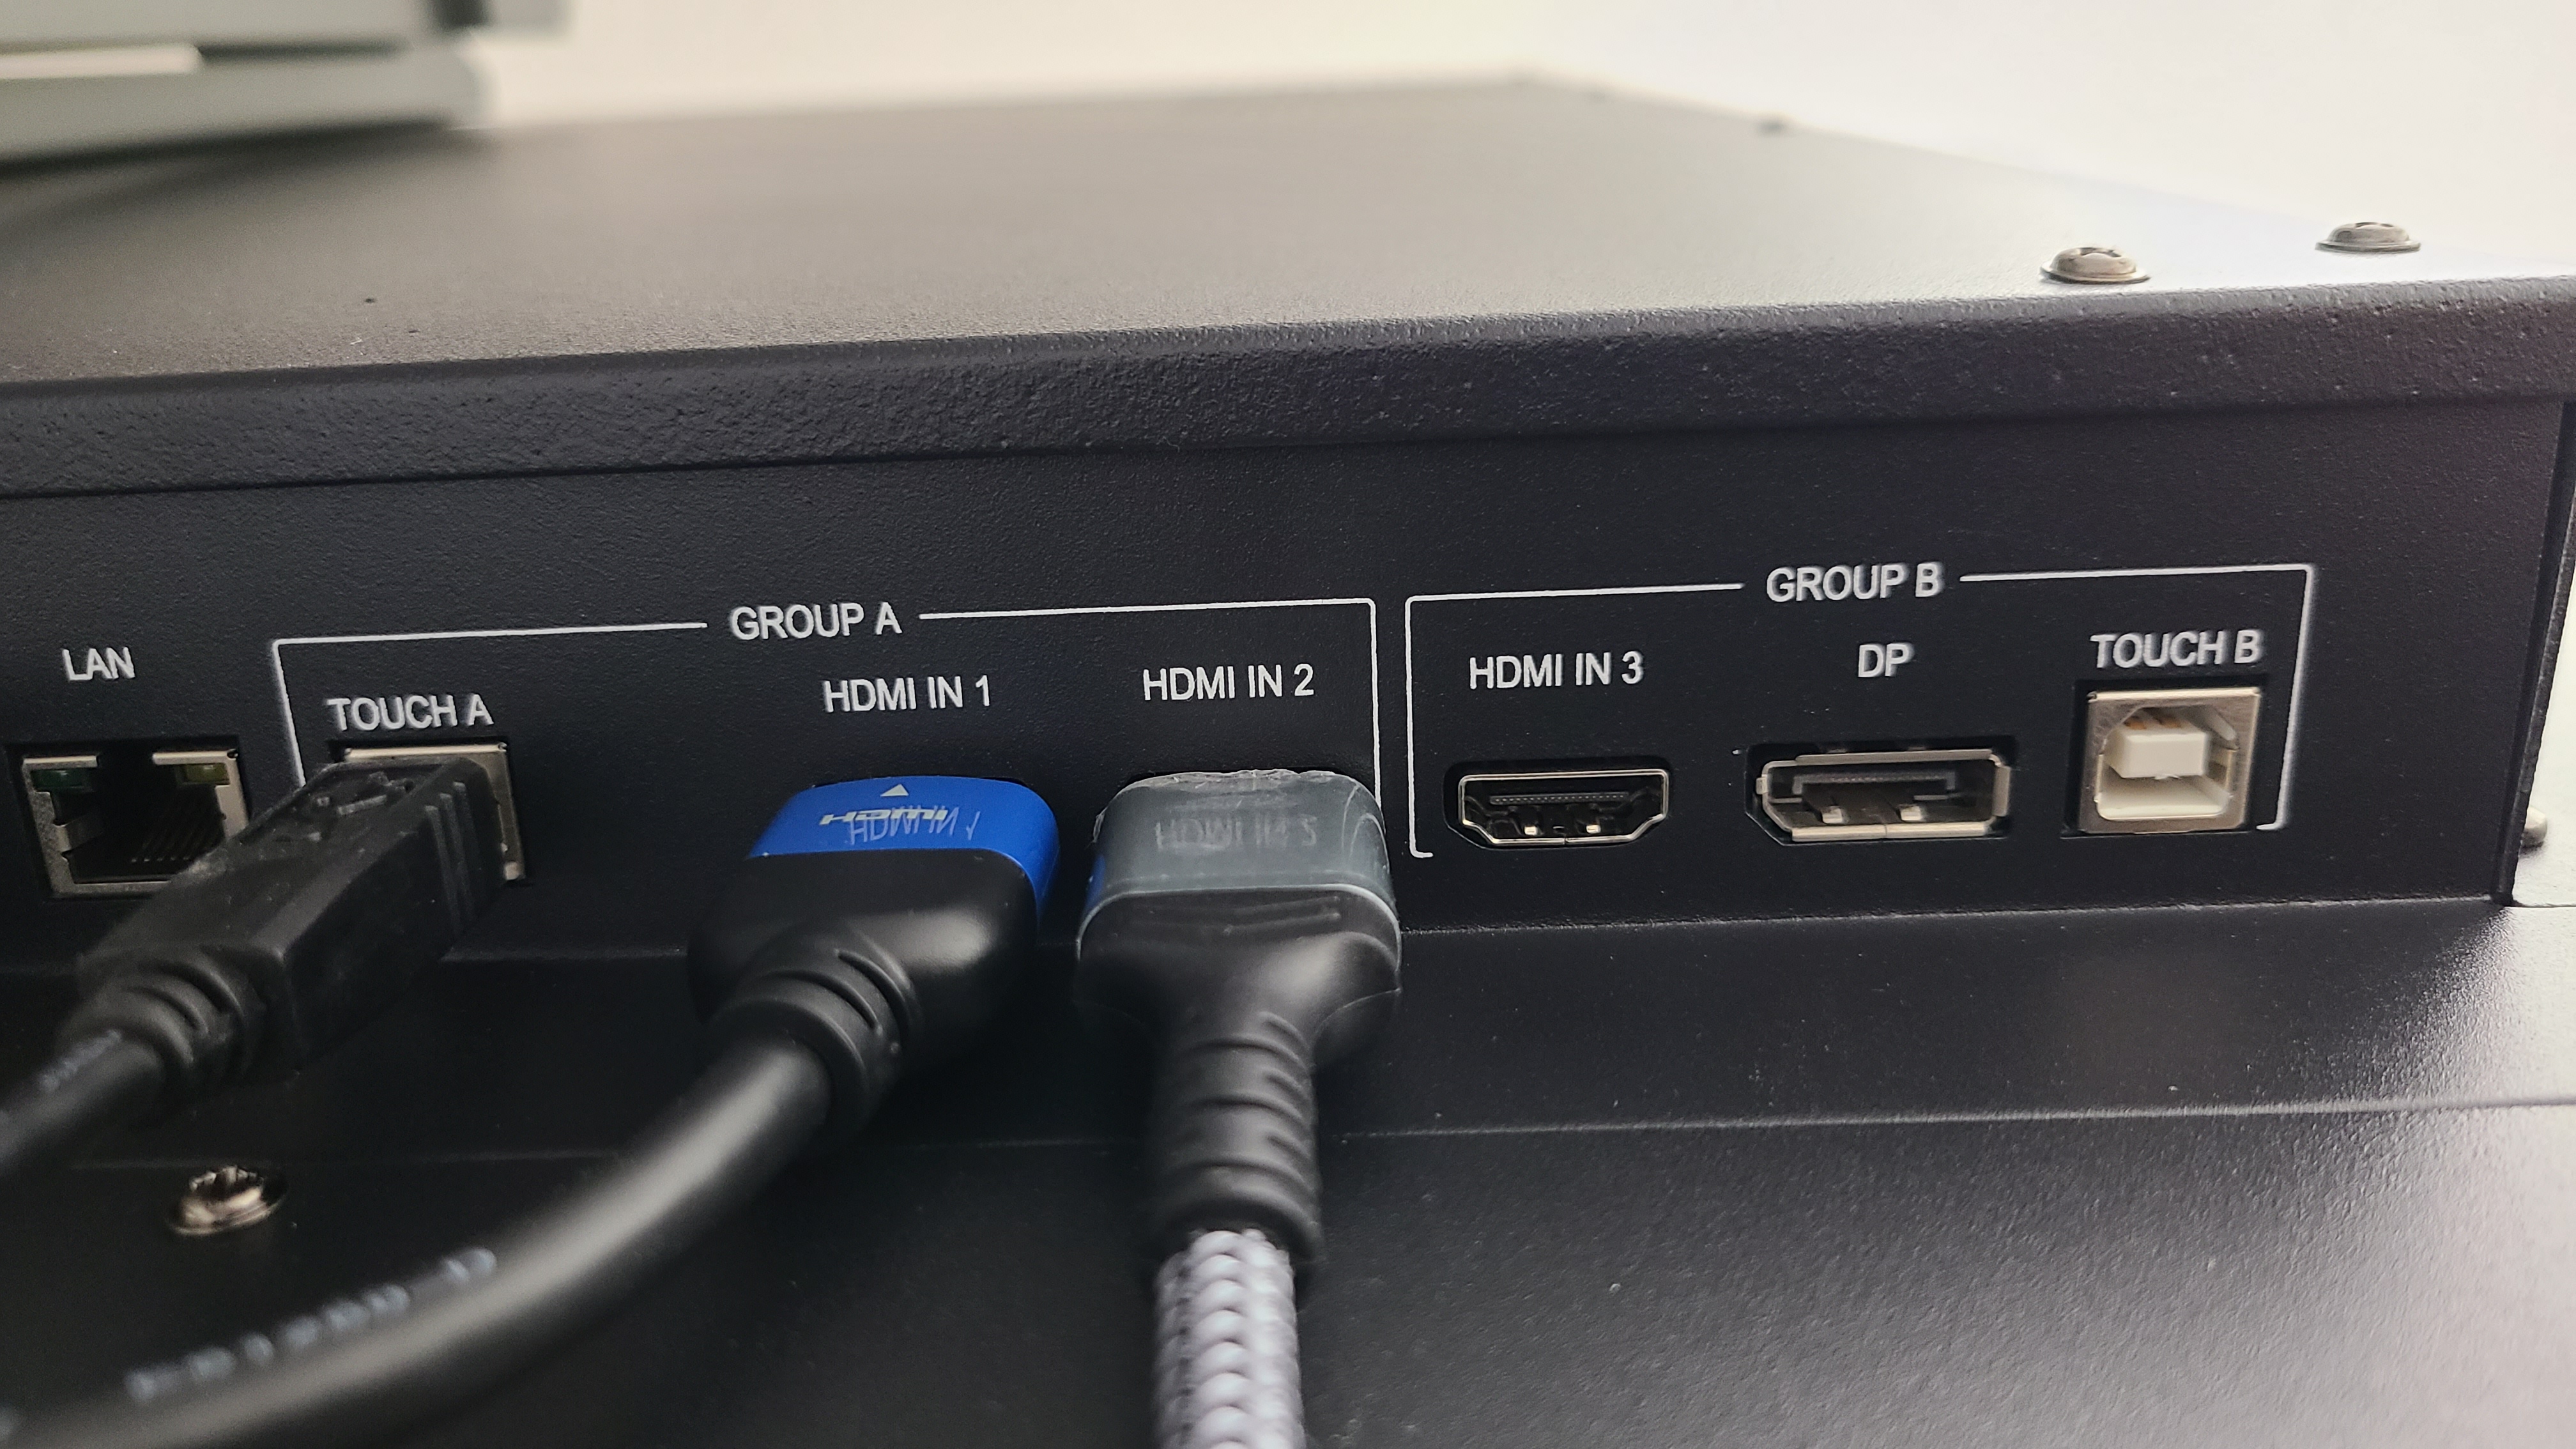
NOTE: In other words, when you use a HDMI port in GROUP A, make sure to use the TOUCH A port for the USB cable for touch functionality. This would be the first thing to troubleshoot if there ever was a problem.
All of the above can be replaced using a single USB-C to USB-C Cable (Gen 3.2 type)